Items are received in your inventory in Supy by creating a goods received note (GRN) which can be considered like a digital copy of the supplier's invoice.
Creating a GRN (Goods-Received Note) for an Order
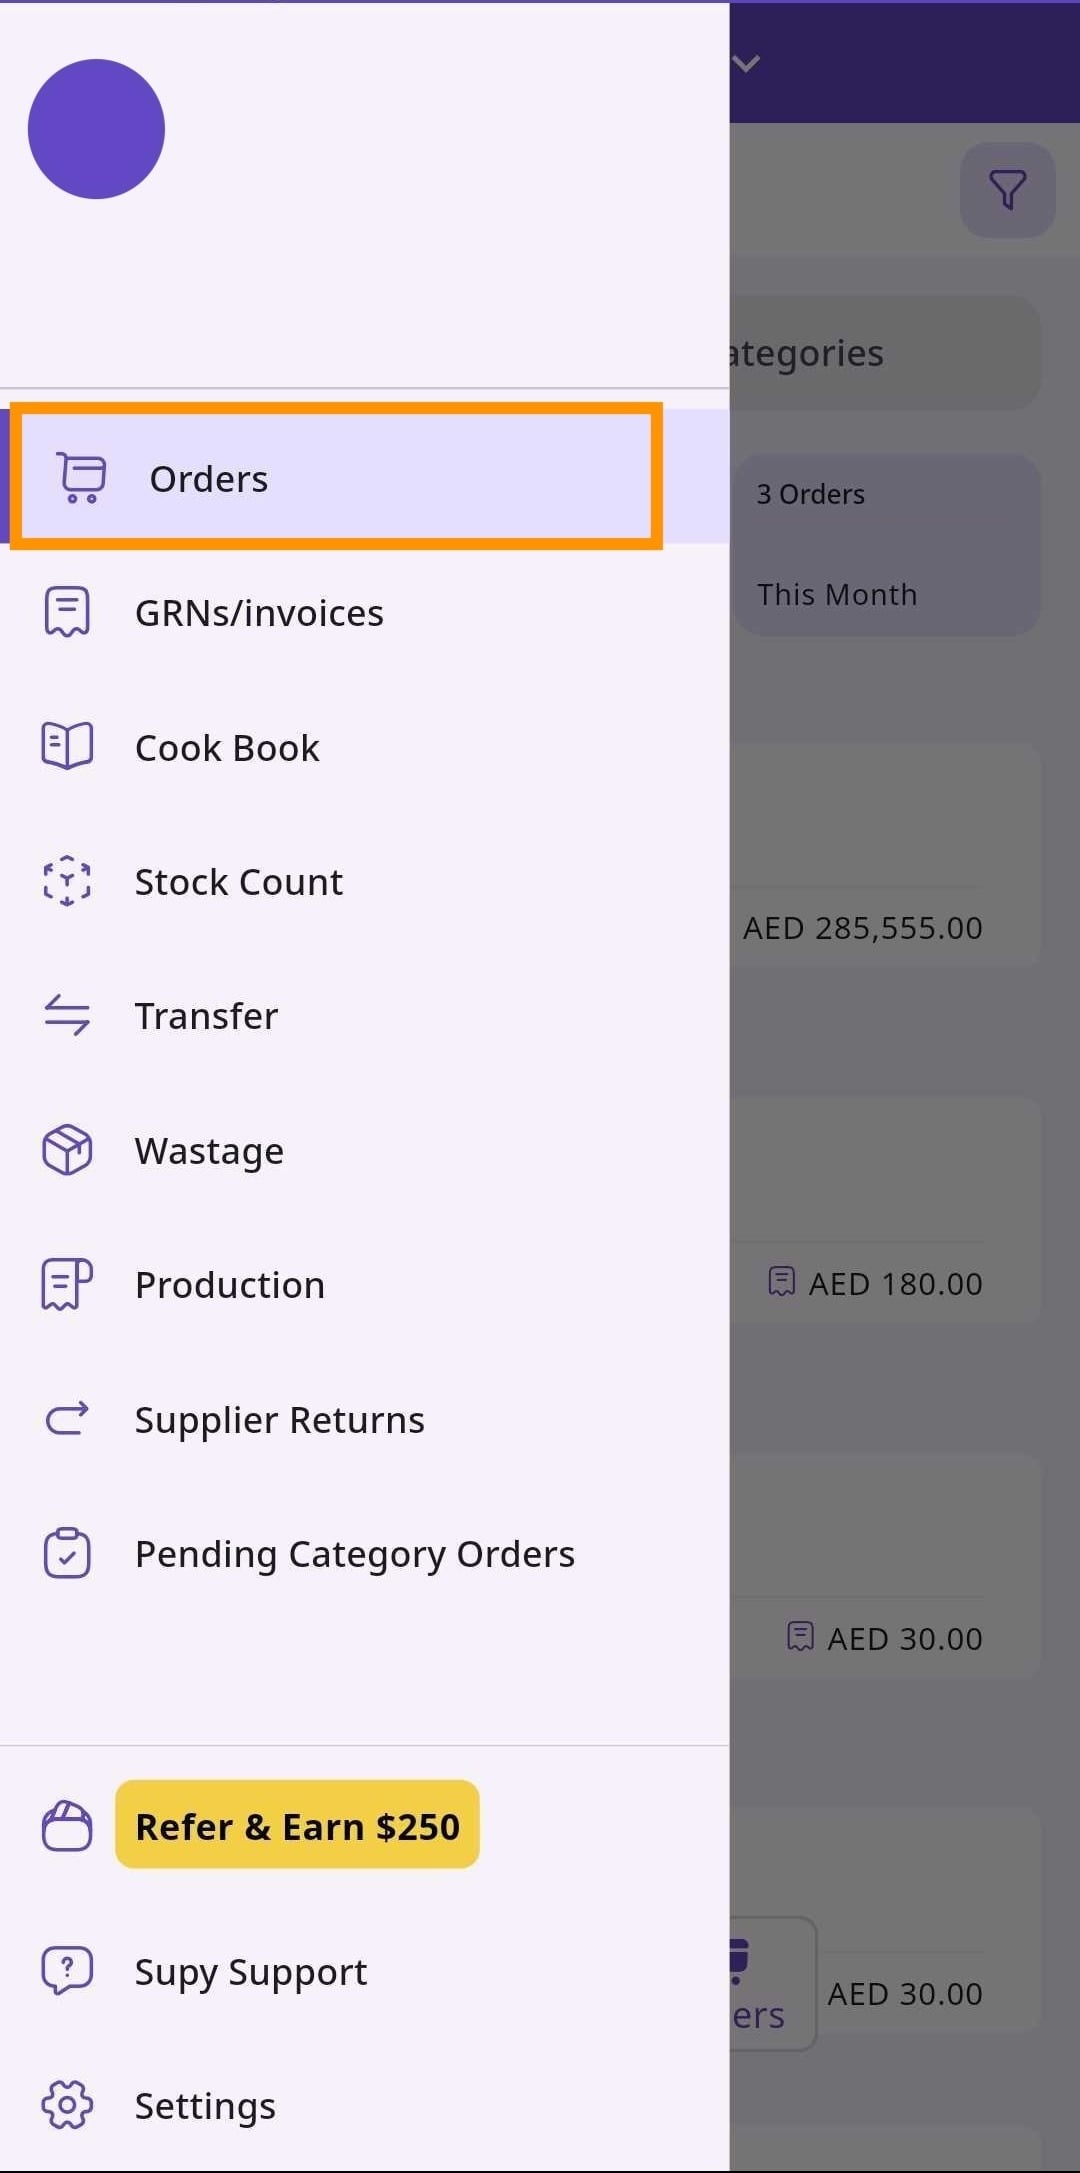
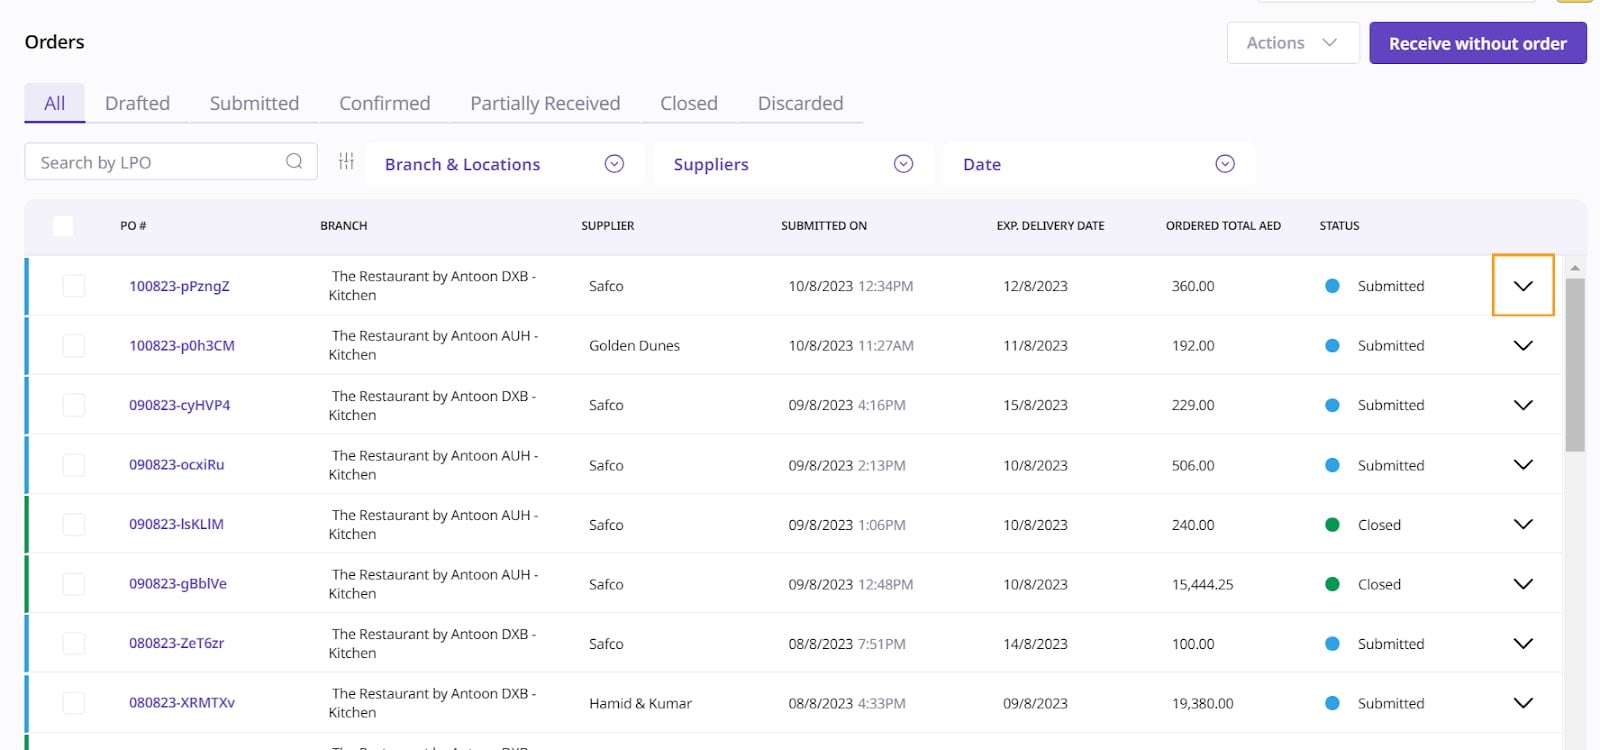
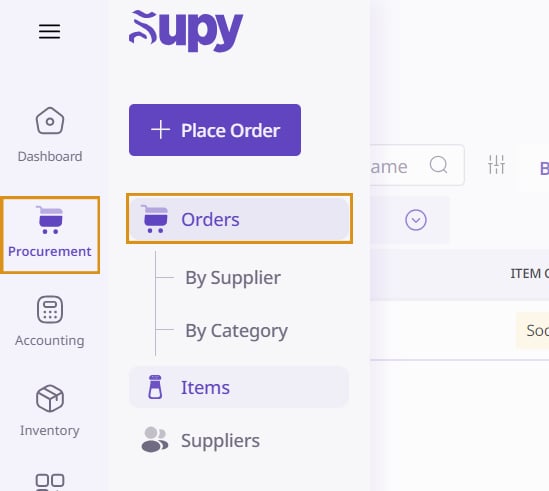
Open your Supy portal and navigate to the Procurement module. Click on 'Orders'.
Retailer Portal

Mobile App
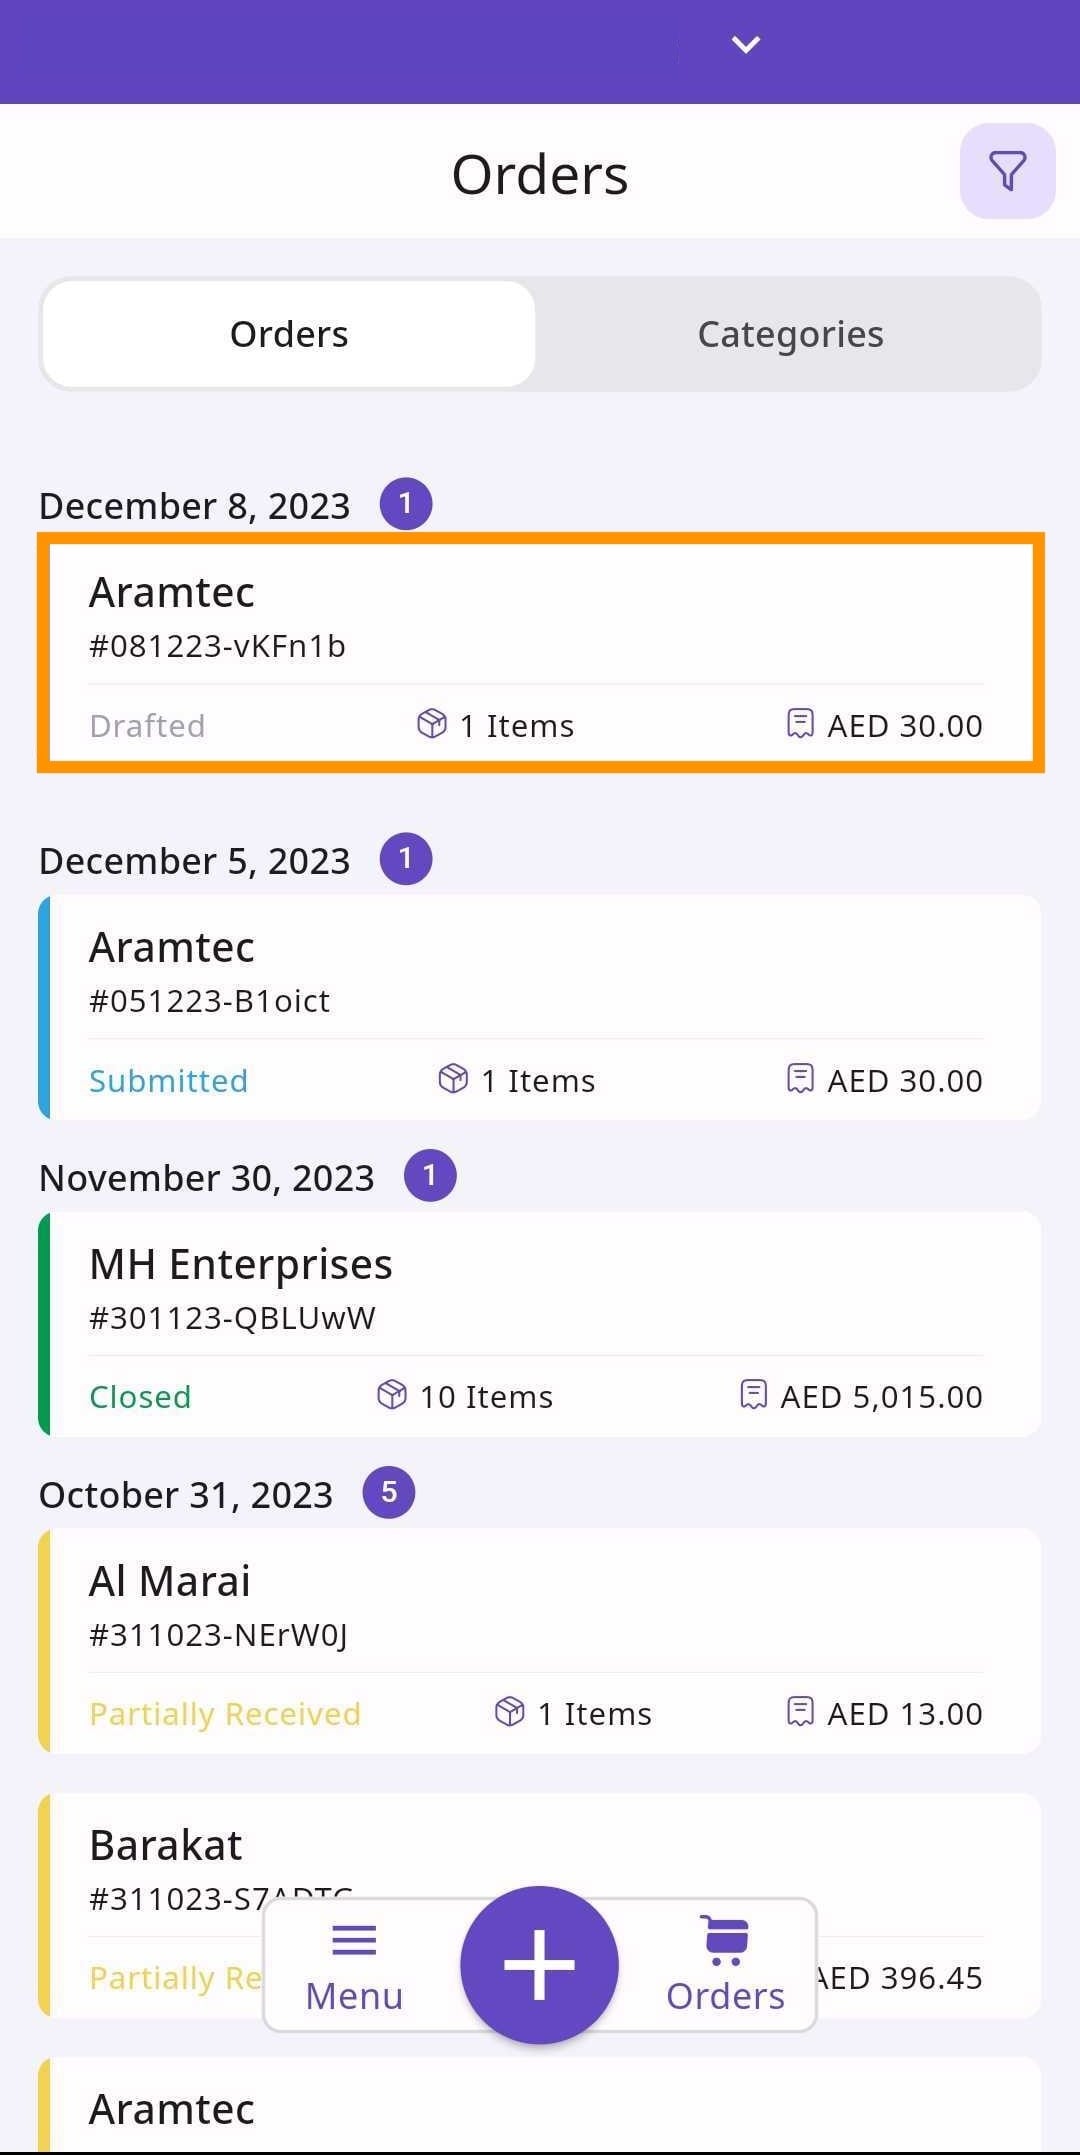
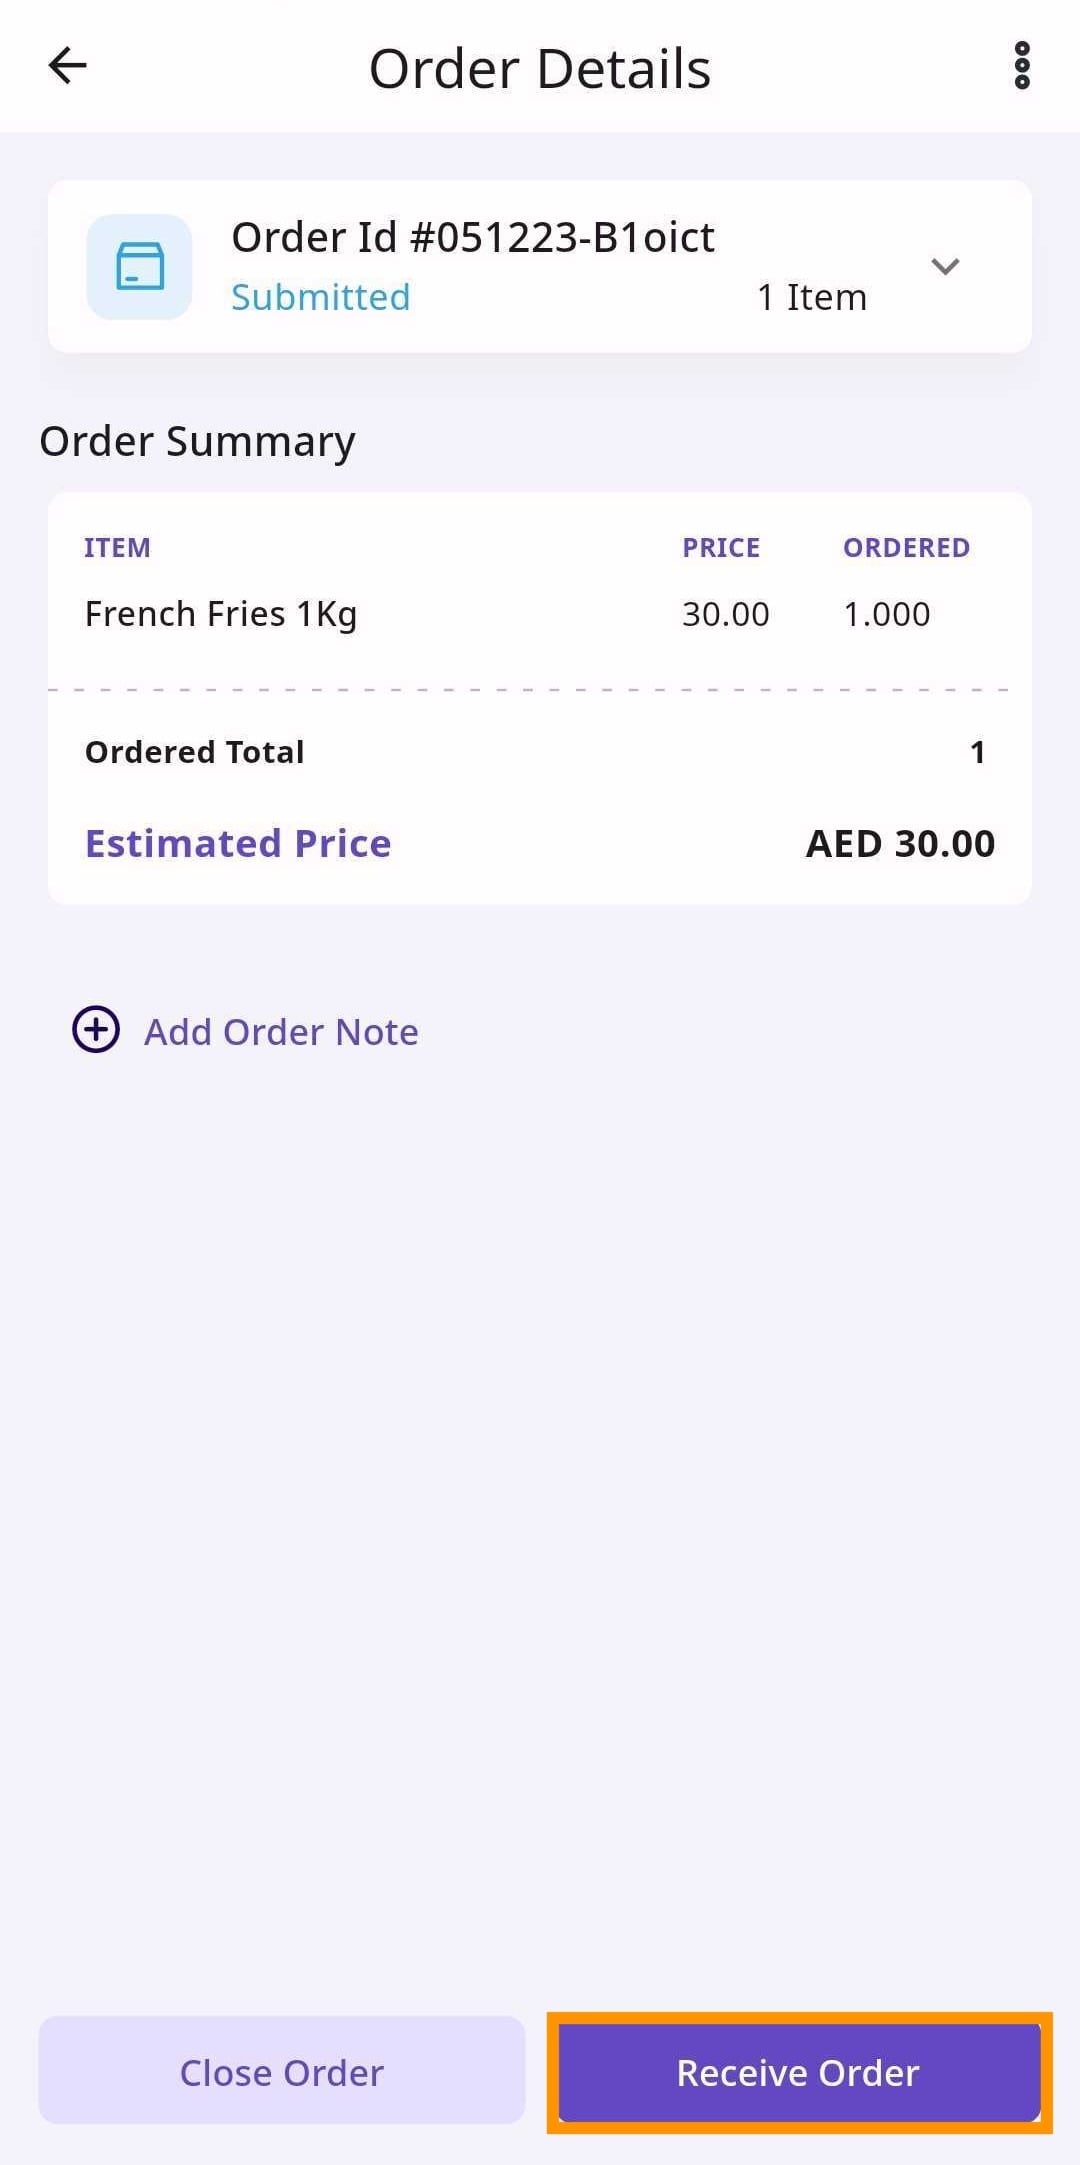
Select the order you want to receive and then click ‘Receive Order’.
Retailer Portal

Mobile App
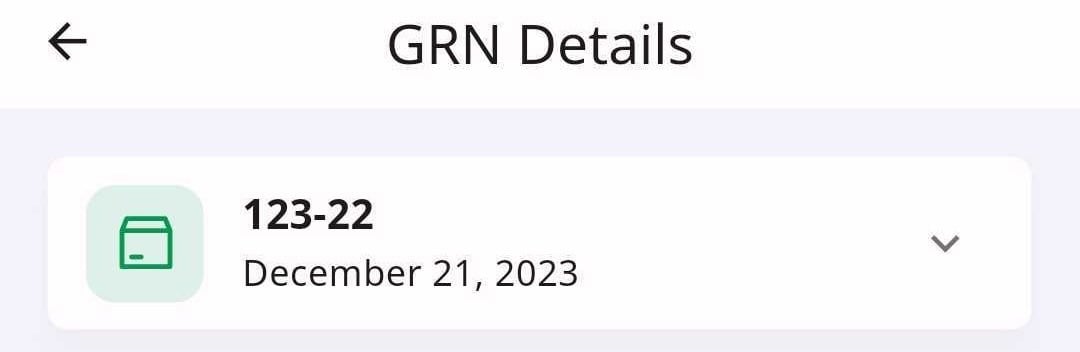
From here, you will be brought to the Accounting module to create a Goods-Received Note (GRN). A GRN is an official document used to prove/document what has been paid and what has been received.
In the creation of the GRN, there will be several sections:
Document Details
Linked Orders
Received Items
Activity Log
Other Details
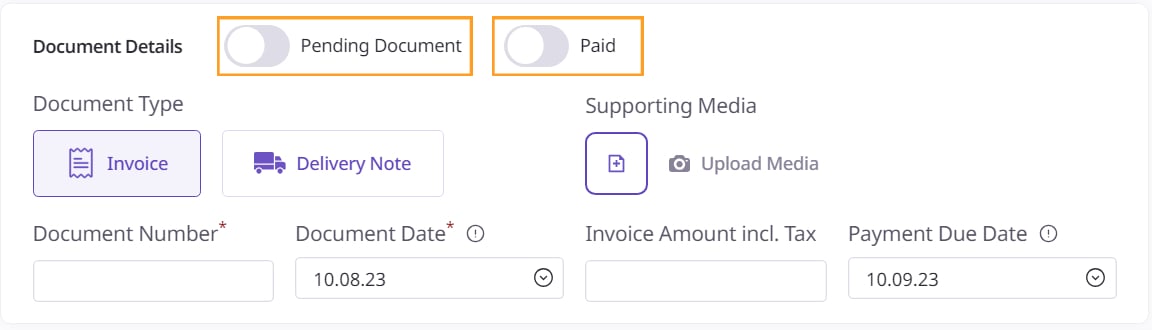
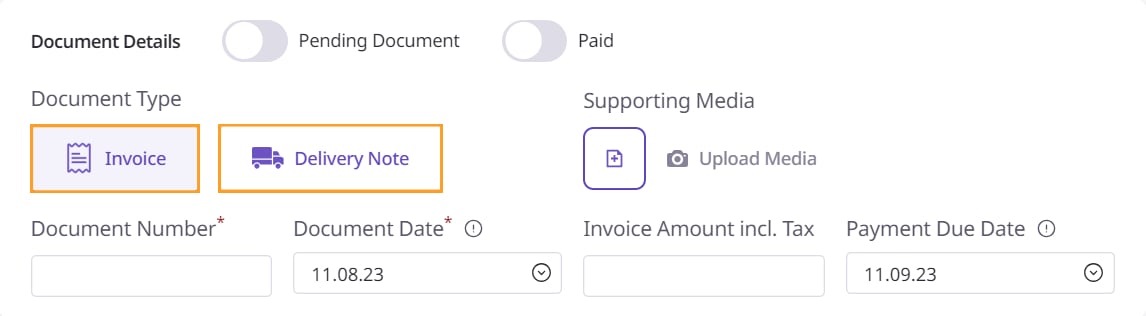
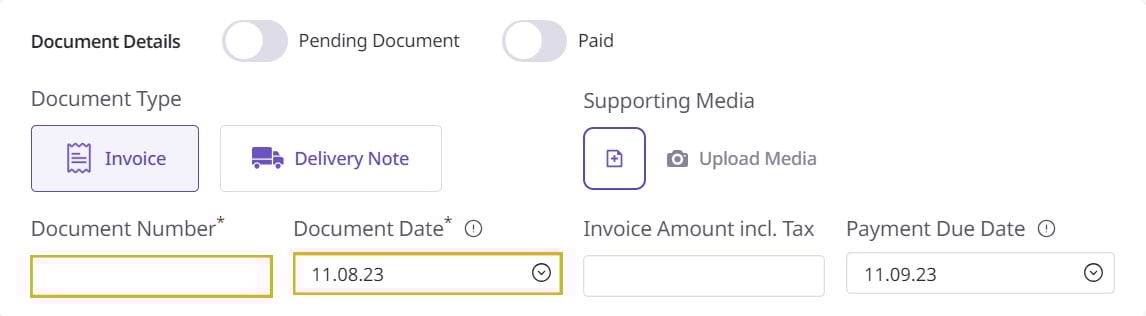
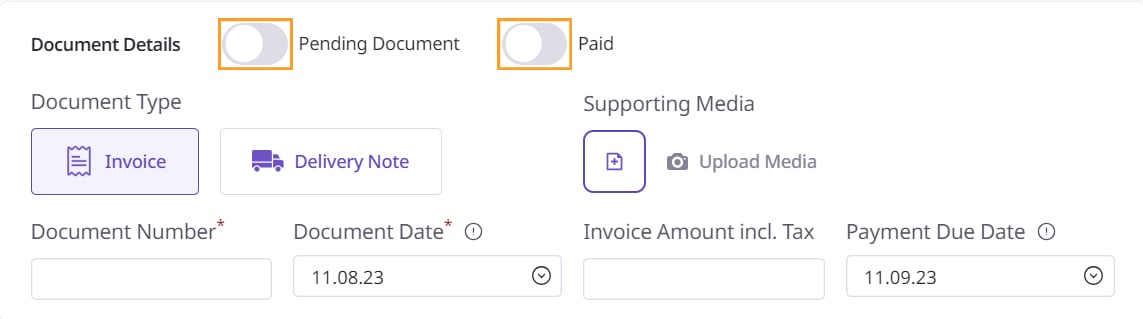
Supplier Name, Branch Name, and GRN Creation will already be filled out, so start with the Document Details. Here, select the ‘Paid’ option if the order is paid for already. Select the ‘Pending Document’ option if you have yet to receive some items that you’ve ordered.
Retailer Portal
Mobile App
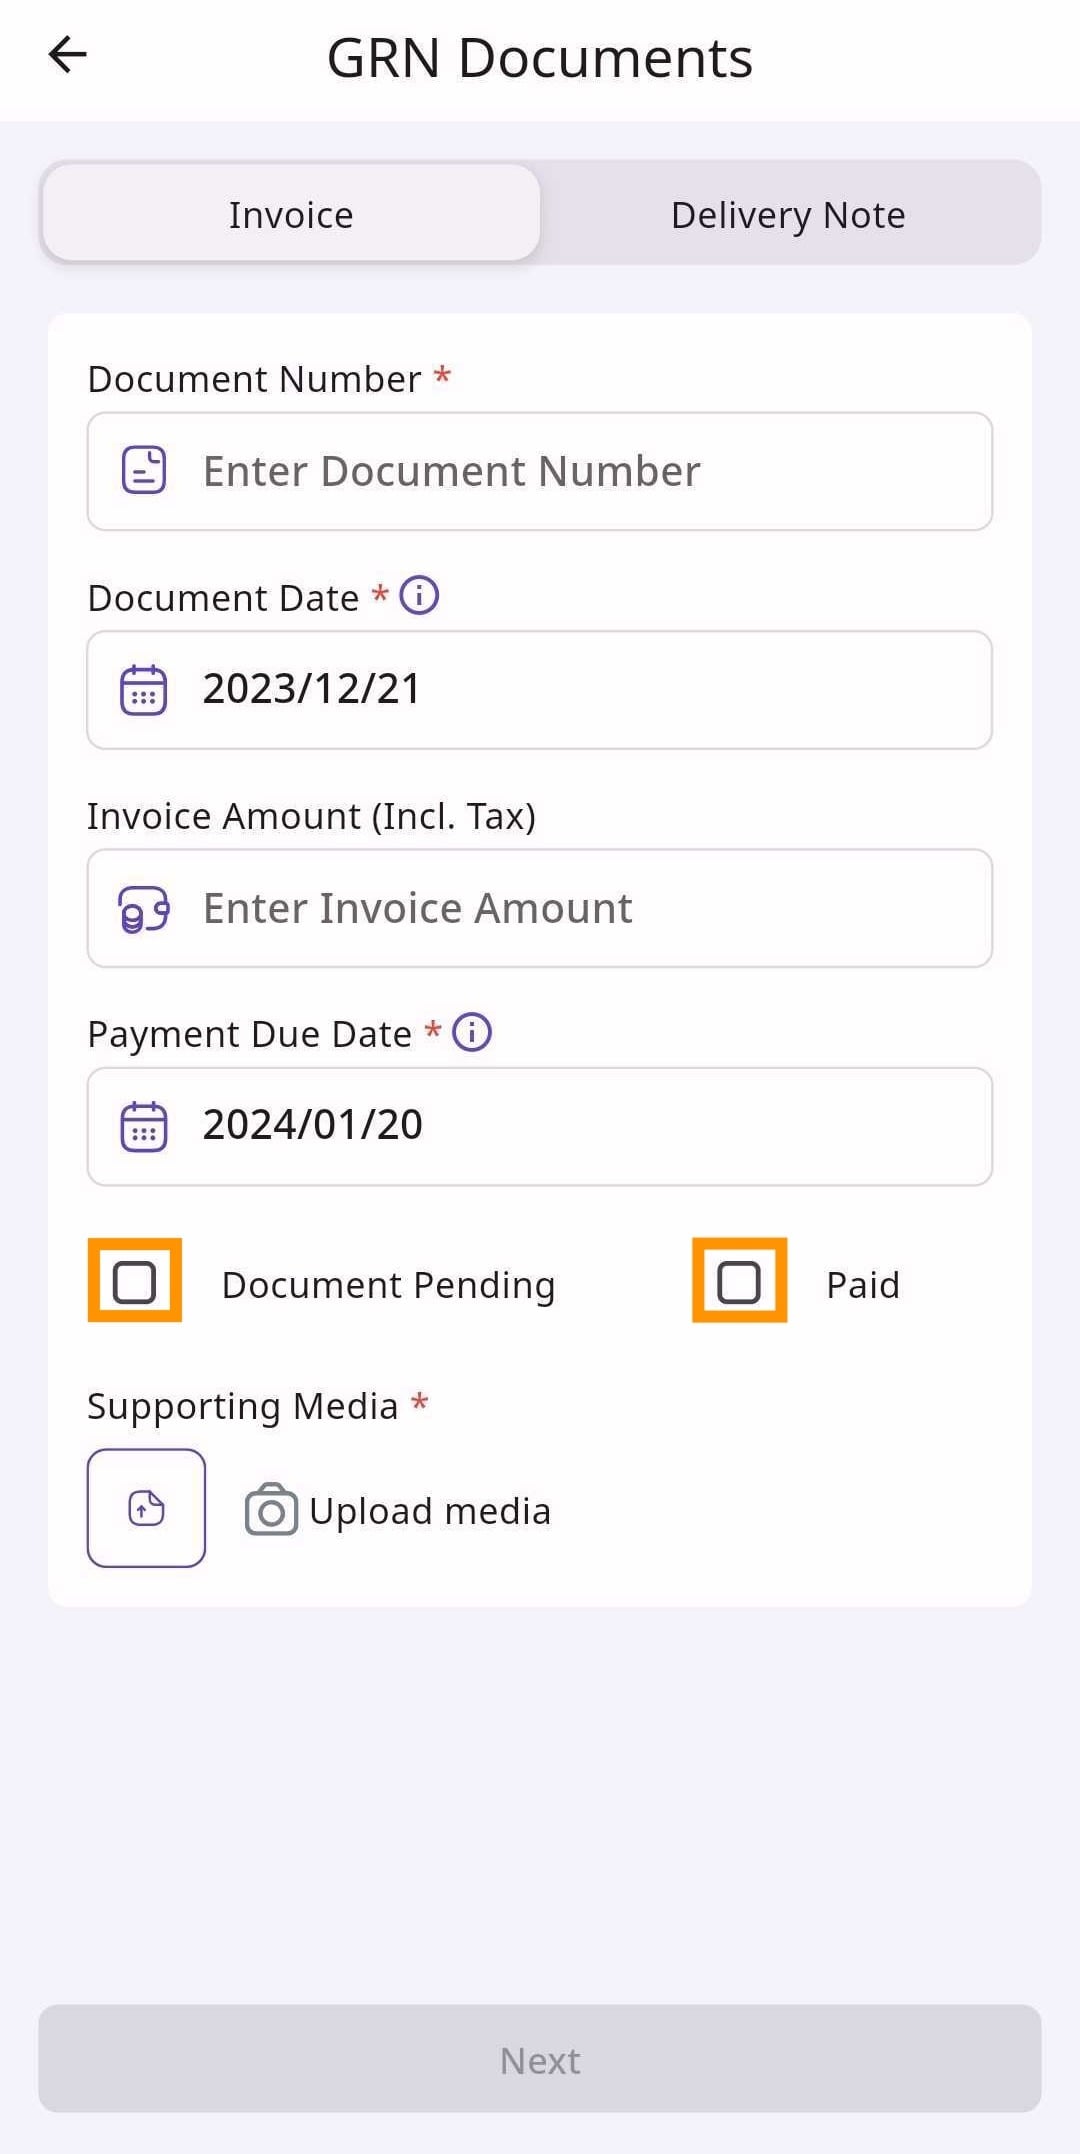
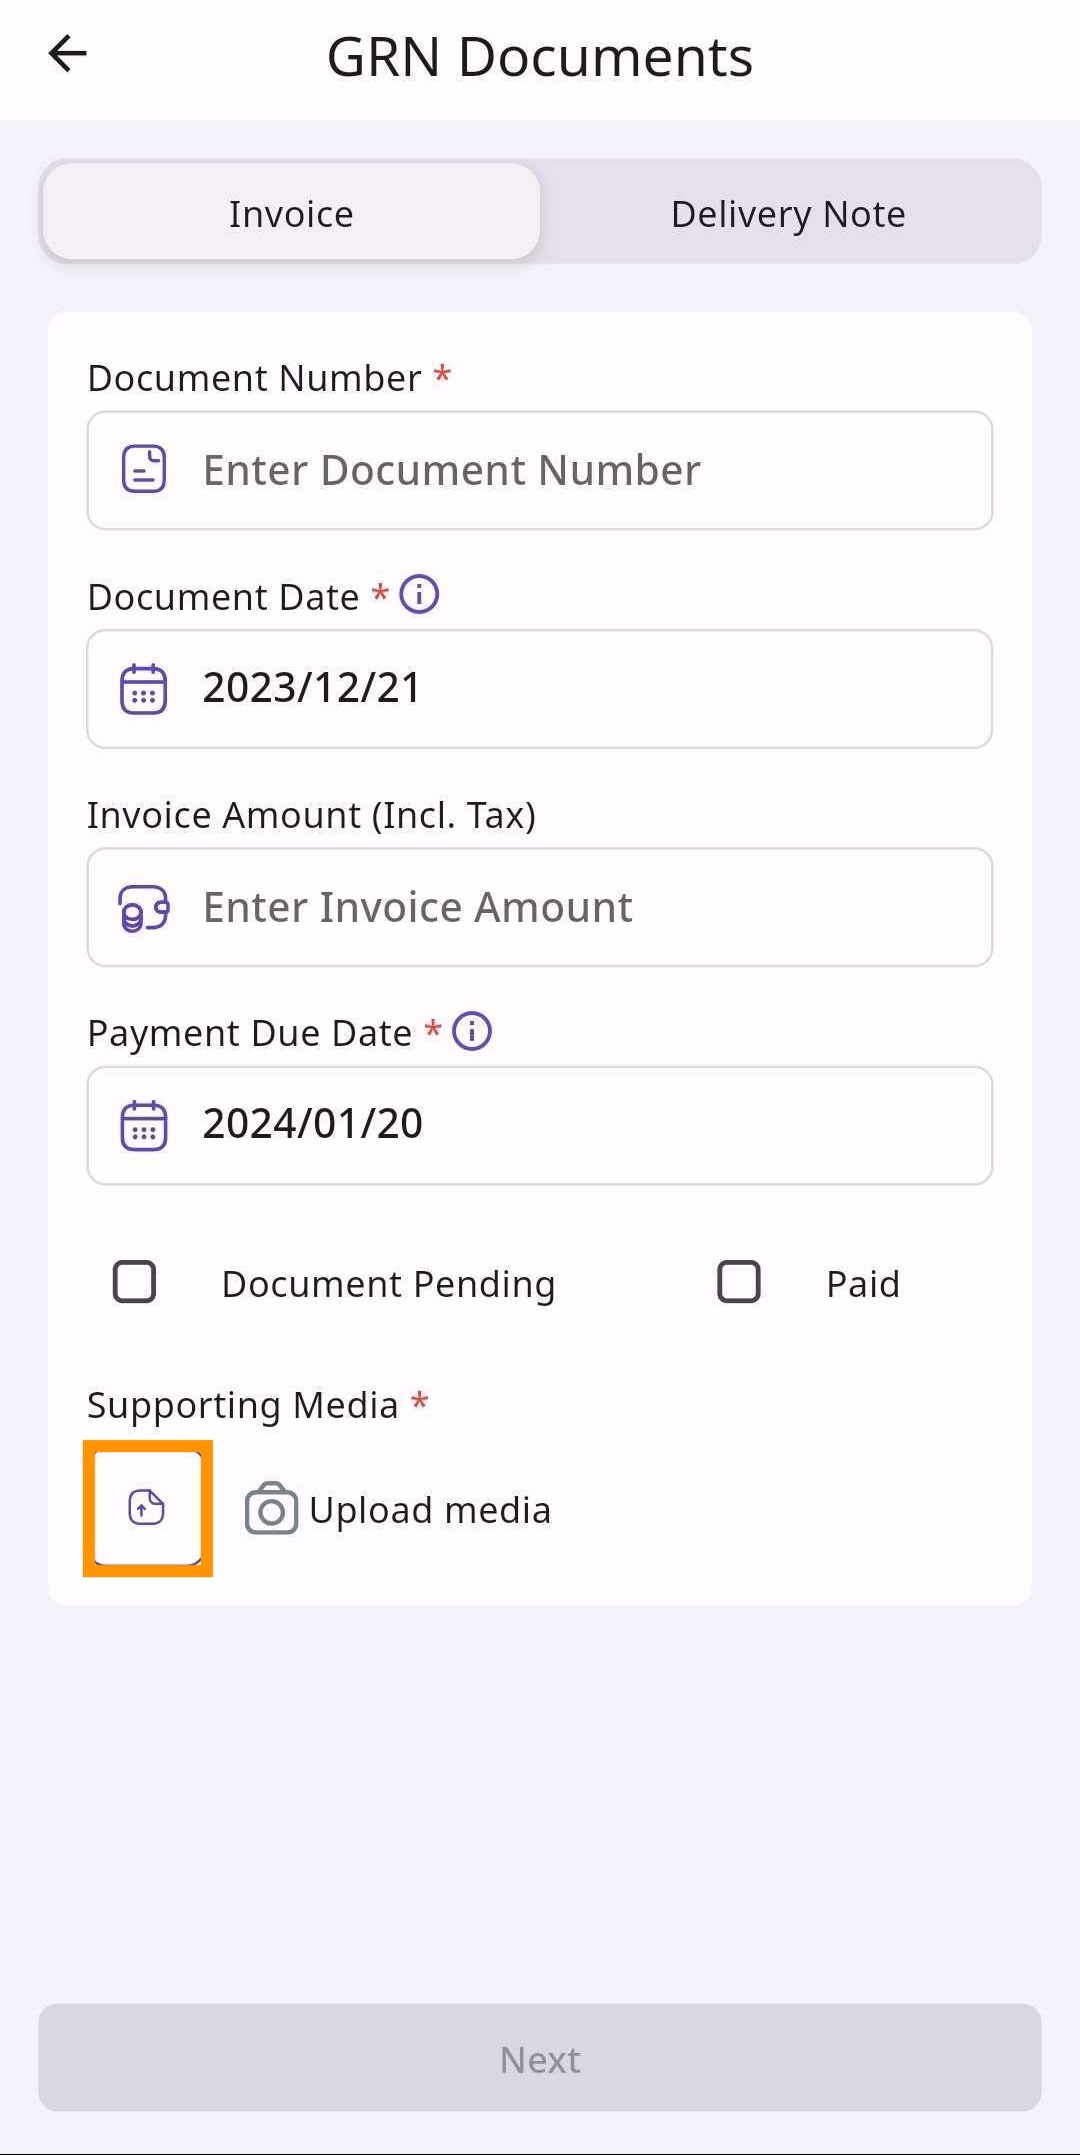
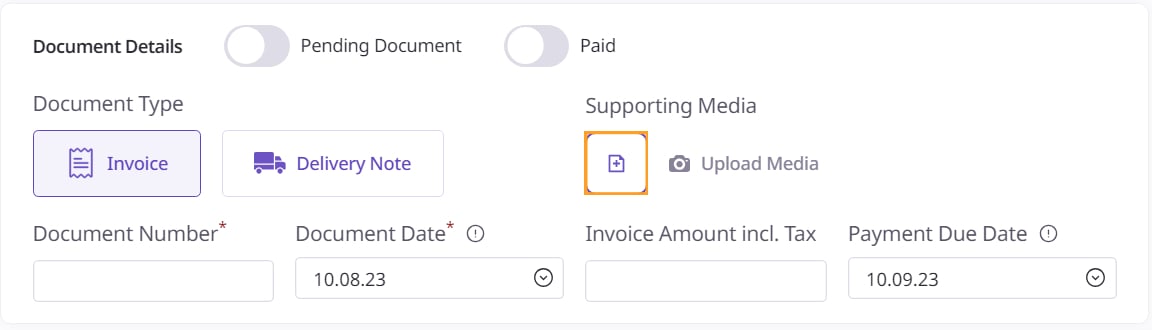
Put in any pictures relevant to the order in ‘Supporting Media’. This is generally used for uploading the invoice.
Retailer Portal

Mobile App
Next, select whether the GRN is an ‘Invoice’ or a ‘Delivery Note’. An invoice contains the price of the received item. A delivery note does not contain the prices of the items you are receiving.
Retailer Portal
Mobile App
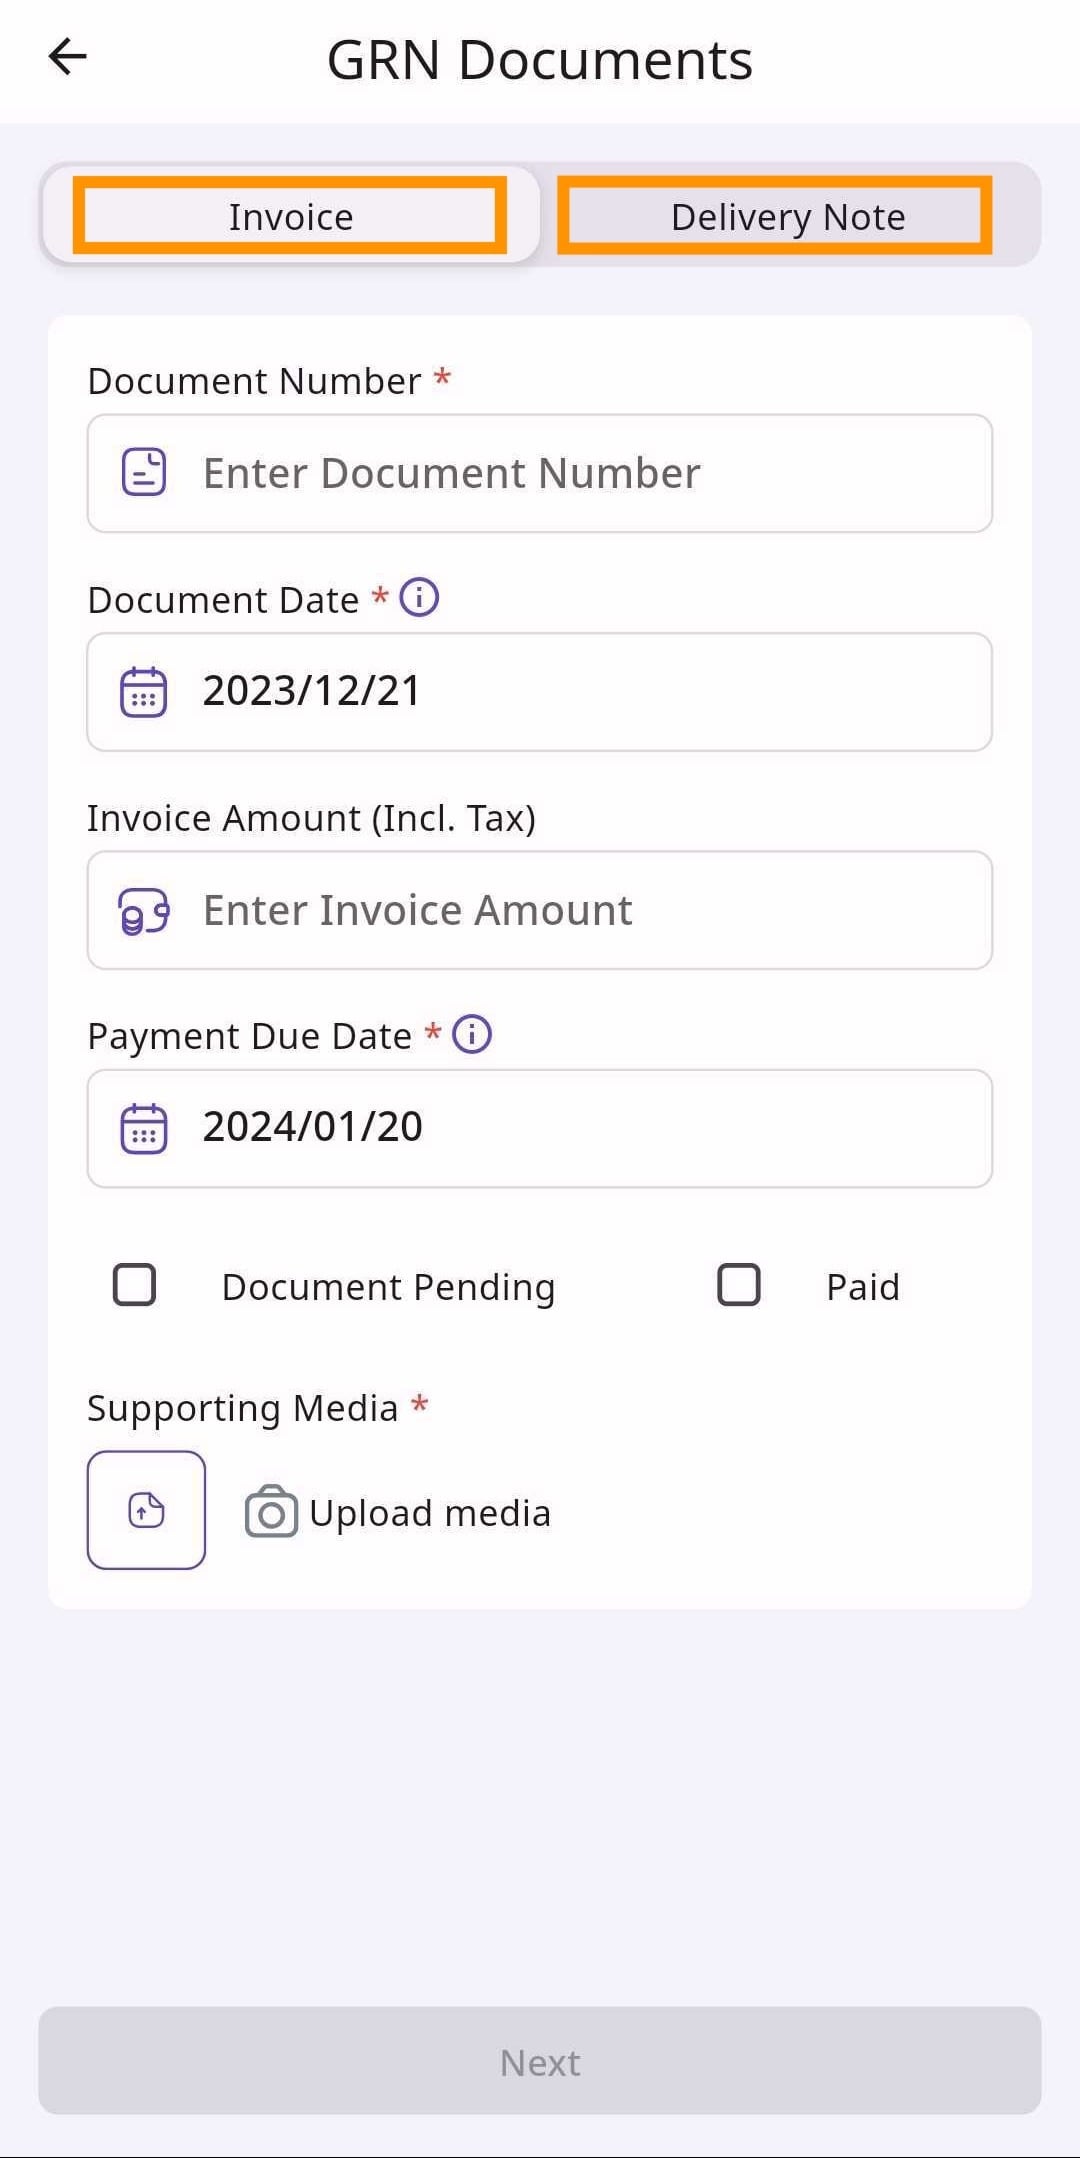
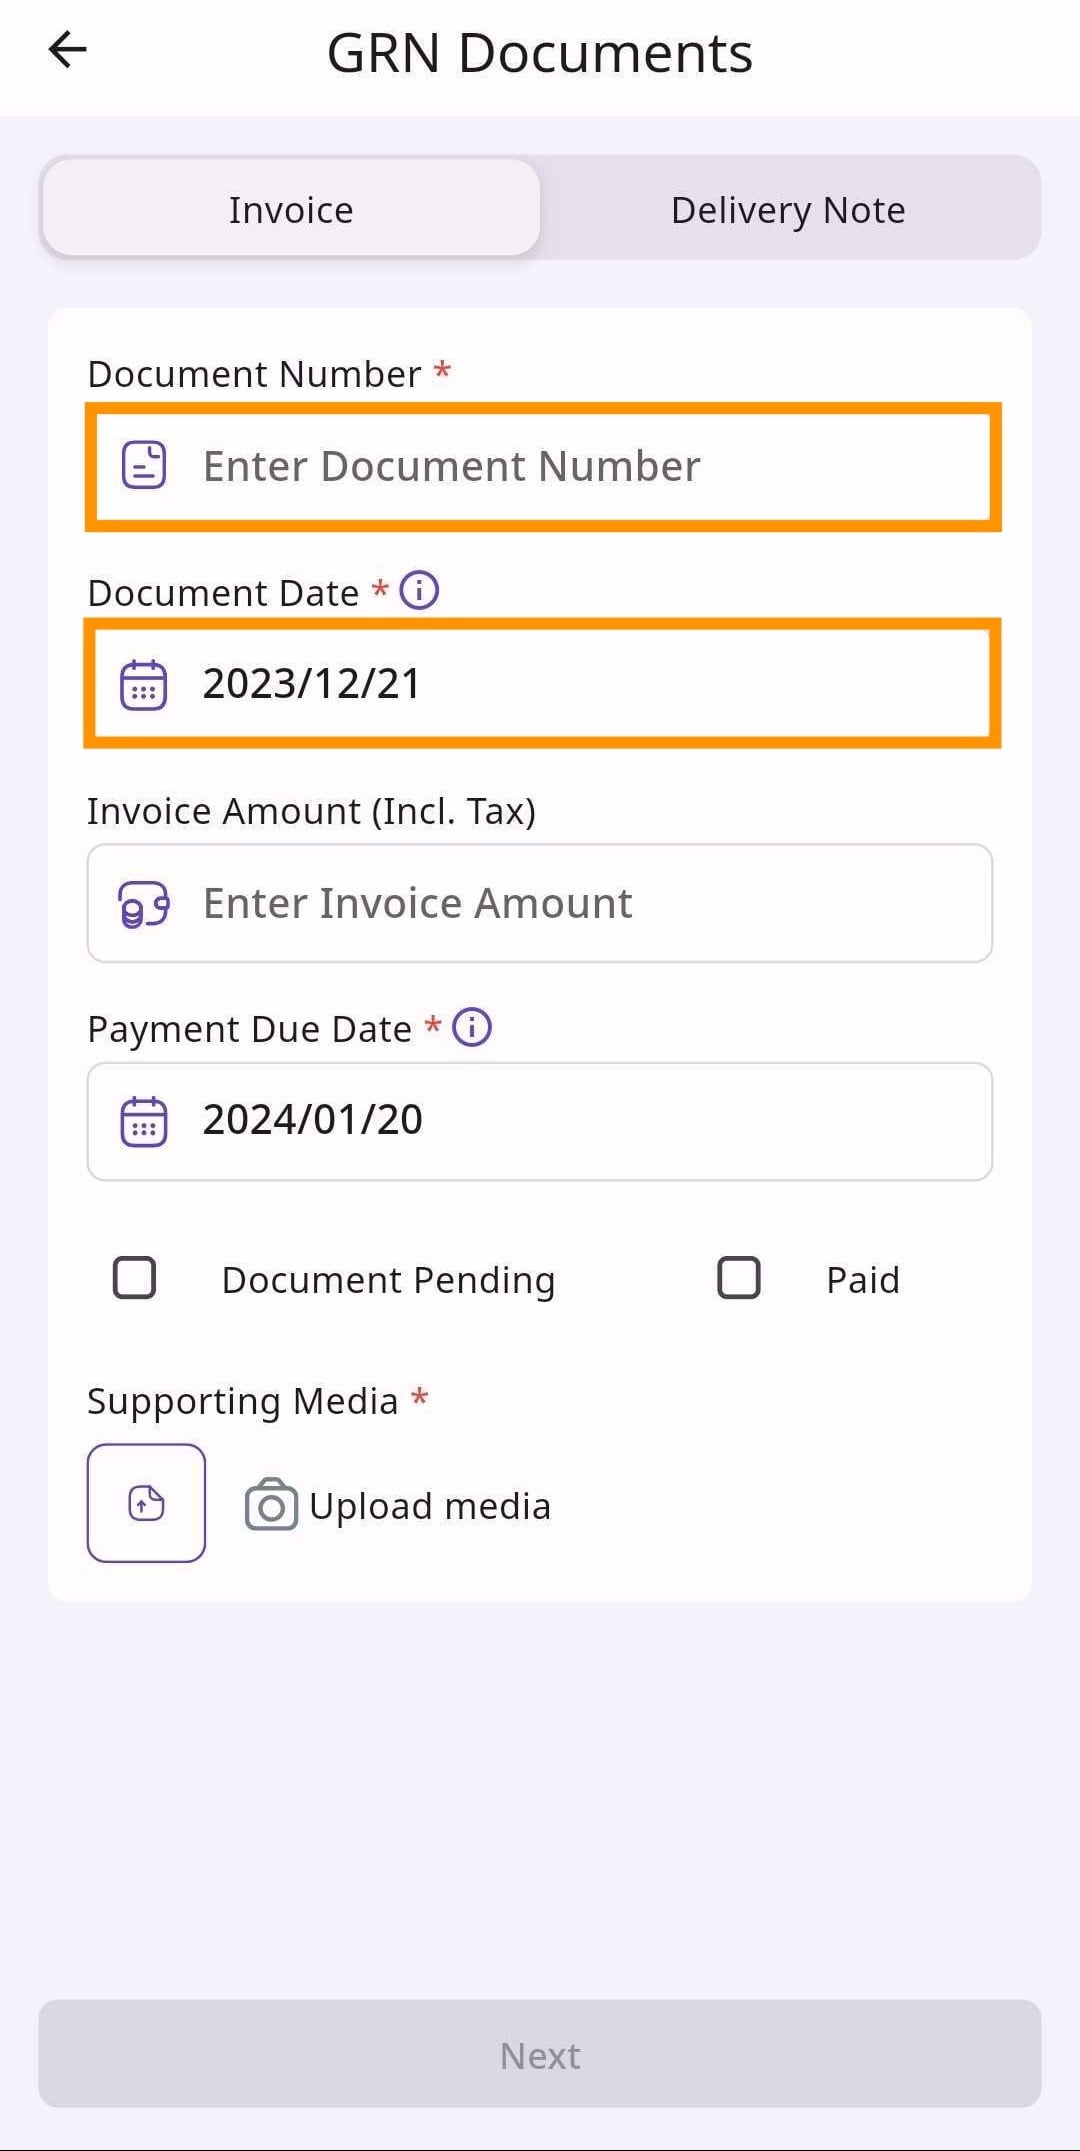
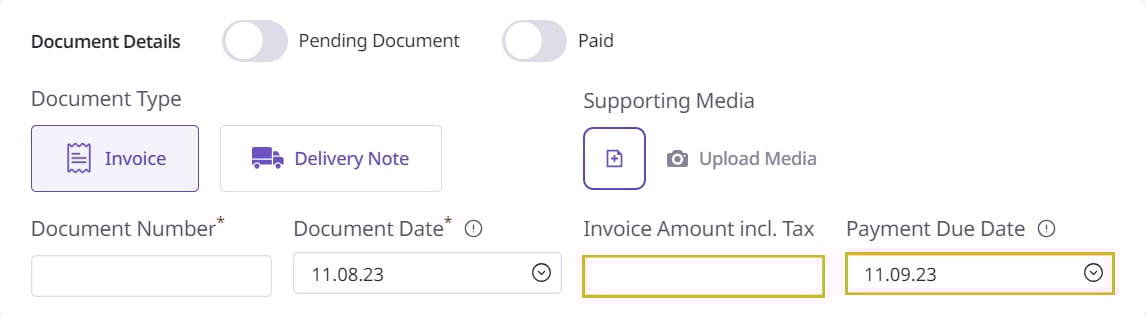
Below this, input a document number and a document date. A document number can be a random number and the document date is the date on which the goods were received in the retailer’s timezone.
Retailer Portal
Mobile App
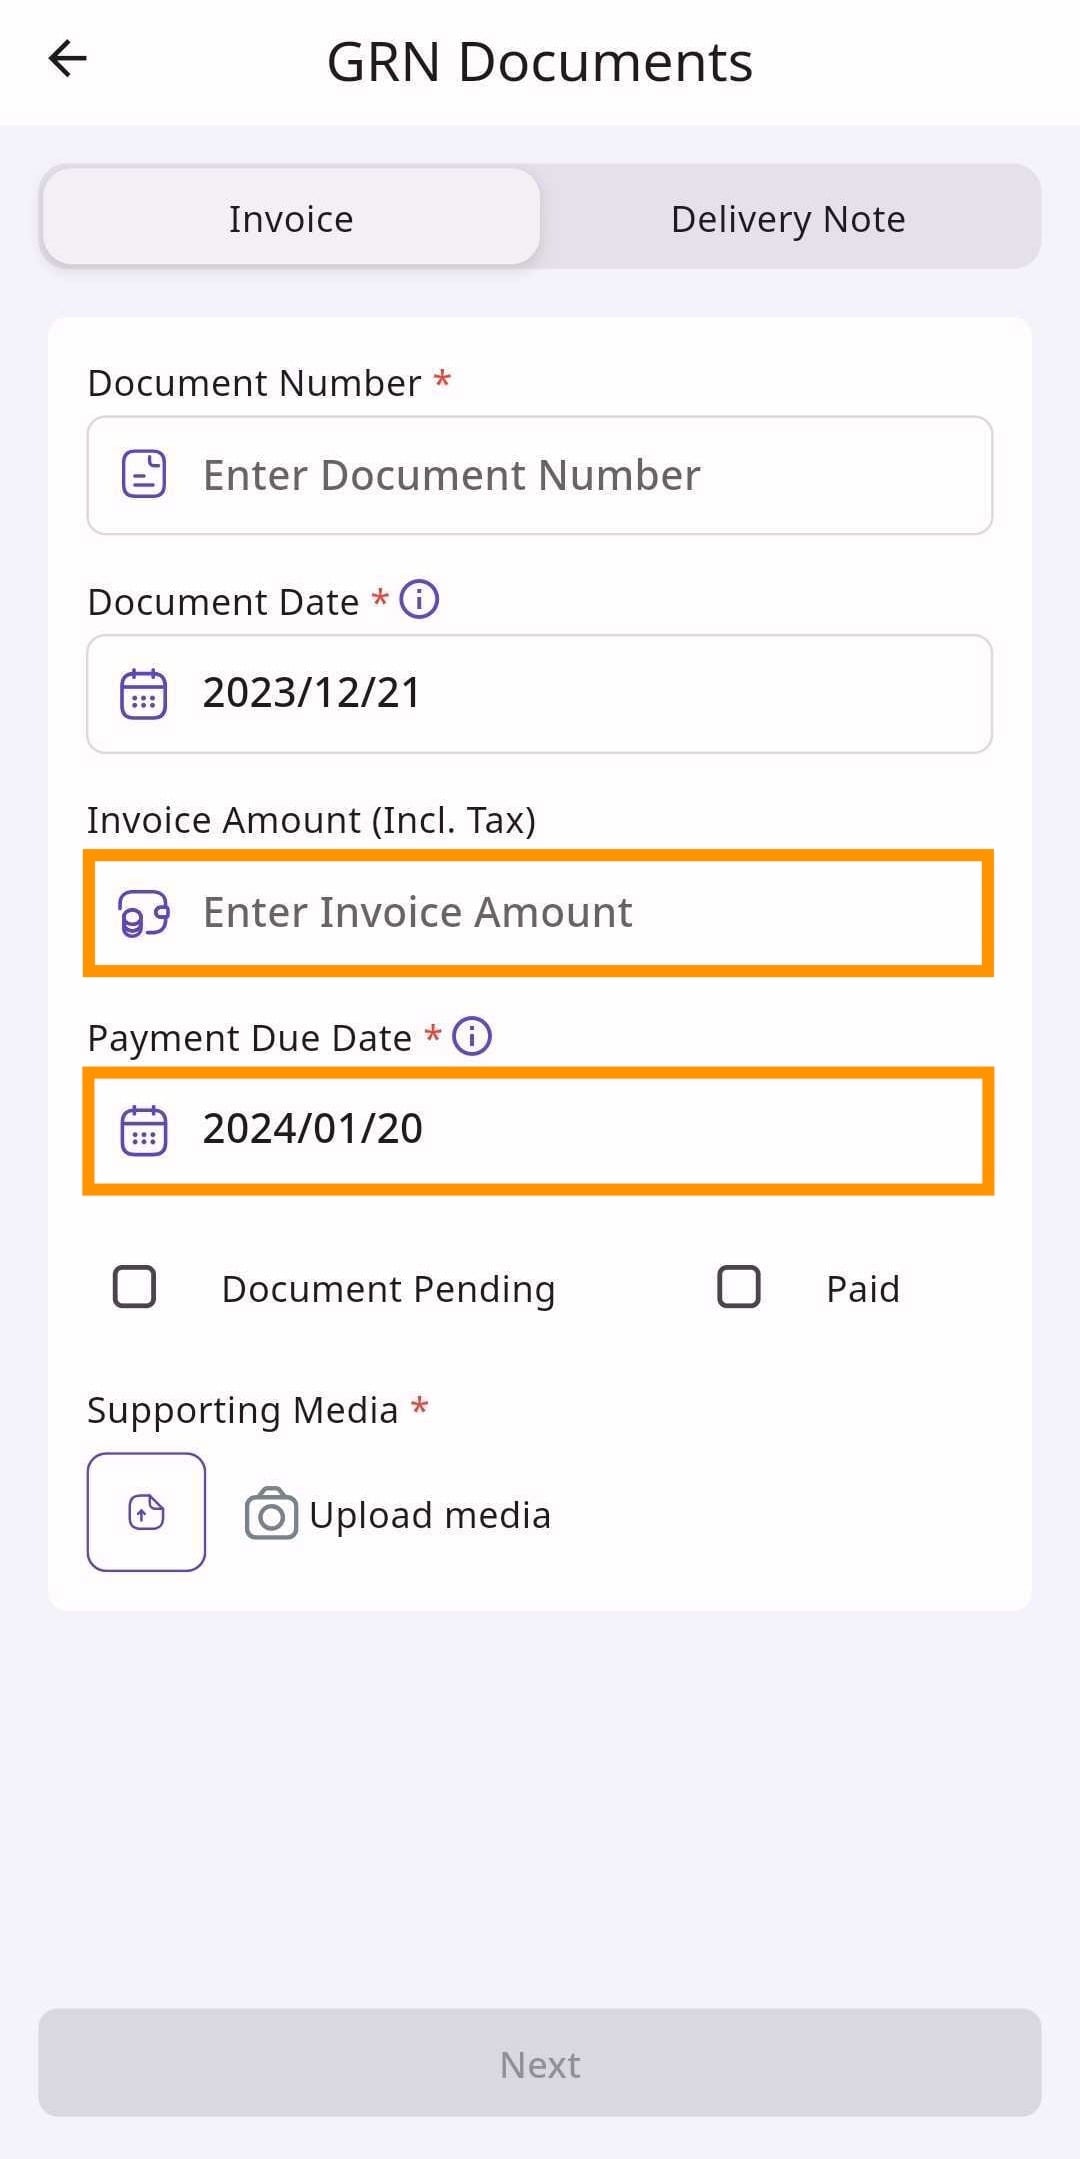
If you selected ‘Invoice’ as the document type, fill in the Invoice Amount including Tax and the Payment Due Date. The Payment Due Date is the due date for the payment of the order as per the retailer’s time-zone.
The Payment Due Date will not be applicable if you checked the ‘Paid’ option.
Retailer Portal

Mobile App
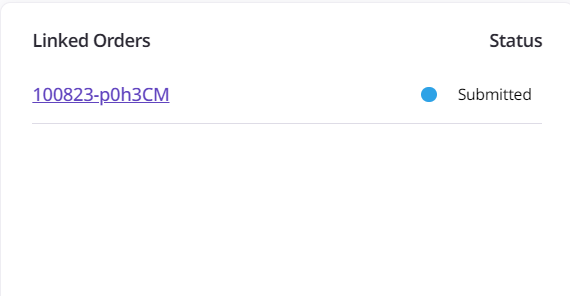
Linked Orders will display all of the orders that are linked to this GRN.
Here, you should see the name of the order that you are creating a GRN for.
Retailer Portal
Mobile App
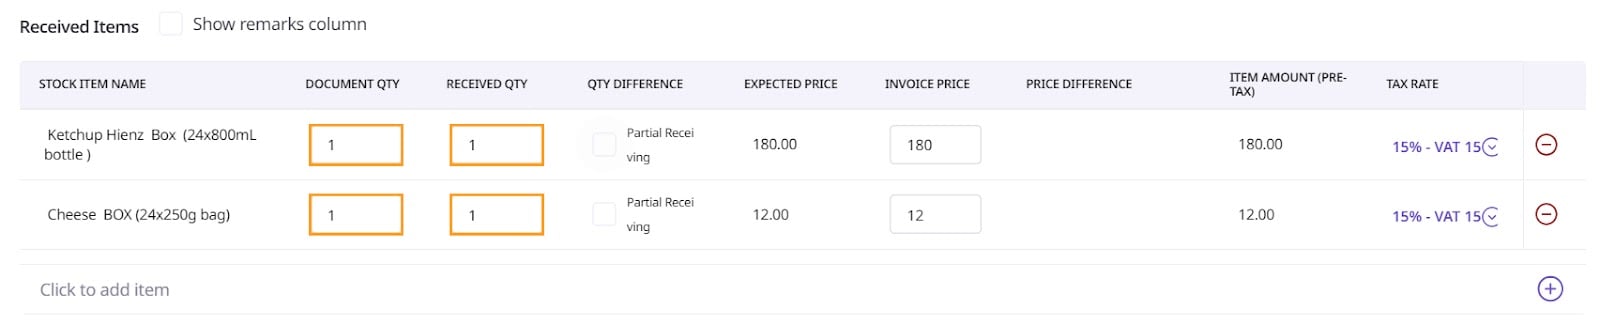
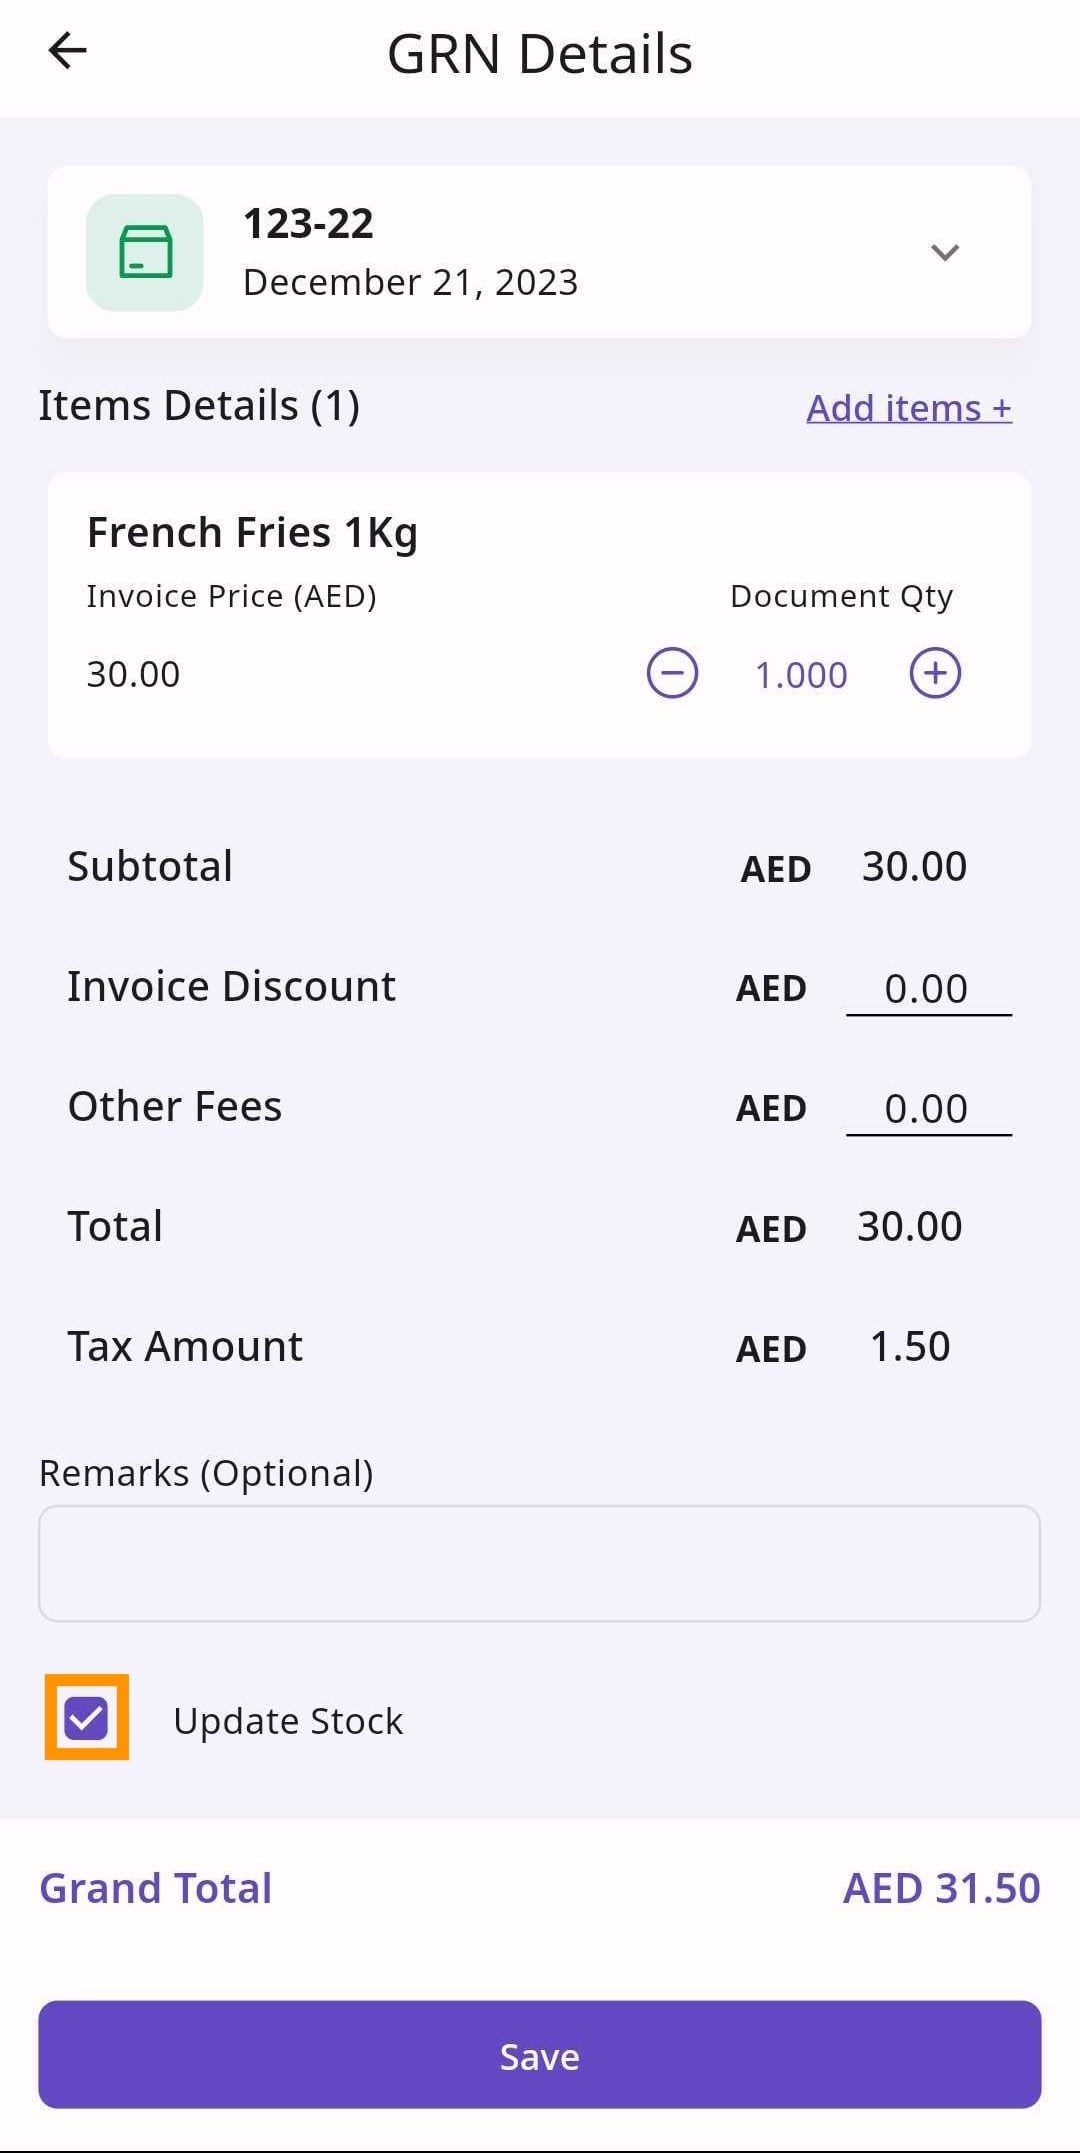
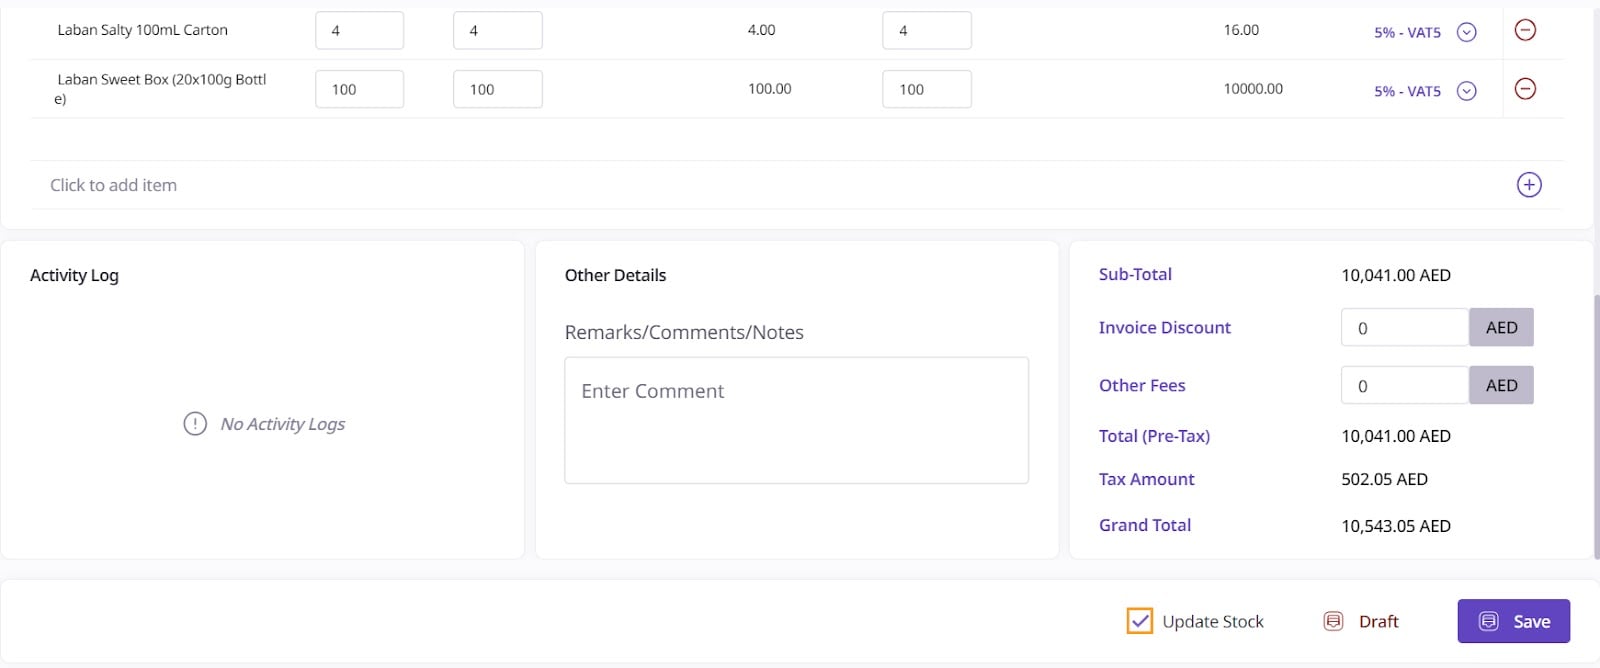
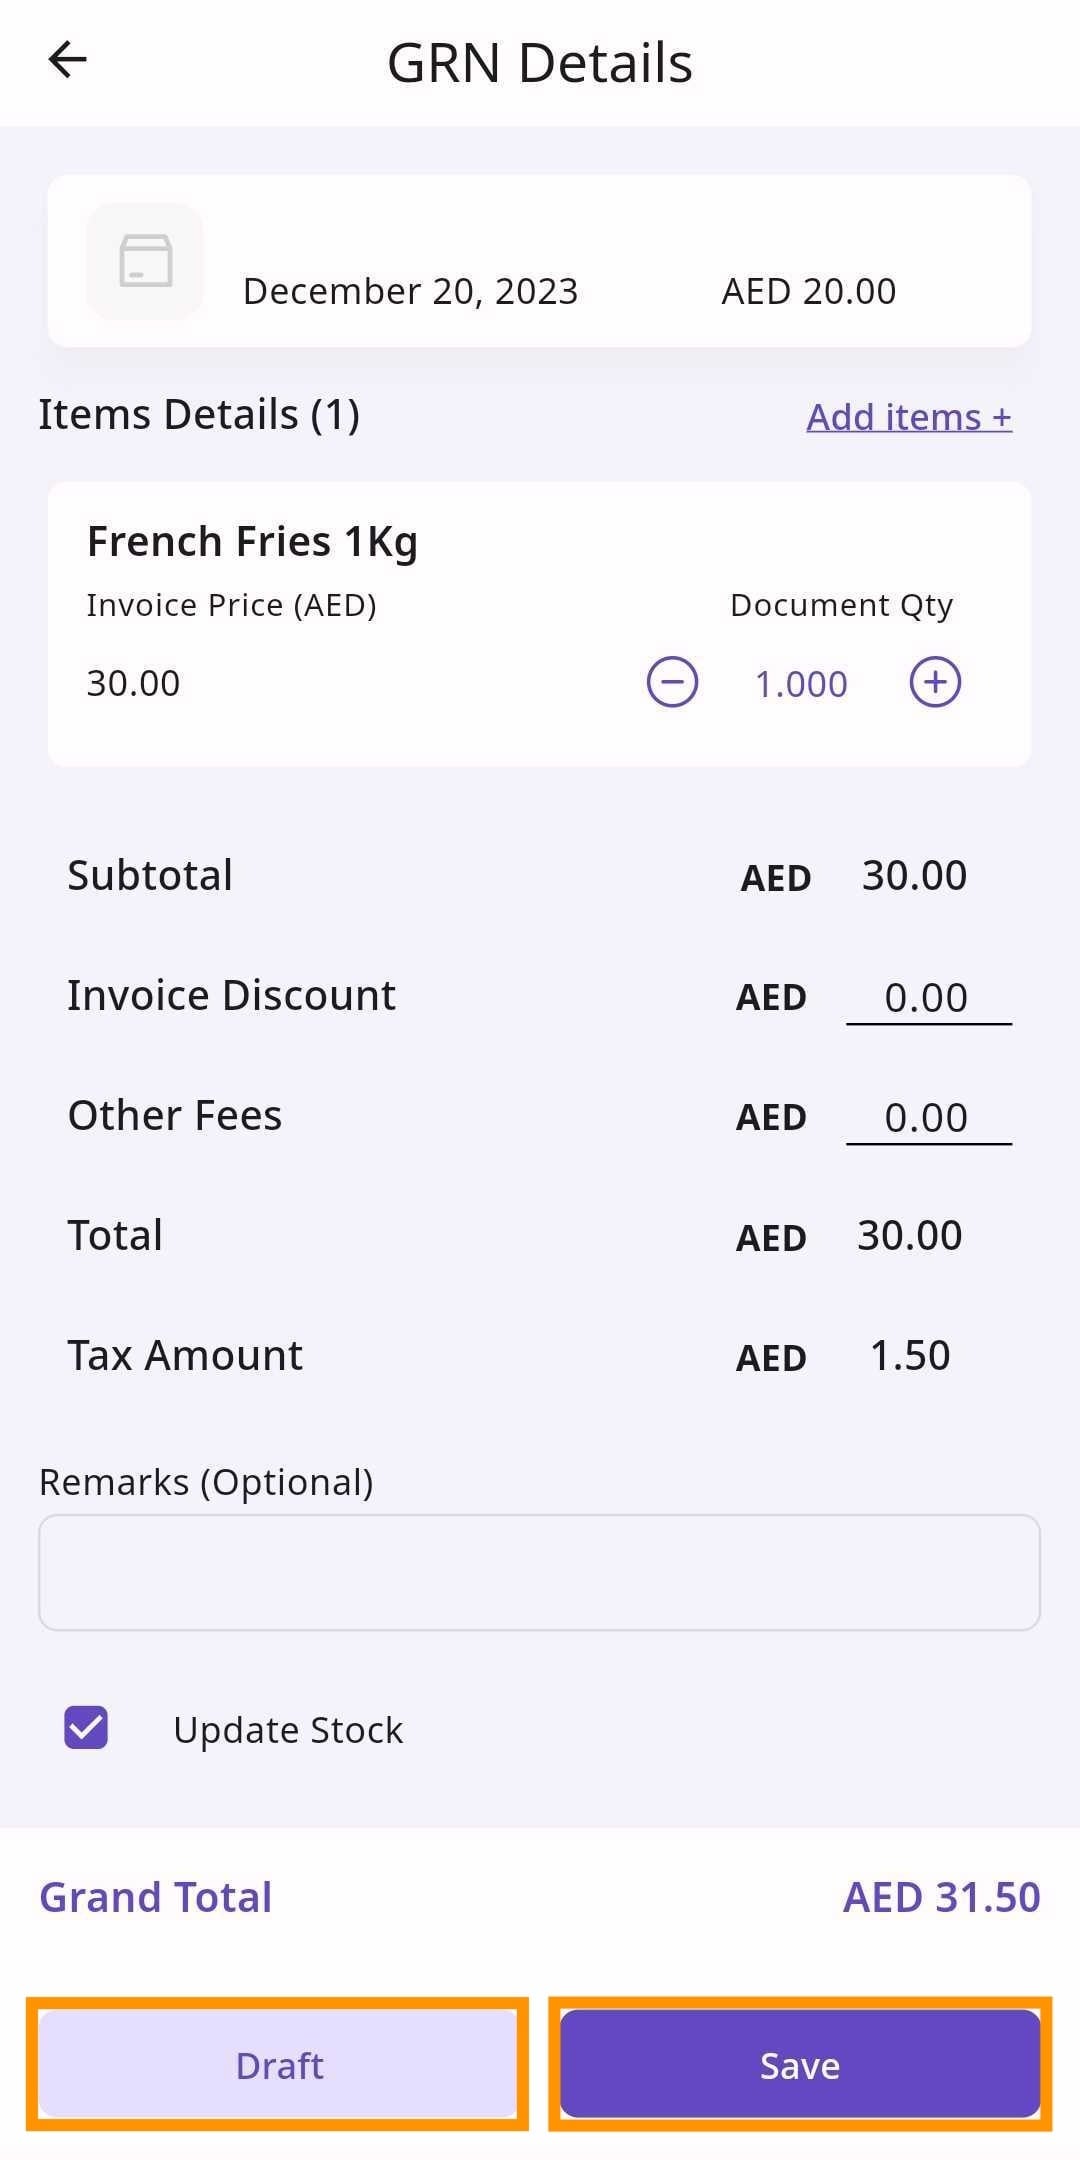
Received Items is where you log all of the items you have ordered and received.
The items that you ordered will automatically appear in ‘Received Items’. For each item, fill out the ‘Document Quantity’ and the ‘Received Quantity’. The ‘Document Quantity’ is how many items the invoice lists as ordered and the ‘Received Quantity’ is how many items you actually received.
Retailer Portal
Mobile App
If your Received Quantity differs from the Document Quantity, you will have the option to select ‘Credit’. This option is for when the supplier does not have that item and issues a Credit Note to compensate for the lack of item.
Similarly, if part of the order is different than your ordered amount, you can flag the order as a ‘Partial Receiving’ by checking that option.
Retailer Portal

For a Delivery Note GRN, move onto the Activity Log at this step.
For an Invoice GRN, fill in the price of each item on your invoice in the ‘Invoice Price’ space.
Retailer Portal

Mobile App
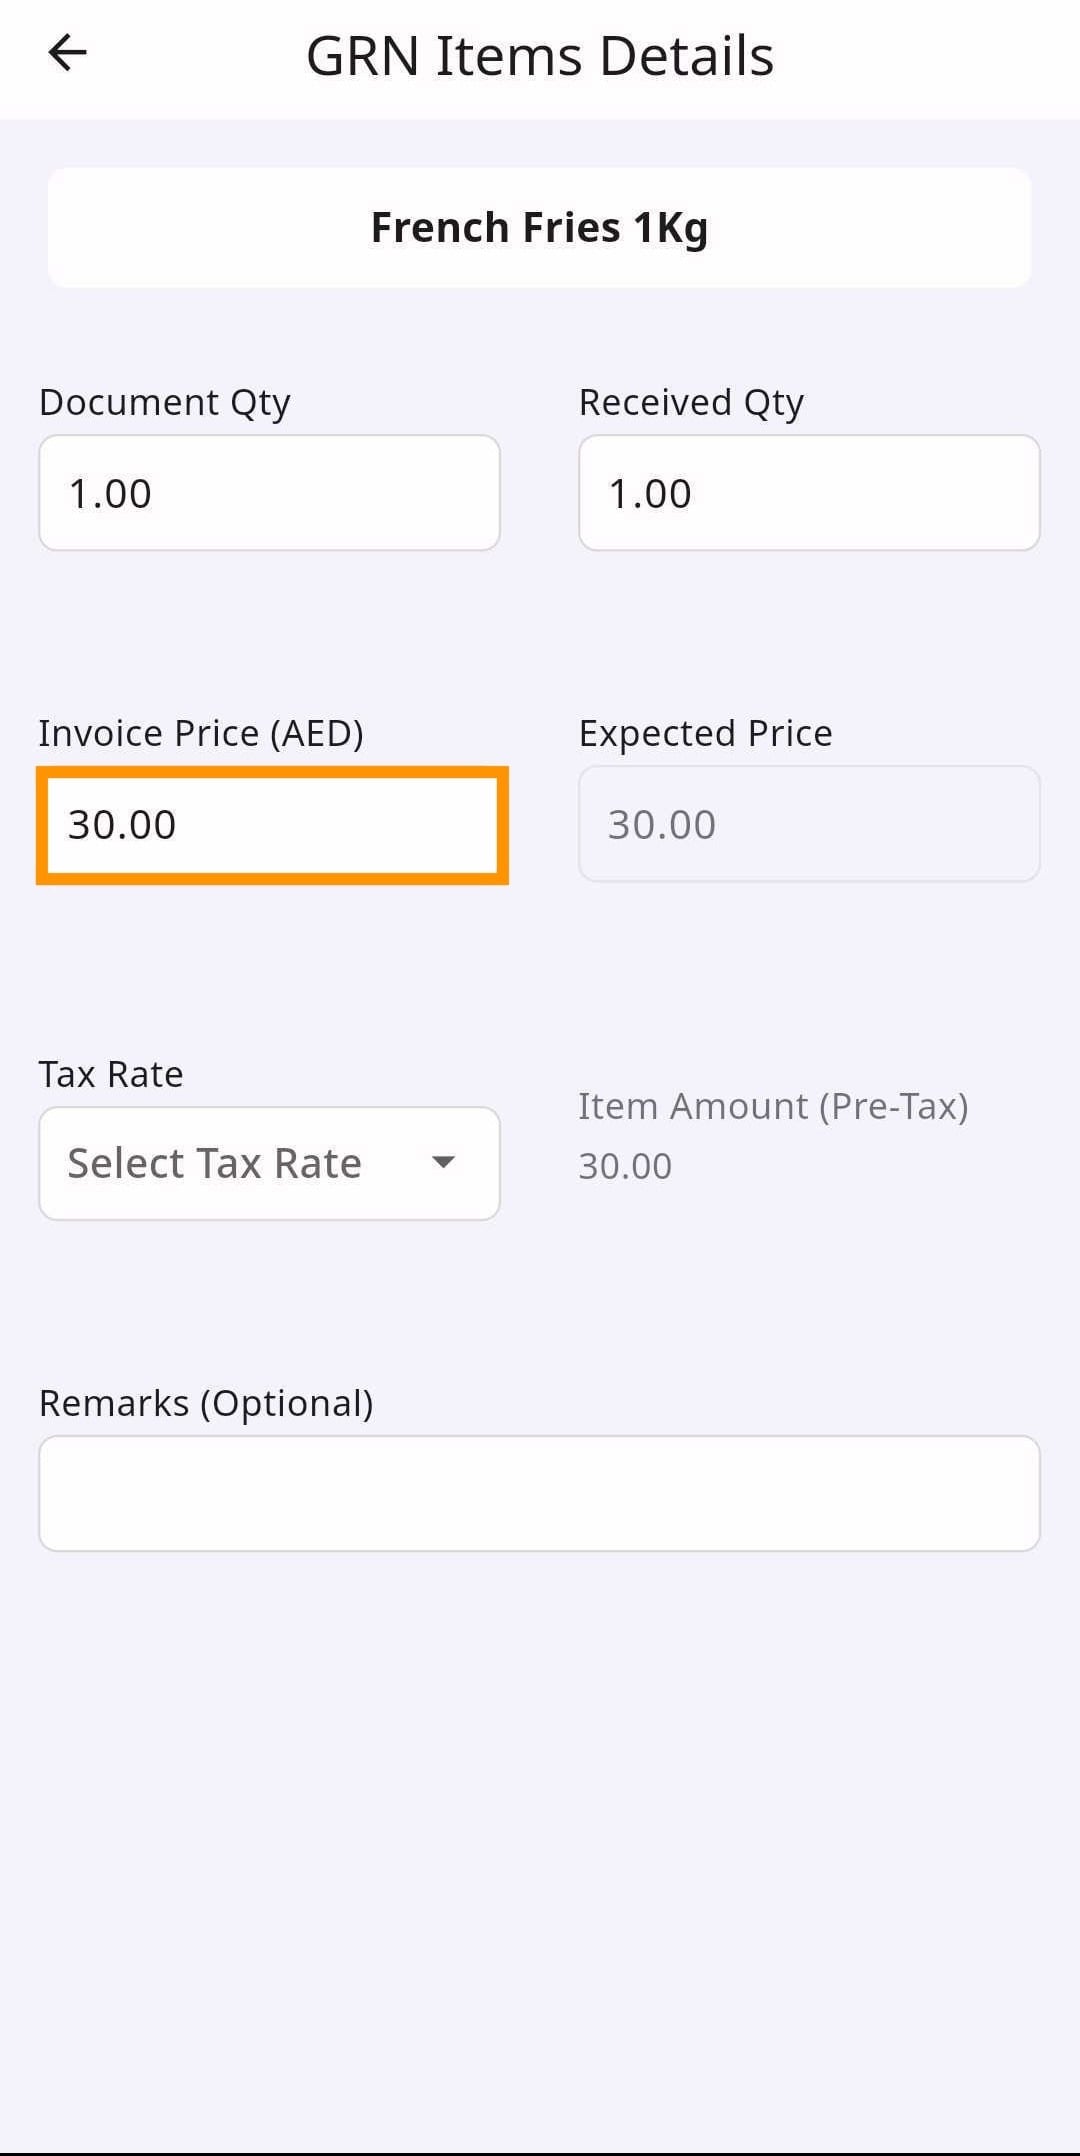
If there is any price difference, you will have the option to select ‘Credit’, ‘Update Price’, or ‘Discount’. Select ‘Credit’ if the change in price is due to a Credit Note, select ‘Discount’ if you received a discount, and select ‘Update Price’ if the expected price was wrong and you want to update the price accordingly.
Retailer Portal

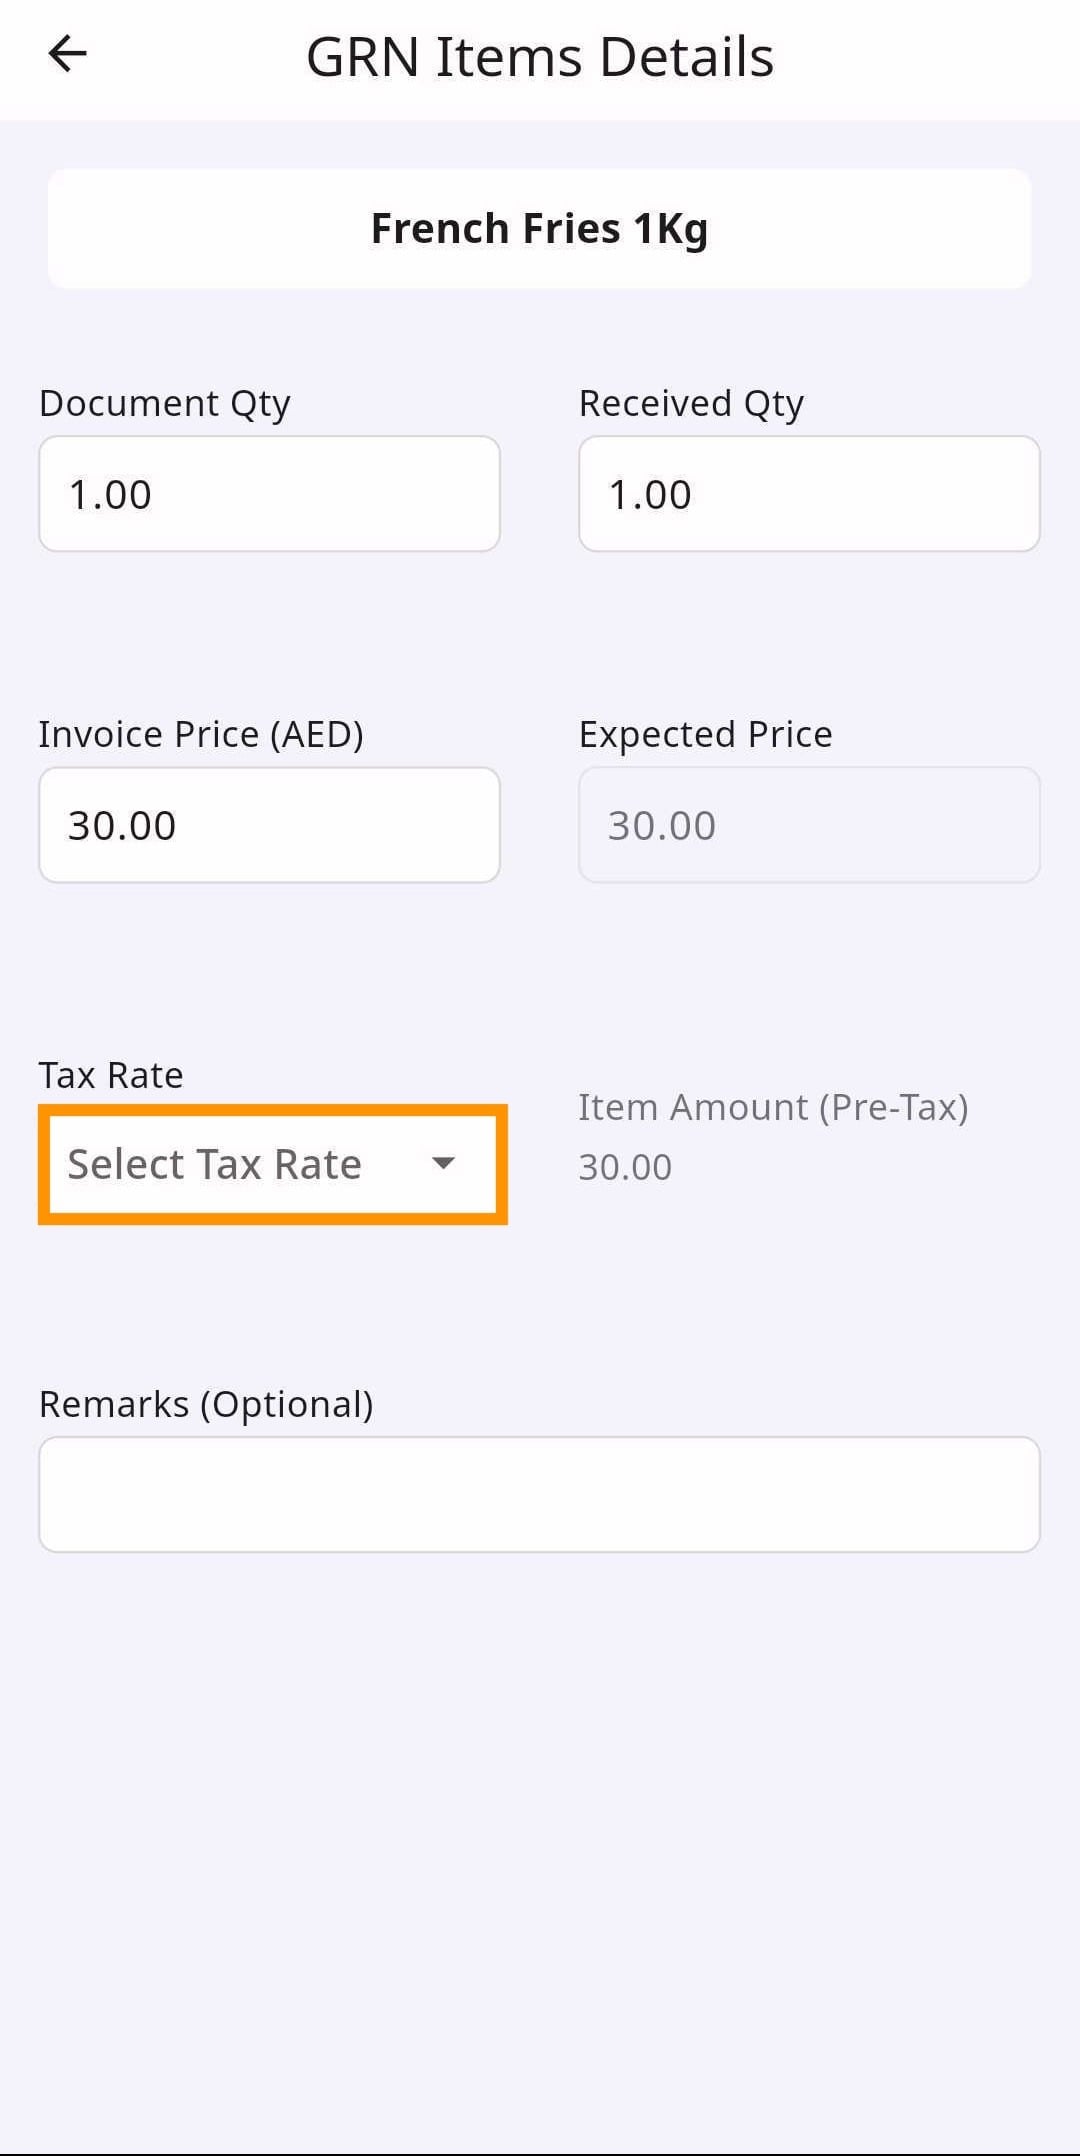
Finally, select a tax rate for each item.
Retailer Portal

Mobile App
When finished, move onto the Activity Log.
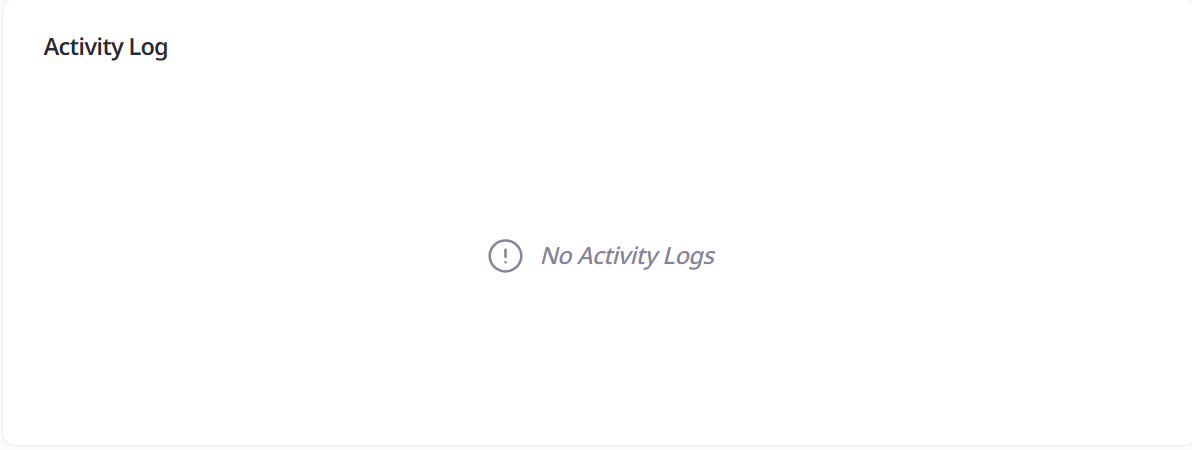
Activity Log is the log of activities for that GRN. Once you save your GRN, that activity will appear in the Activity Log.
Retailer Portal
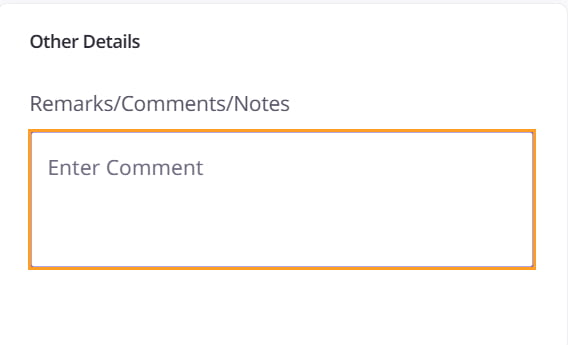
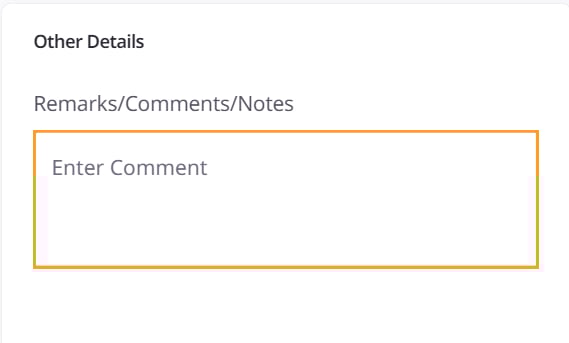
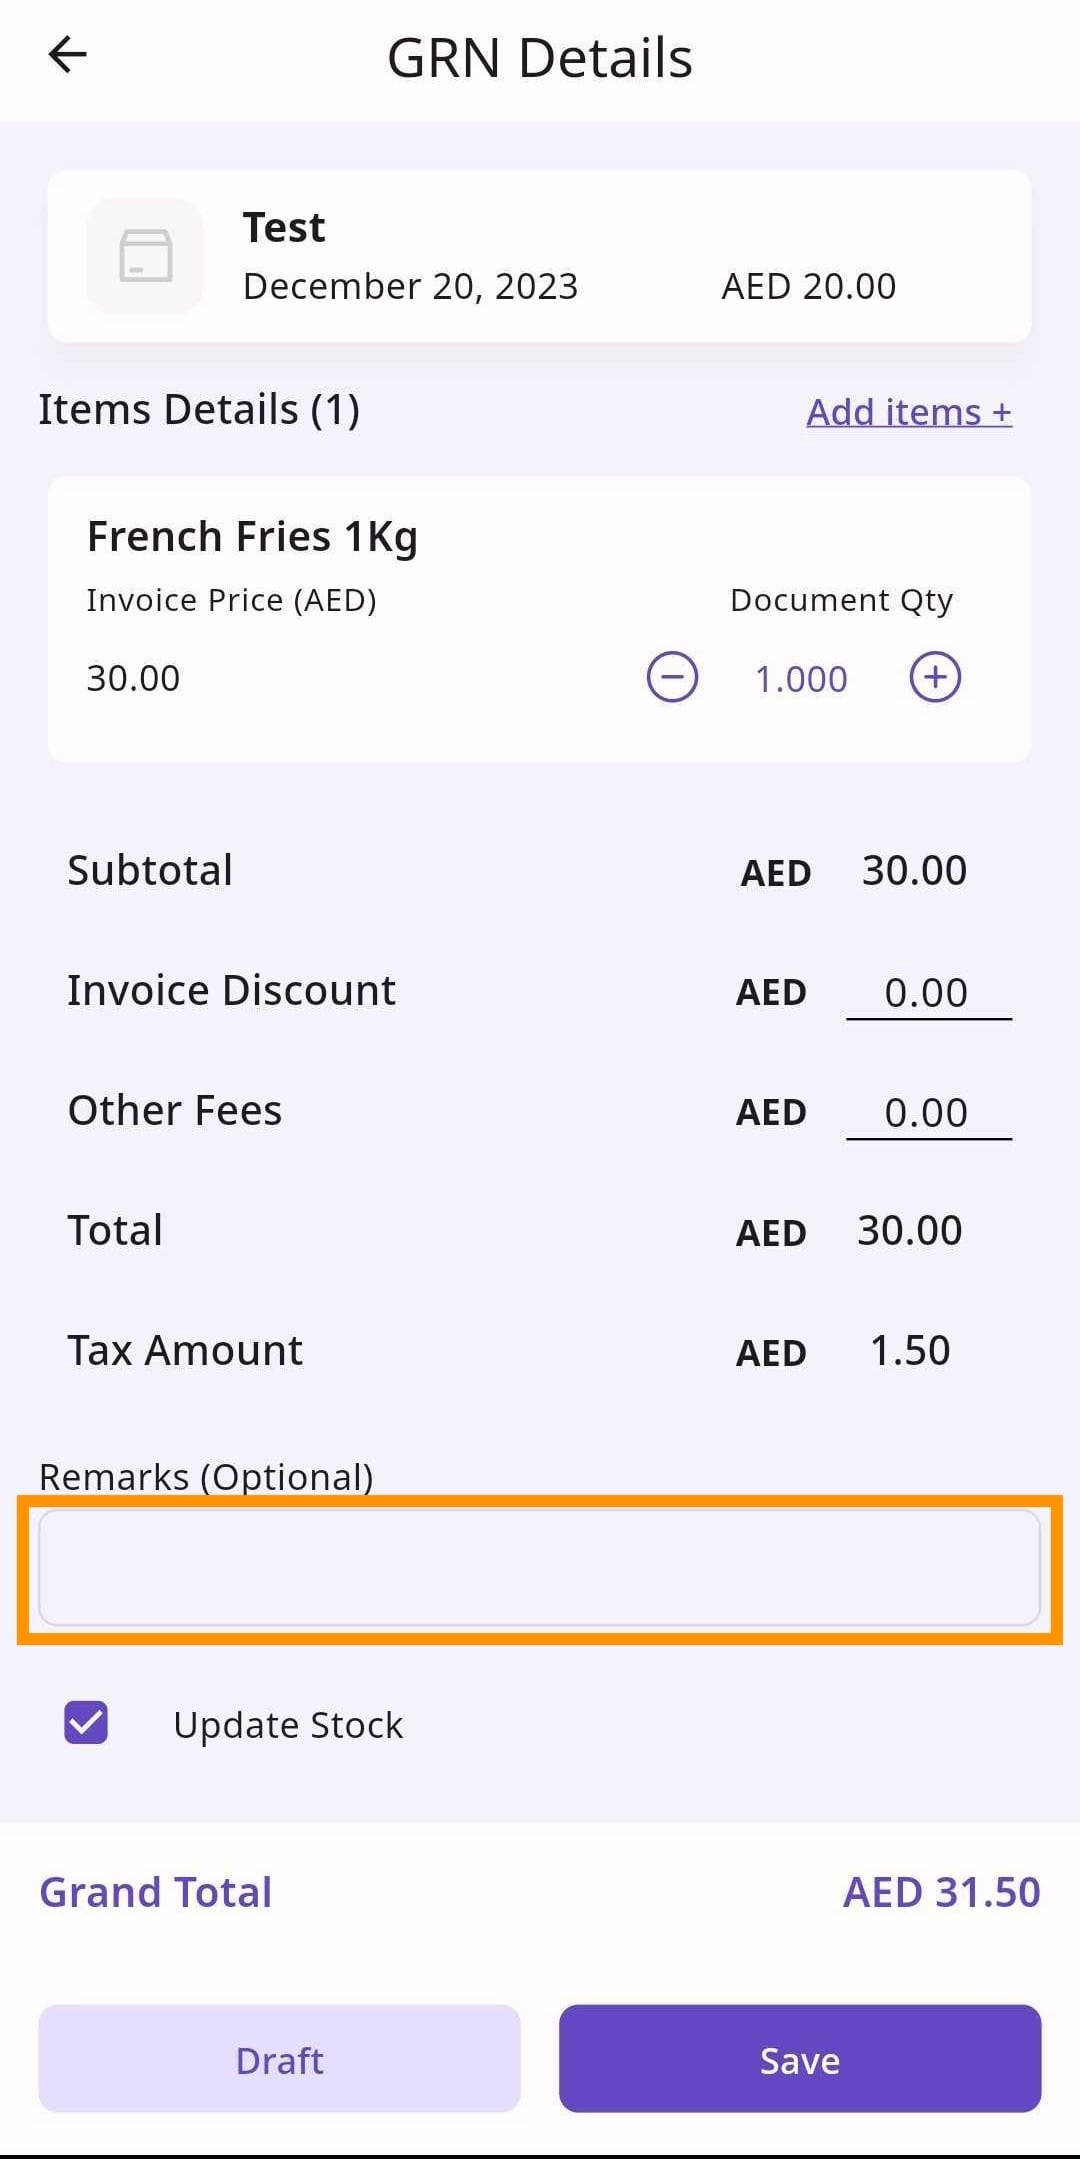
Fill out any other relevant information in Other Details.
If you have any Remarks/Comments/Notes for the supplier, then fill that text field out.
Retailer Portal
Mobile App
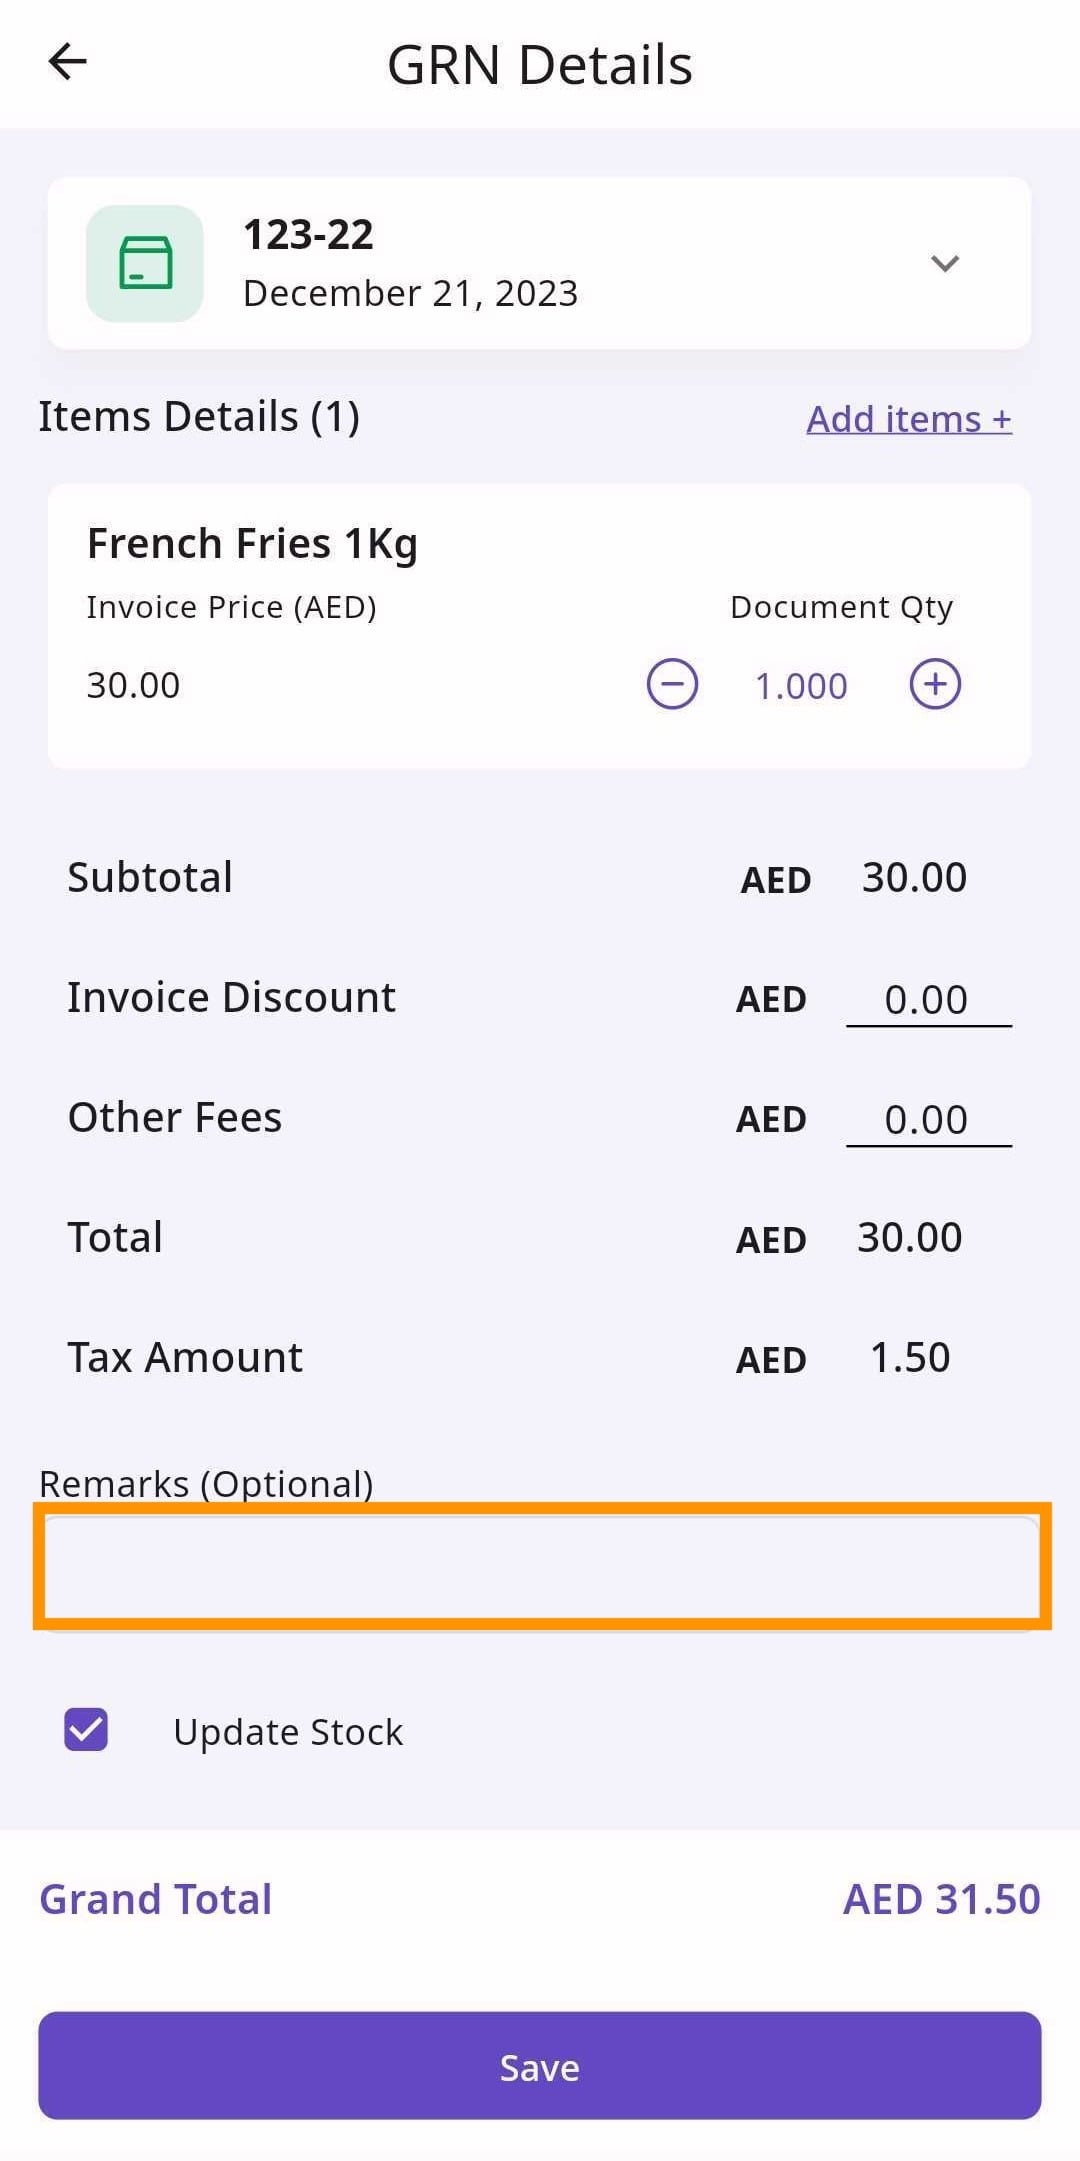
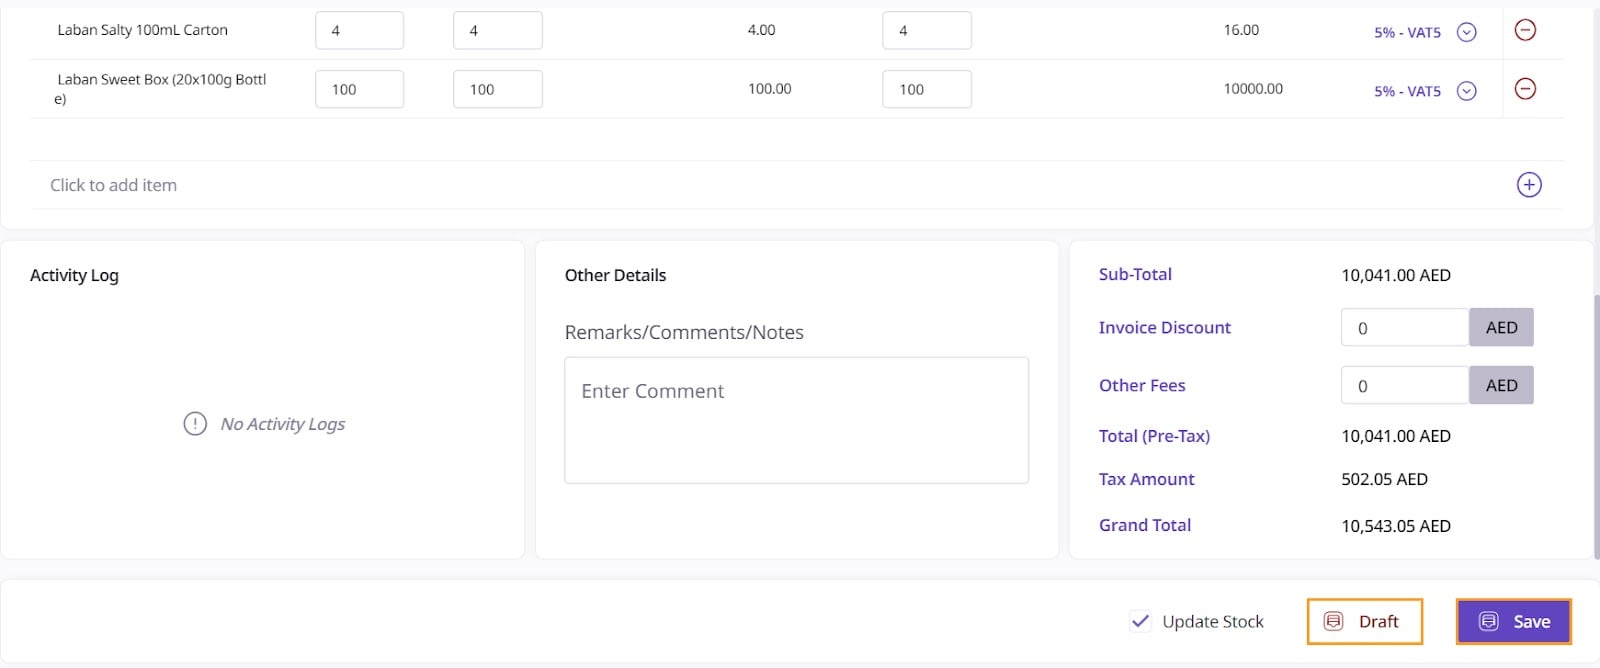
If you want your stock to be updated based on the goods received, select the ‘Update Stock’ option.
Retailer Portal
Mobile App
If you selected ‘Delivery Note’, you can now ‘Save & Close Order’. If you want to save the GRN but not close the order, click ‘Save’. If you want to draft the GRN click ‘Draft’. If you selected ‘Invoice’, then keep following along.
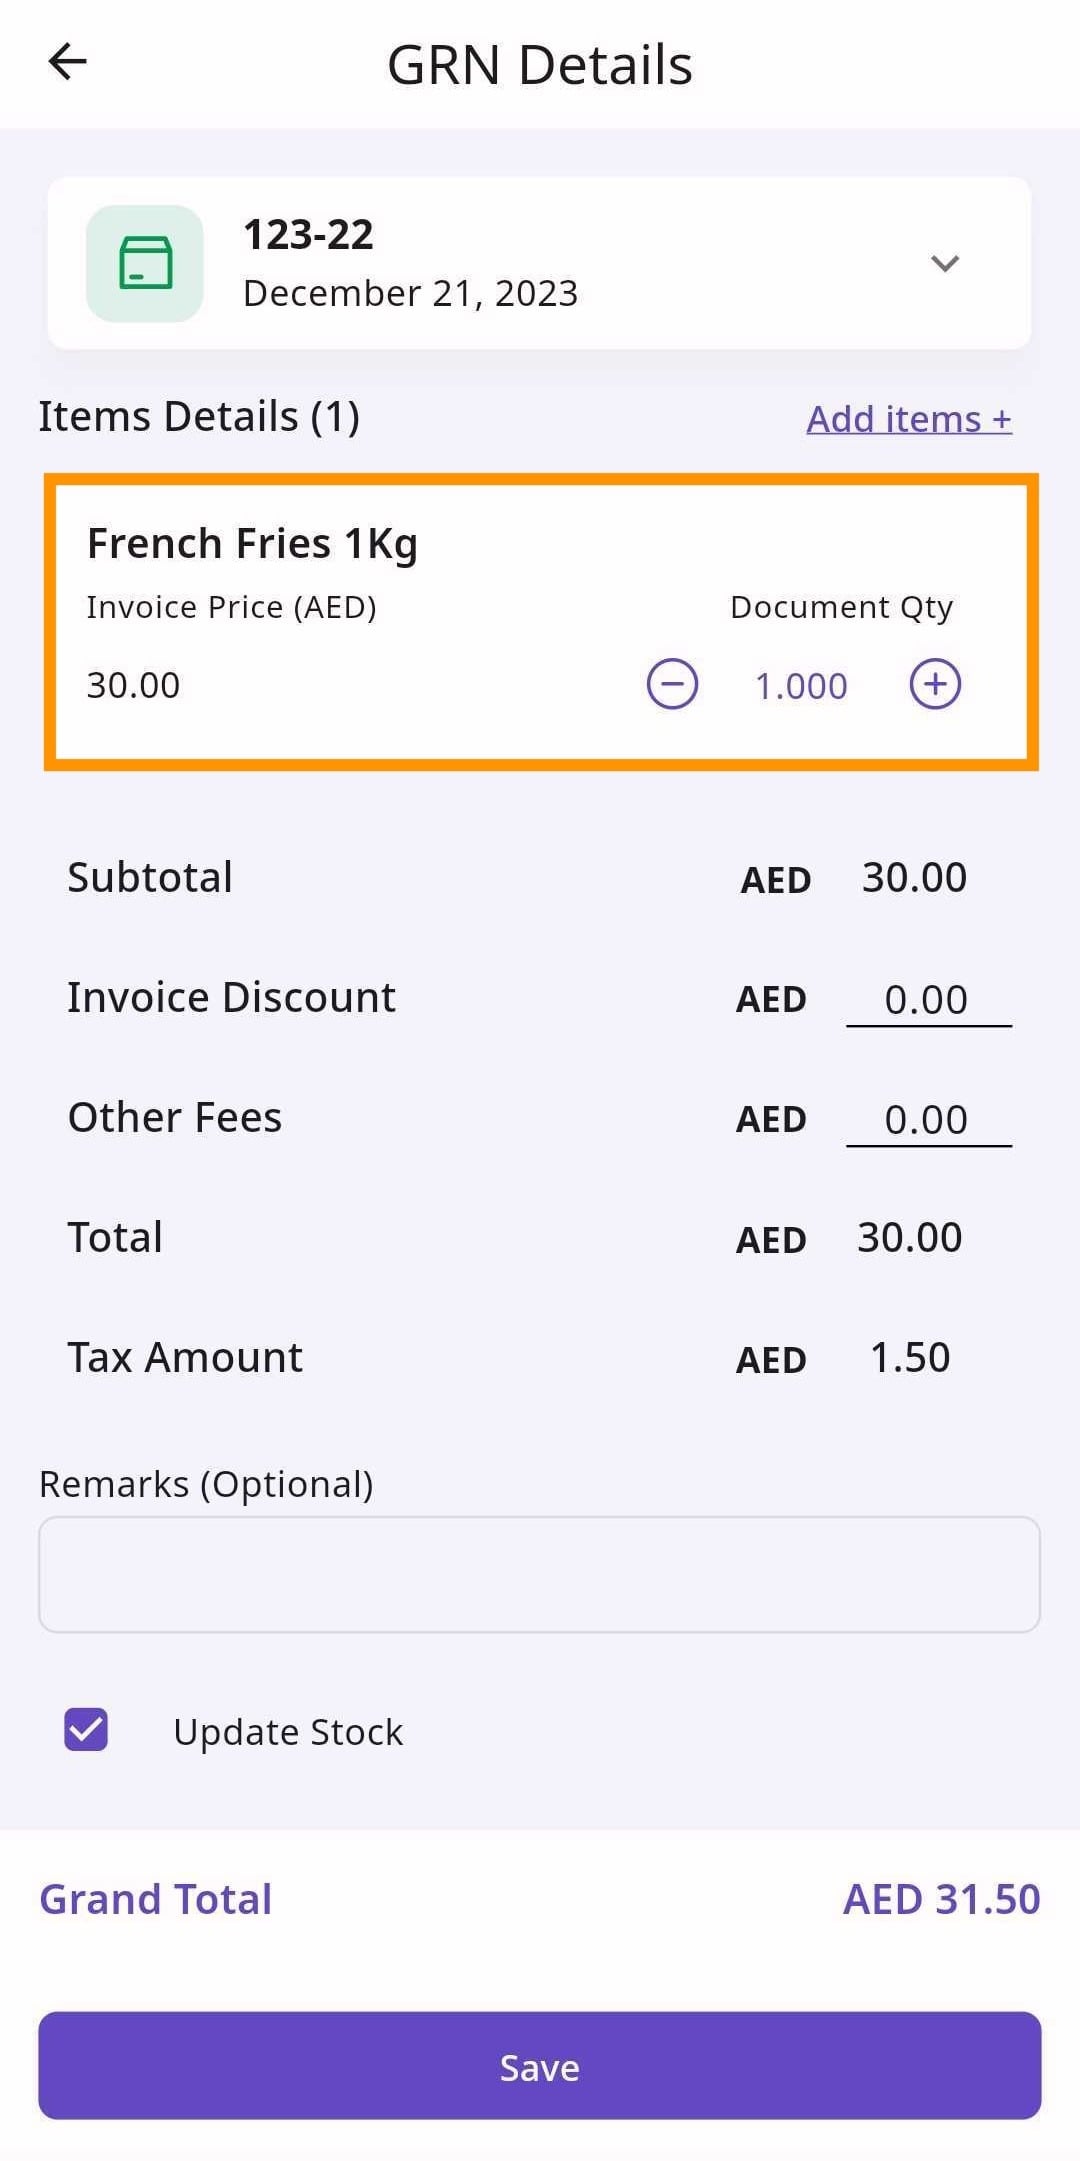
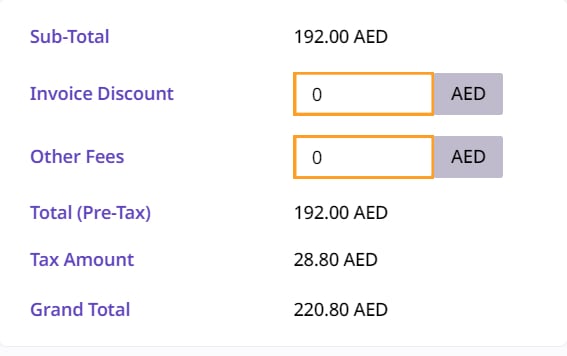
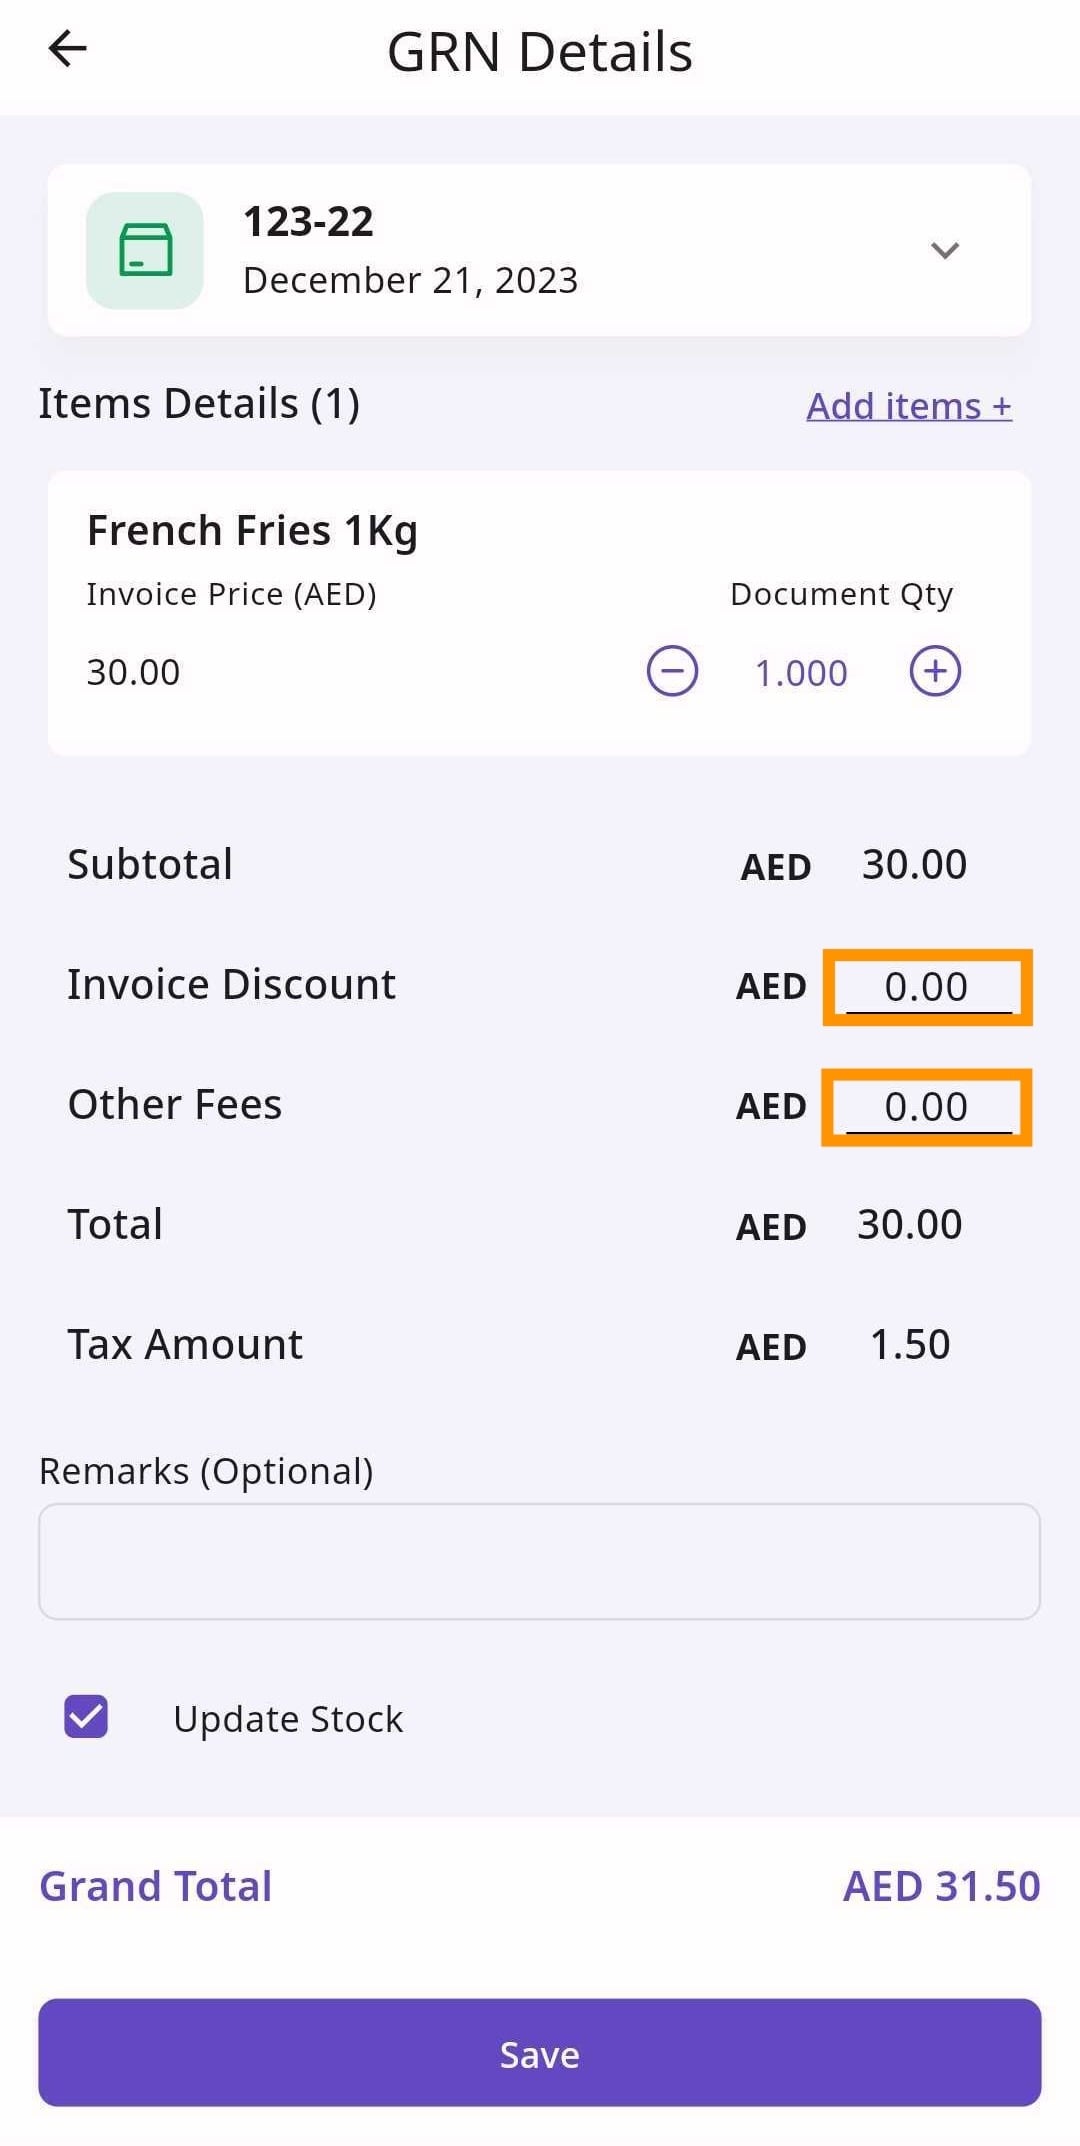
If you have an invoice discount, fill the discount amount into the ‘Invoice Discount’ text-field. If there are other fees, fill out that text-box.
Retailer Portal
Mobile App
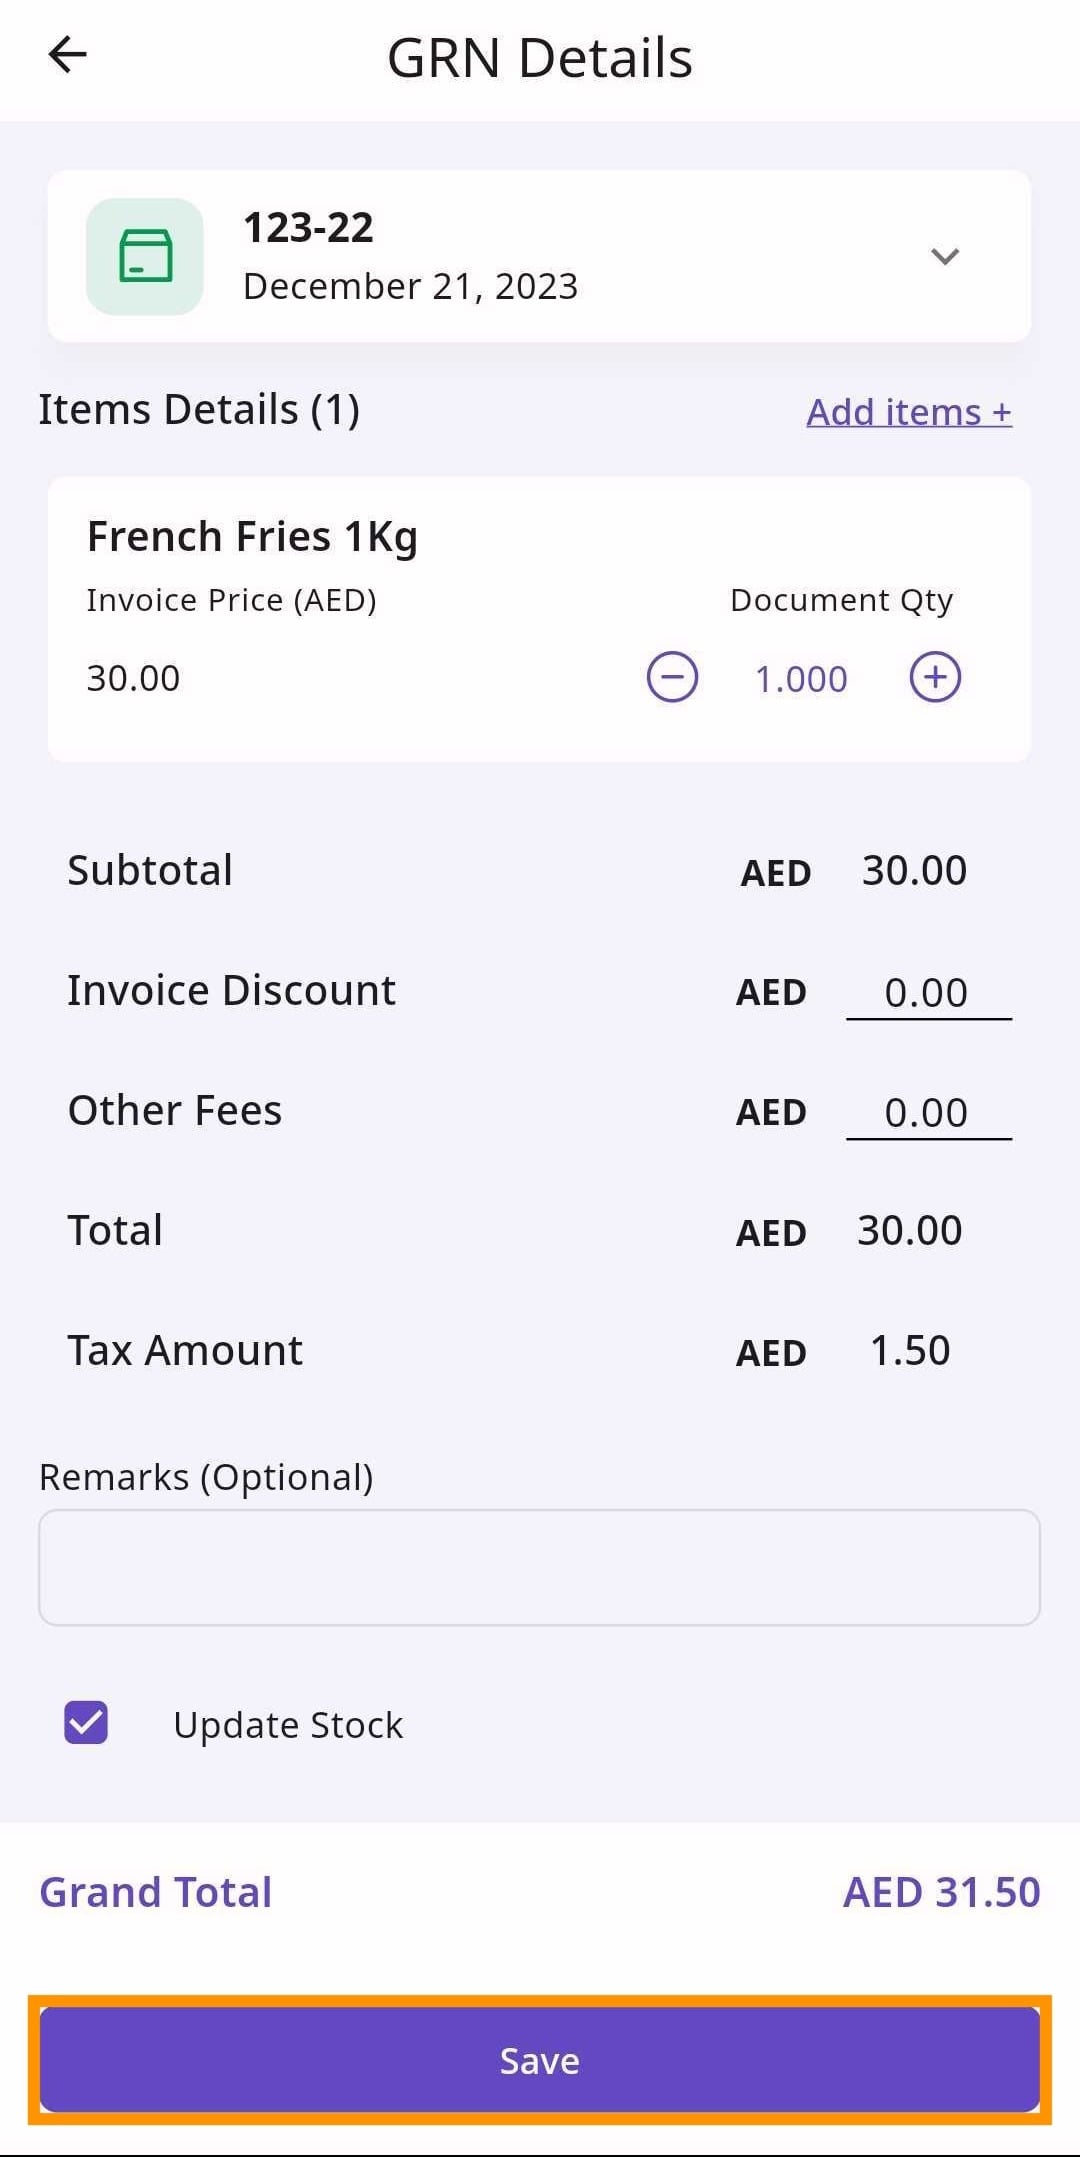
Once finishing your selection, click ‘Save & Close Order’. If you want to save the GRN but not close the order, click ‘Save’, and if you want to draft the GRN for later, click ‘Draft’.
Retailer Portal

Mobile App
‘Receiving without Order’ is a method of receiving items without placing an order. An example of this is getting goods from a supermarket.
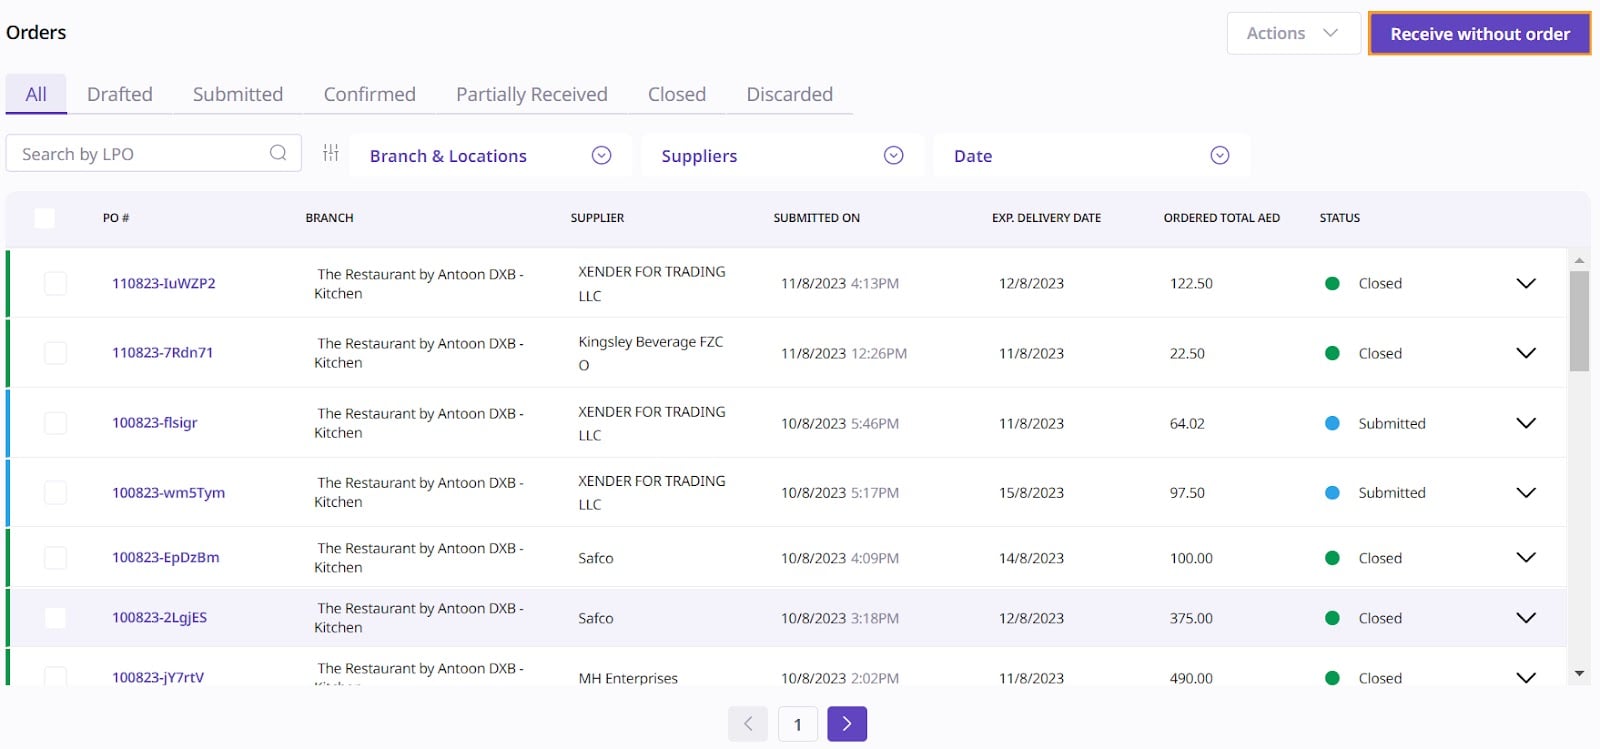
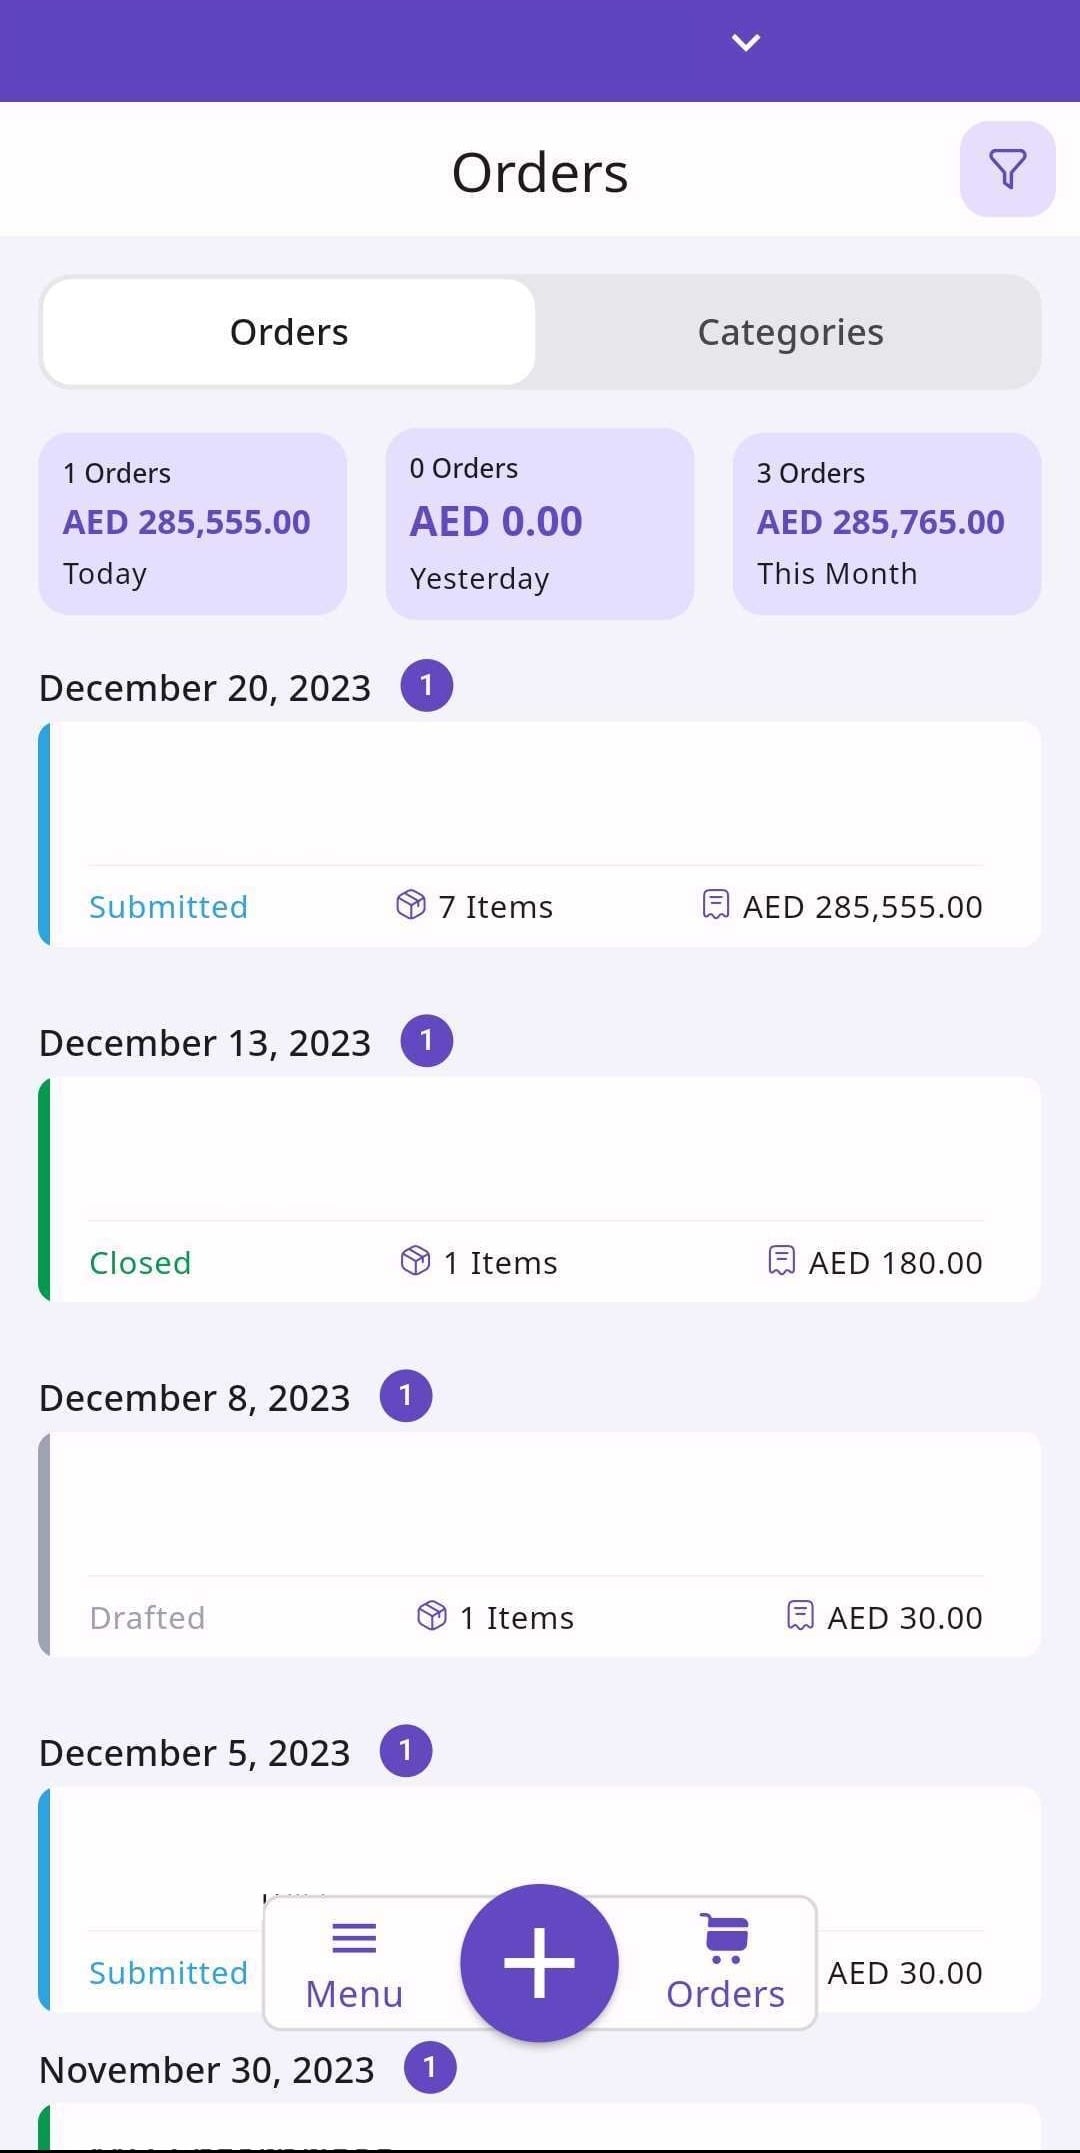
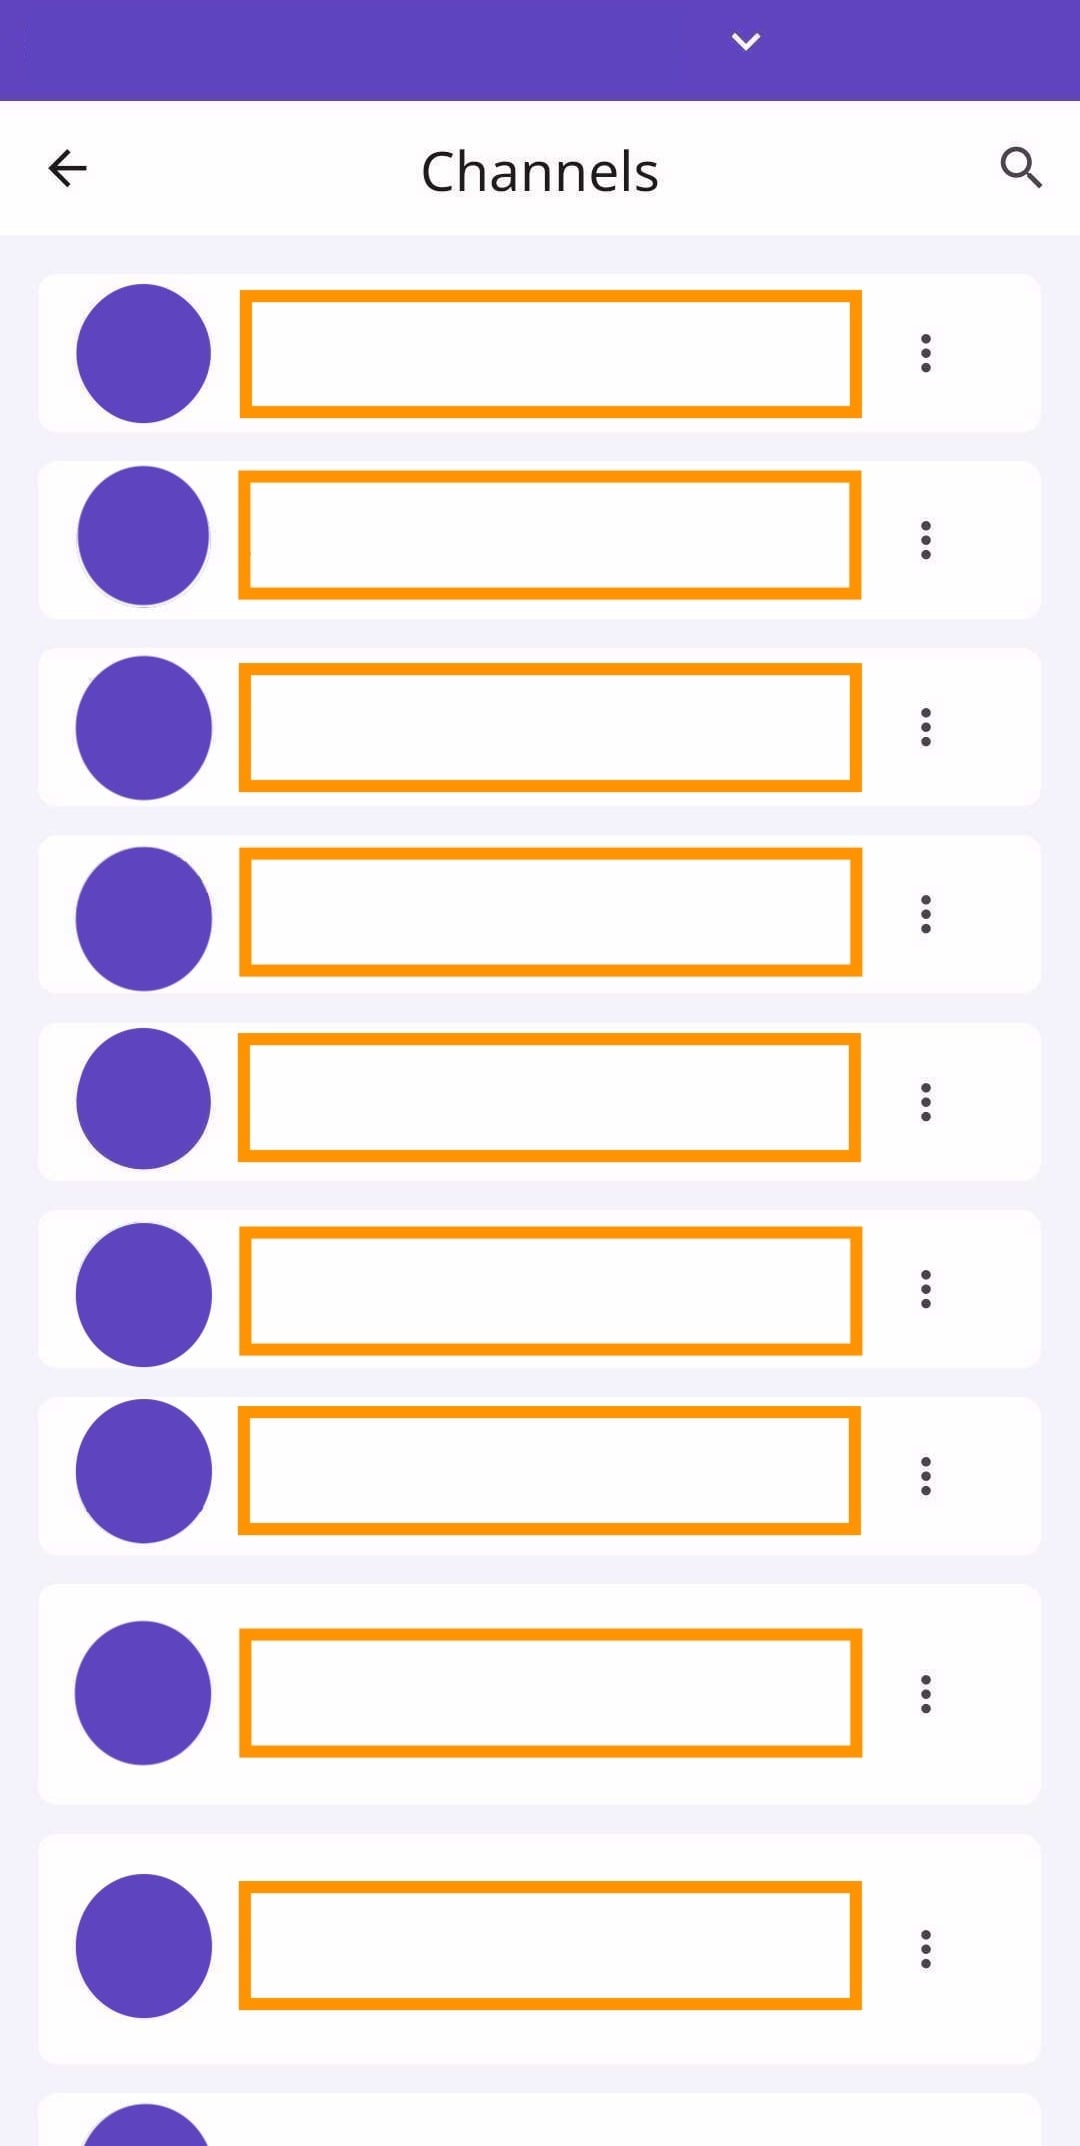
To ‘Receive without Order’, navigate to the Procurement tab and click on ‘Orders’. This will display the list of all previously placed orders.
Retailer Portal
Mobile App
Click the ‘Receive without Order’ button located on the top right hand corner of the screen.
Retailer Portal
Mobile App

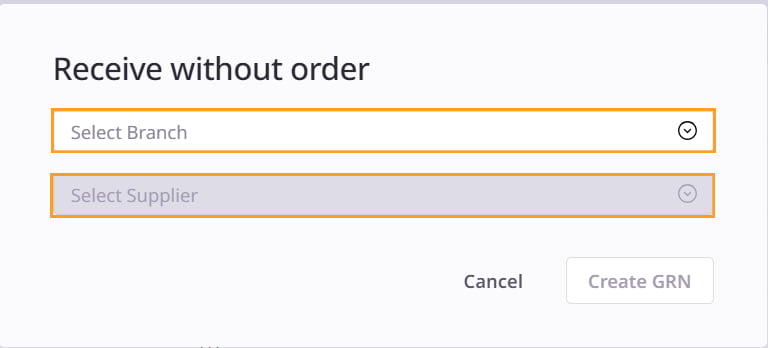
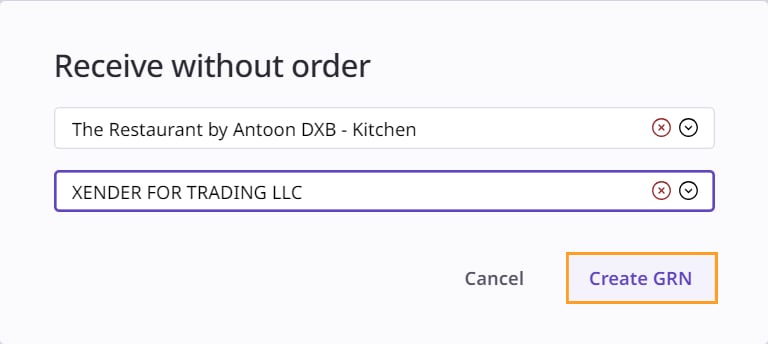
By doing this, you bring up a screen with two drop-down menus: one for selecting a branch, and the other for selecting a supplier. Select the branch you are receiving for and the supplier you are receiving from.
Retailer Portal
When finished, click ‘Create GRN’.
Retailer Portal
Mobile App
From here, follow the standard process of creating a GRN.
Start with the Document Details. If you have yet to receive some goods, select the ‘Pending Document’ option. If the items are already paid for, then select that option.
Retailer Portal
Mobile App
Specify the document type (Delivery Note or Invoice). Invoices include prices, while Delivery Notes do not.
Retailer Portal

Mobile App
In the ‘Supporting Media’ section, add in any relevant media that you have for the order.
Retailer Portal
Mobile App
If you choose 'Invoice' as the document type, input the Invoice Amount including Tax and specify the Payment Due Date. This date marks the deadline for order payment, according to the retailer's time-zone.
The Payment Due Date is not relevant if you have selected the 'Paid' option.
Retailer Portal
Mobile App
Next, move onto the ‘Received Items’ section.
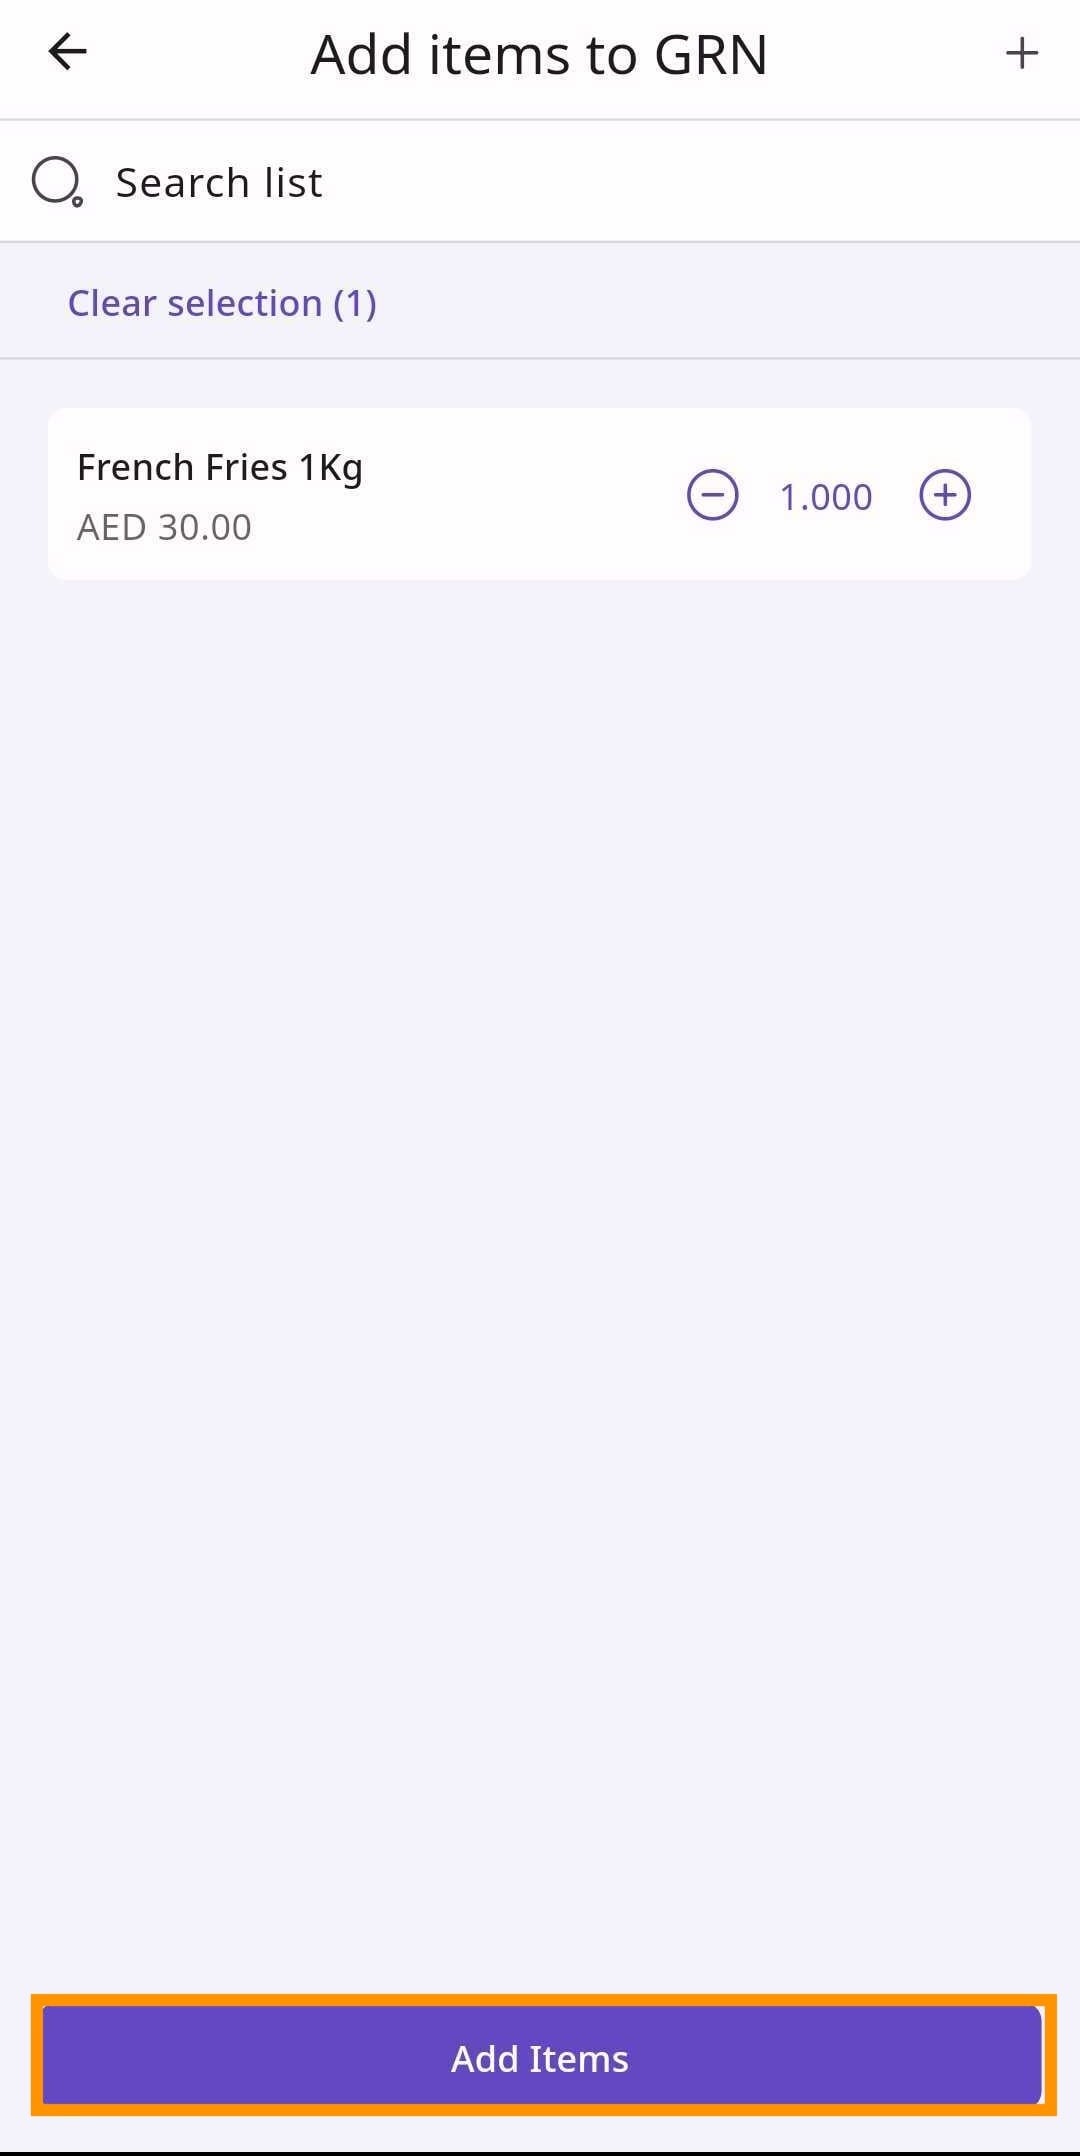
Click the plus icon to add items.
Retailer Portal

Mobile App
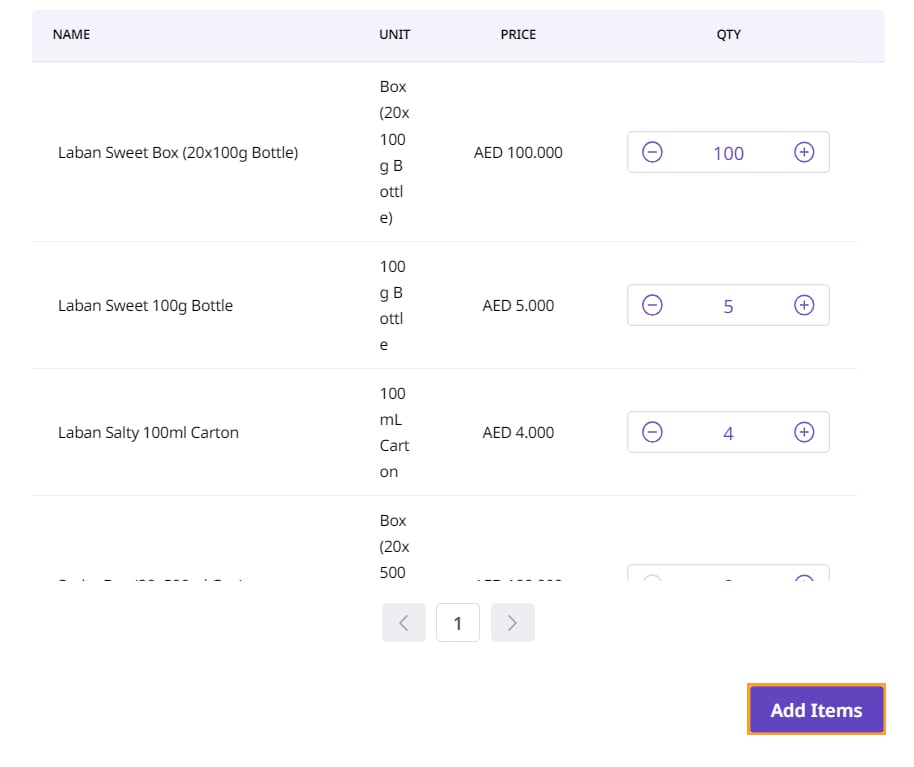
This will bring up a screen listing all items of a supplier. Select the quantity that you received for each item.
Retailer Portal
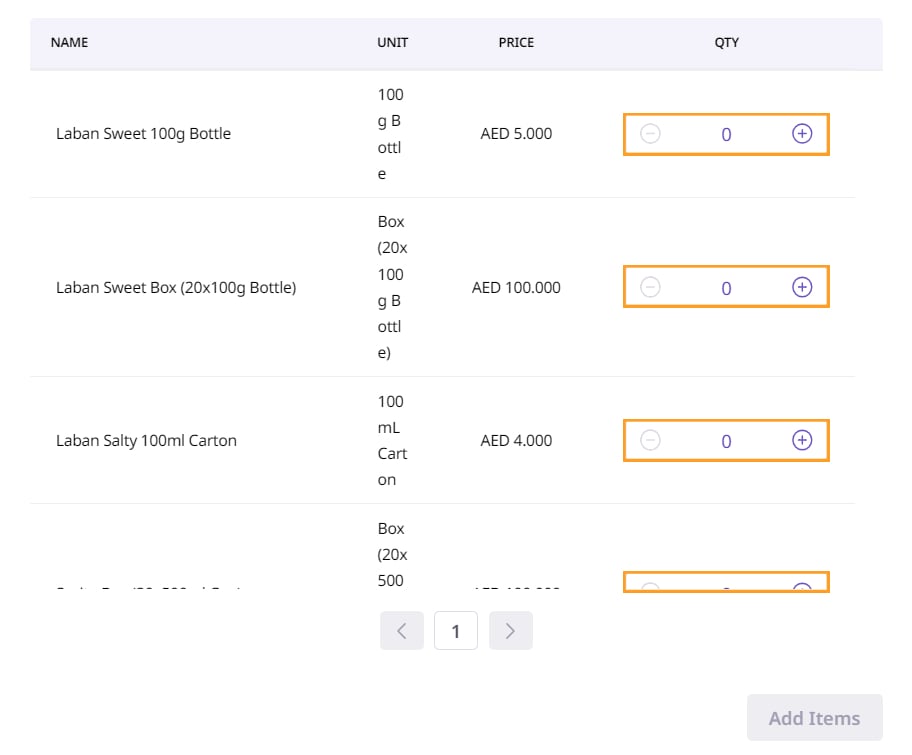
Mobile App
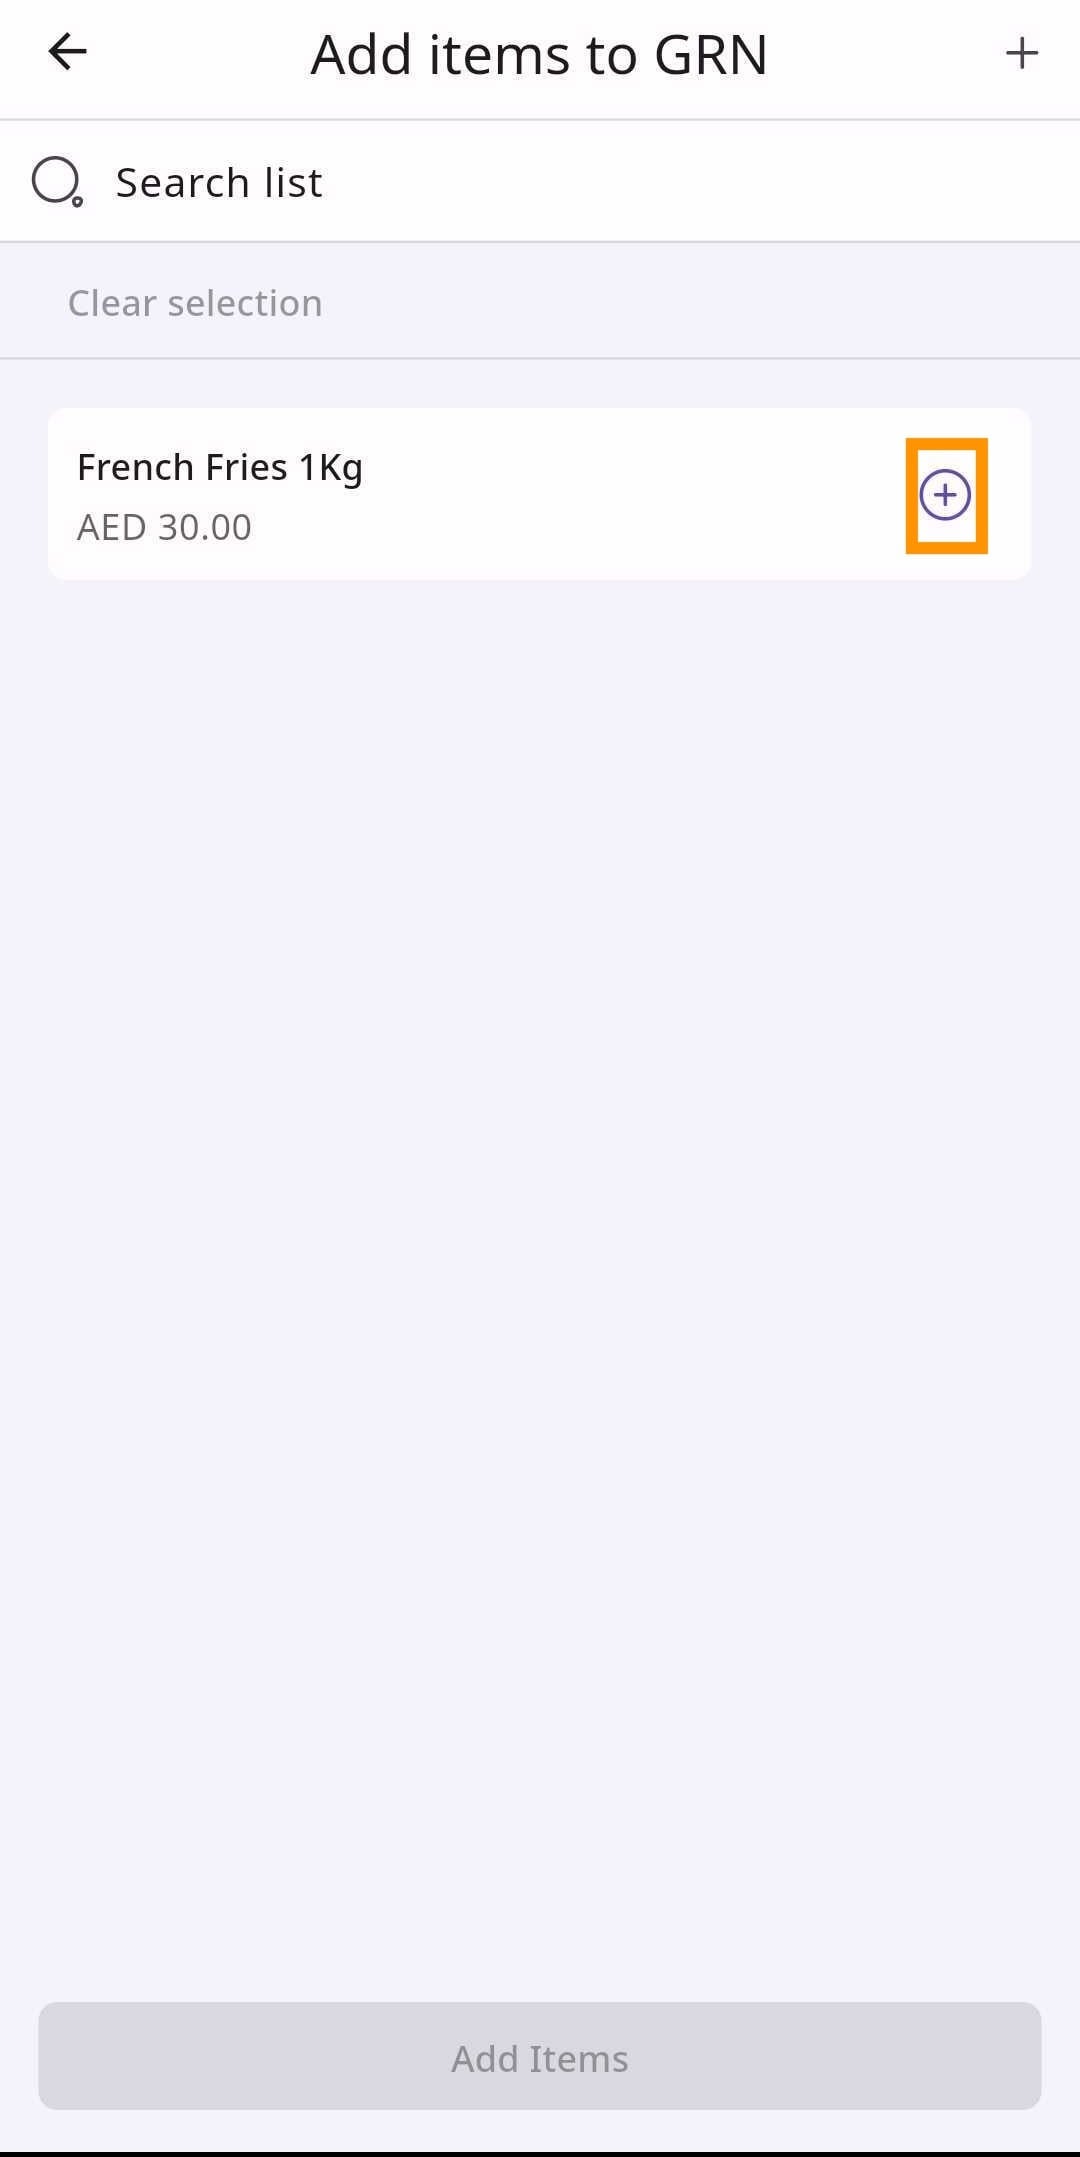
After selecting the quantity for each item, click ‘Add Items’.
Retailer Portal
Mobile App
Next, move onto ‘Other Details’, where you put any remarks/comments that you have.
Retailer Portal
Mobile App
Retailer Portal
Mobile App

The total price will be automatically calculated based on the information you put into ‘Received Items’.
When finished, click ‘Save’. If you want to draft the GRN for later, select ‘Draft’.
Retailer Portal
Mobile App
Your GRN should now be visible in the list of GRNs.