Supy's sales import feature allows you to efficiently upload and manage your sales data. This article will guide you through the process of creating sales imports, ensuring you can seamlessly integrate your sales information into the Supy platform.
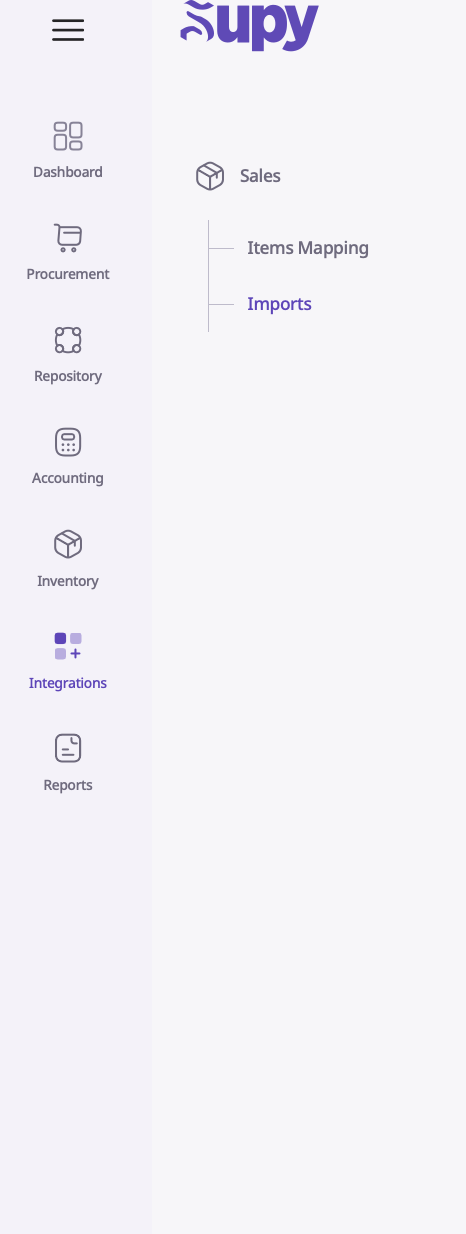
To begin, log into your Supy portal and navigate to the Integrations tab. Within this tab, locate and click on Sales and then Imports. This will take you to the main sales import interface.
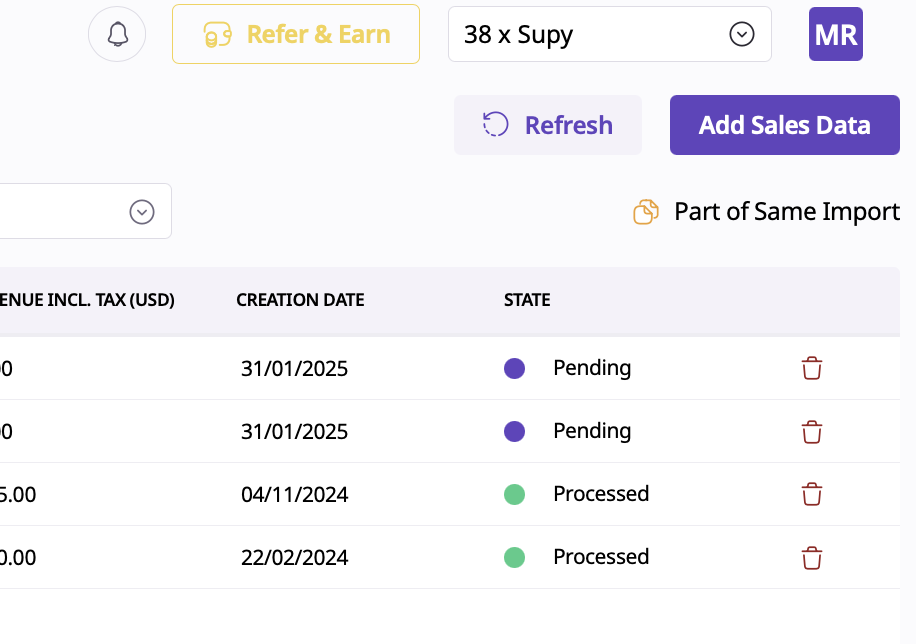
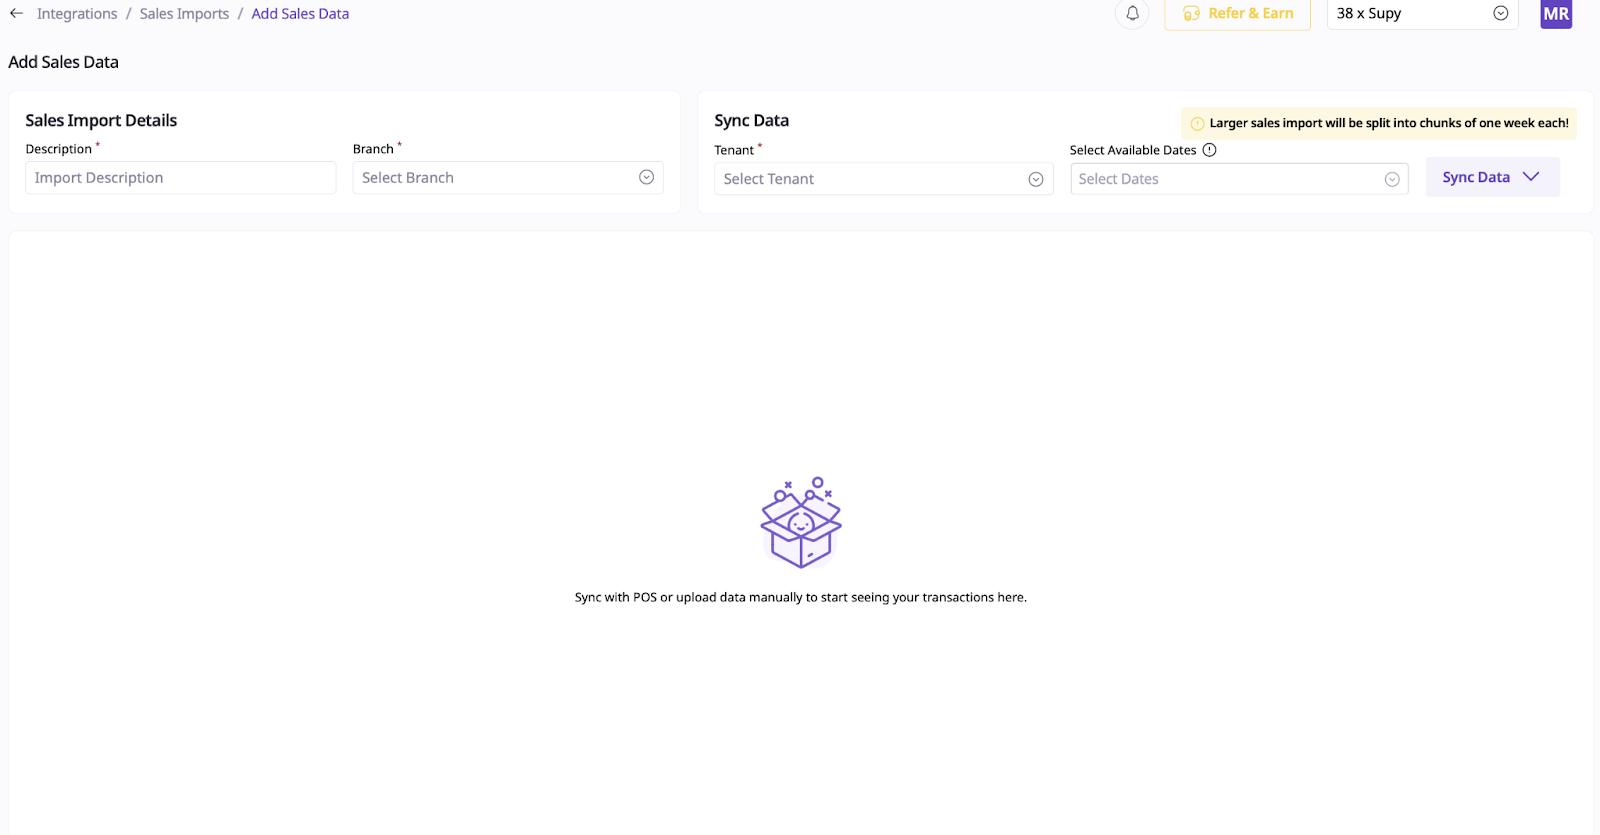
After this, select the Add Sales Data button in the top right corner.
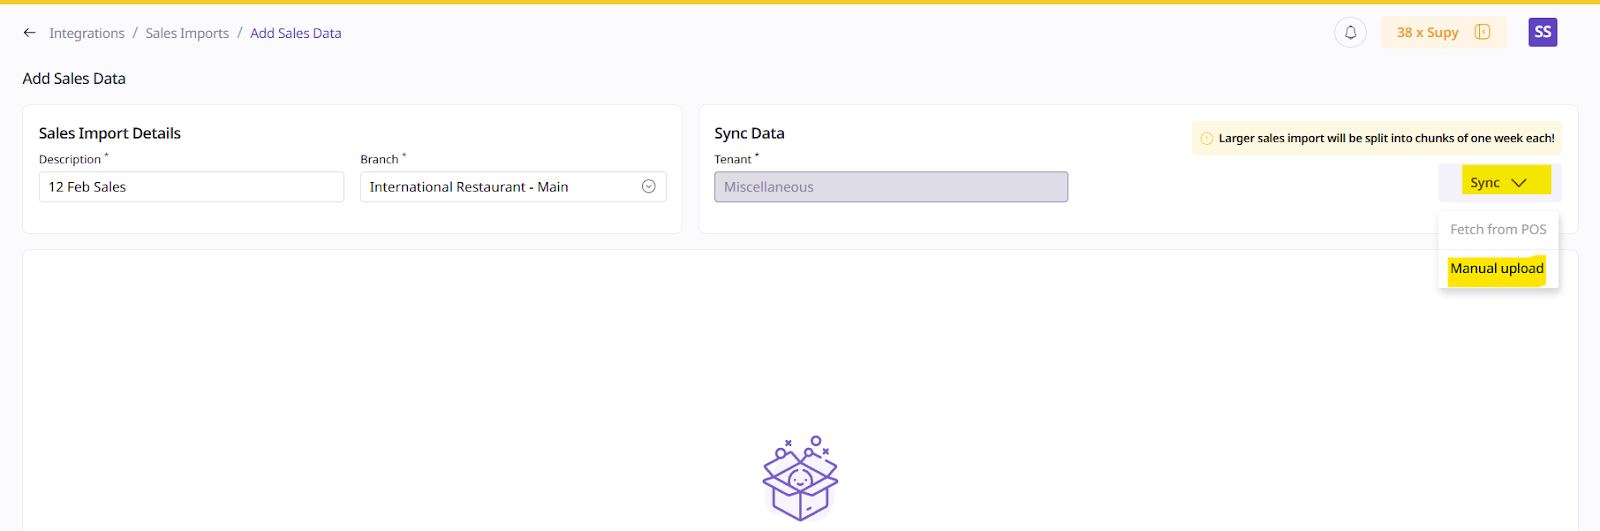
Description: Enter a descriptive name for your sales import event in the "Import Description" field (e.g., "January 2025 Sales" or "Weekend Promo Sales").
Branch: Use the dropdown menu next to "Branch" to select the branch associated with this sales data. If your business operates multiple branches, ensure you choose the correct one for accurate reporting.
Tenant (Optional): If applicable, select a tenant from the dropdown menu under "Sync Data." This option is useful if you’re managing sales data for specific tenants or sub-entities.
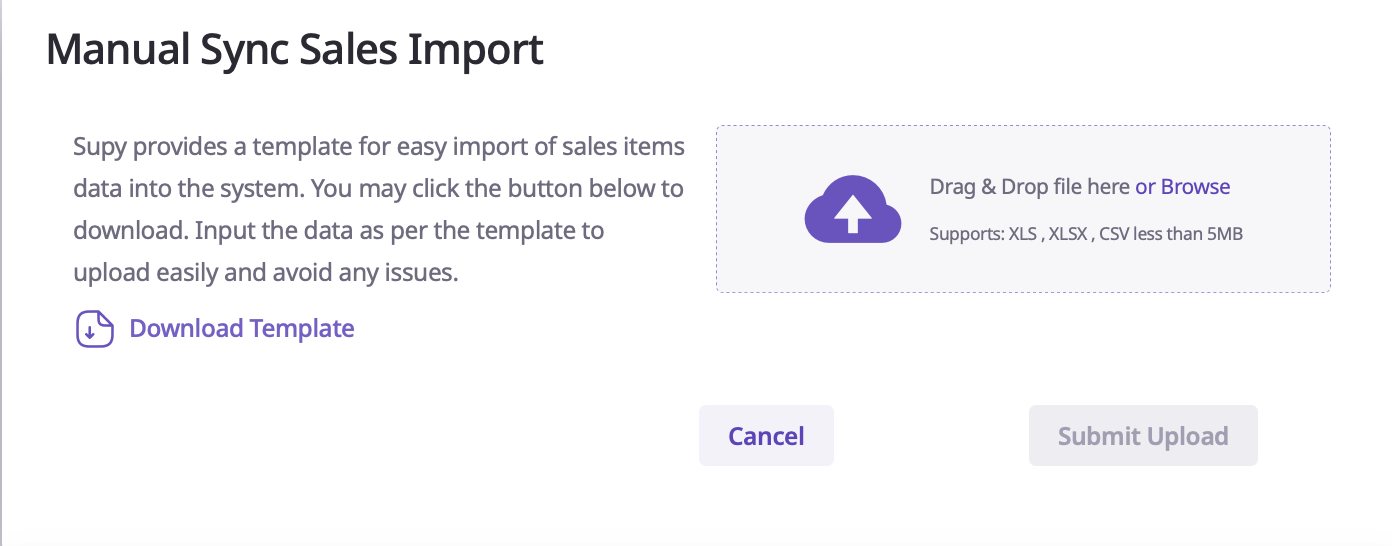
The next steps include Downloading the Template. To efficiently manage data, users can follow these steps to download, fill, and upload a template:
Accessing the Template
1. Navigate to the appropriate tab in the system interface.
2. Locate the "Download Template" option.
Downloading the Template
1. Click on the "Download Template" button.
2. Save the file to a convenient location on your computer.
Filling the Template
1. Open the downloaded template using a spreadsheet application.
2. Fill in the required information, ensuring all mandatory fields are completed.
3. Save the filled template.
To begin entering your sales data:
1. Open the downloaded template file using Microsoft Excel or Google Sheets.
2. Locate the following key columns in the spreadsheet:
- Sales Date
- POS ID
- POS Item Name
3. Fill in the Sales Date column with the appropriate date for each transaction.
4. In the POS ID column, enter the unique identifier for each item sold. This ID should correspond to the ones you previously set up in your POS mapping.
5. For the POS Item Name column, input the name of each item sold. Ensure this name matches exactly with the corresponding item name in your POS mapping.
Remember, accuracy is crucial when entering the POS ID and POS Item Name. These should precisely match the information you established during the POS mapping process to ensure proper data integration and reporting.

Next, you will put the quantity of items sold:

Enter the total sales amount for each transaction in two separate columns. In one column, record the total sales without taxes included. In the adjacent column, input the total sales amount with taxes factored in. This distinction allows for accurate tax reporting and analysis.
If you applied any discounts to the sale, locate the discount column in the template. Enter the total discount value for each transaction where applicable. For sales without discounts, you may leave this field blank. Providing accurate discount information helps in tracking promotional effectiveness and maintaining precise financial records.

In the Order ID column of the template, you have the option to enter a custom identifier for each transaction. This field is not mandatory, but it can be useful for your internal tracking and reference purposes. You may create your own unique order ID system, such as combining the date with a sequential number, or use an existing reference number from your point of sale system. If you choose to utilize this field, ensure that each order ID is distinct to avoid confusion in future data analysis or order lookups.

Uploading the Completed Template
1. Return to the same tab in the system interface where you downloaded the template.
2. Look for the "Upload" or "Browse" button.
3. Click on "Browse" to open your file explorer.
4. Navigate to and select the filled template file.
5. Ensure the correct file tab is selected if prompted.
6. Click "Submit Upload" or a similar button to finalize the process.
By following these steps, users can efficiently manage their data using the provided template system. This method offers more control and flexibility compared to manual entry, while being simpler than a full sync process.
Finally, scroll down to the Review Data space.
At the "Review Data" section, verify the details of the sales data you uploaded.
1. Assign a cost center to each item by selecting it from the dropdown menu in the "Cost Center" column.
2. Once all items have a cost center assigned, click Next to proceed.
Your sales data will now be submitted and imported.
Efficiently mapping your Point of Sale (POS) items in Supy is crucial for streamlined inventory management. This guide will walk you through the process step-by-step, ensuring accurate synchronization between your POS system and Supy.
Accessing POS Mapping
1. Log in to your Supy portal
2. Navigate to the Integrations module
3. Click on Items Mapping.
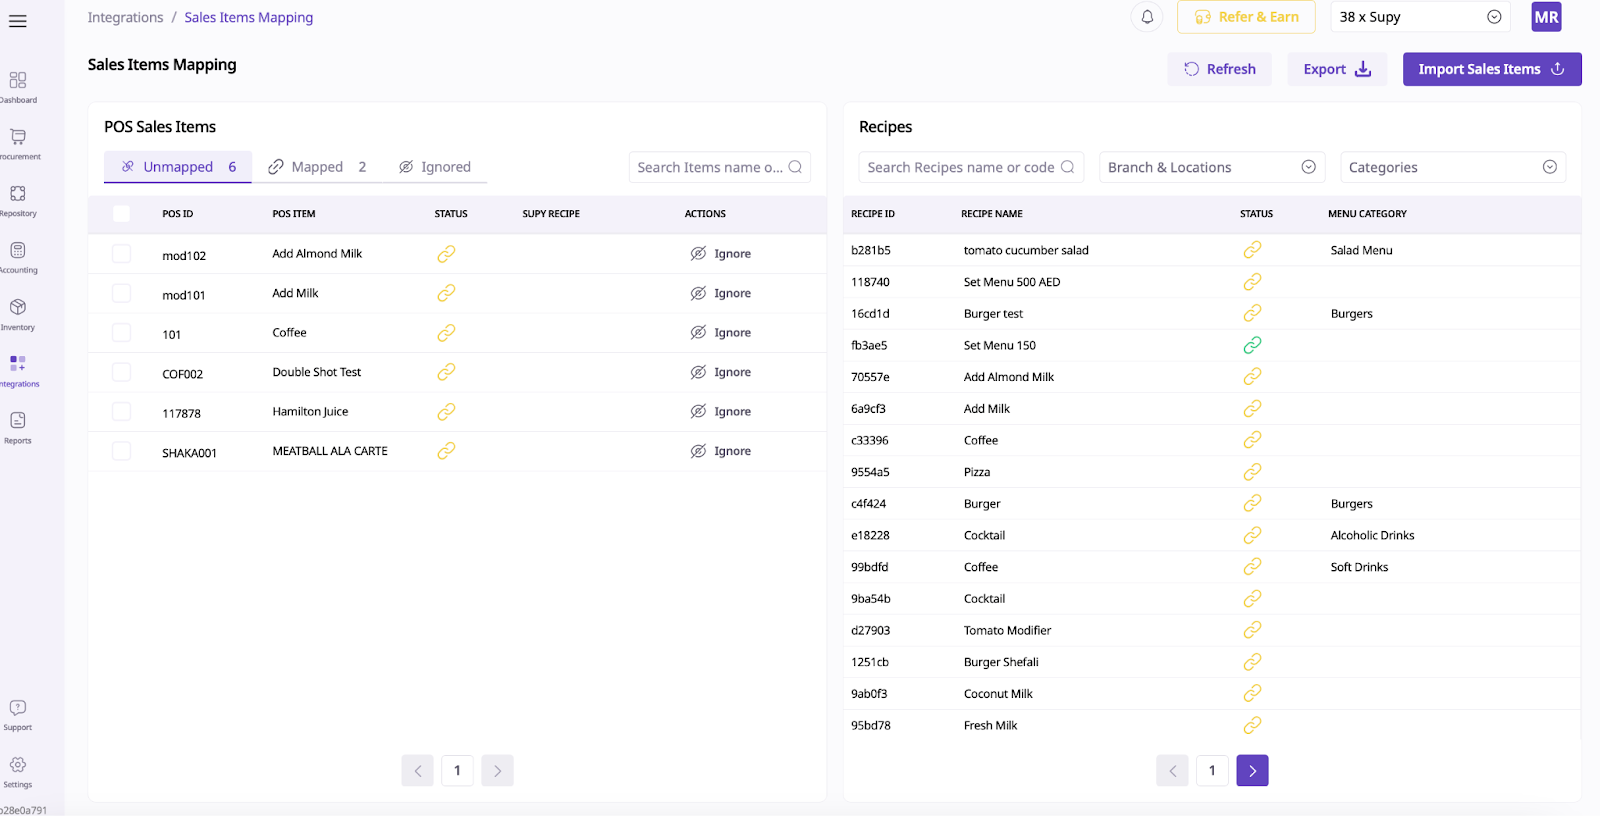
Importing Sales Items
To begin mapping, you'll need to import your sales items:
1. Look for the Import Sales Items button in the top right corner
2. Click on Download Template to obtain the correct format
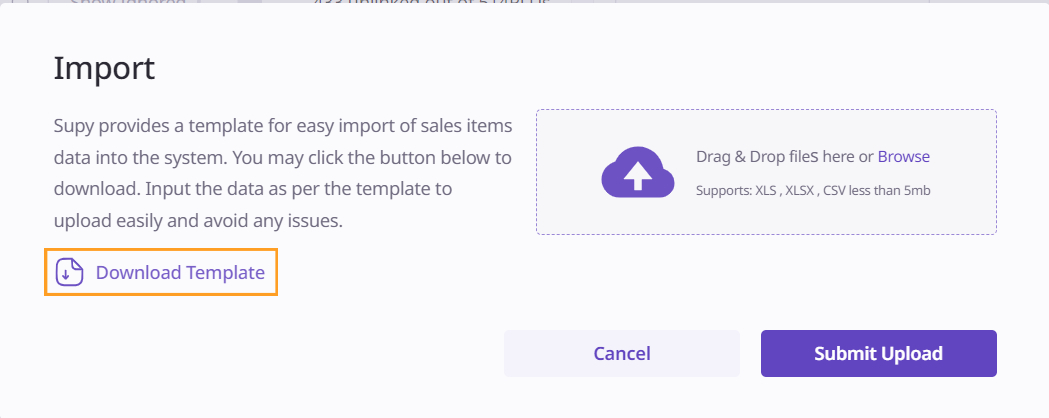
3. Open the template in Excel or Google Sheets
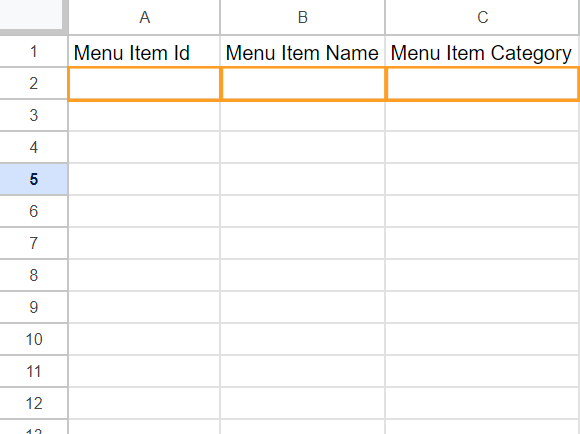
This is a menu item template designed for use in applications like Excel, Google Sheets, or Apple Numbers. It allows you to organize and manage menu items for a POS (Point of Sale) system or similar use cases. Here's how to work with it:
Steps to Use the Template
1. Open the File:
- Open the template in Excel, Google Sheets, or Apple Numbers for editing.
2. Fill in the Columns:
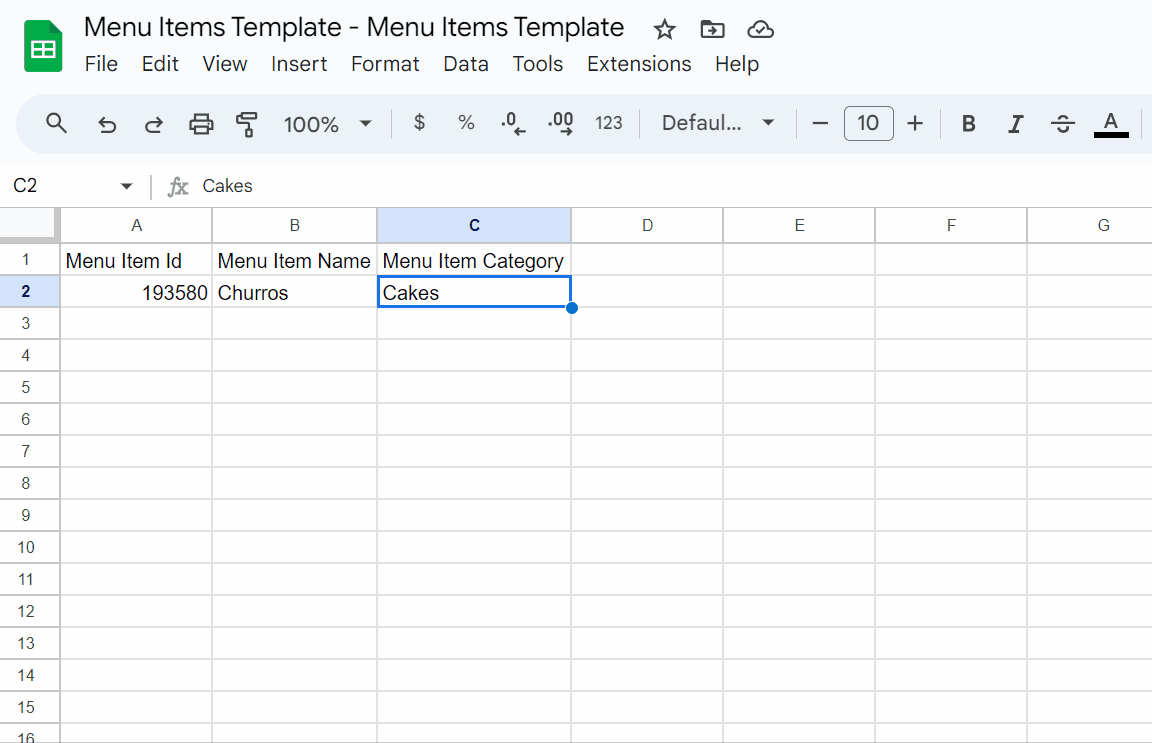
- Menu Item Id: Enter a unique identifier for each menu item (e.g., "001", "002"). This ensures each item is distinct.
- Menu Item Name: Provide the name of the menu item (e.g., "Cheeseburger", "Latte").
- Menu Item Category: Categorize the menu item (e.g., "Beverages", "Main Course", "Desserts").
- Is Modifier: This column indicates whether the item is a modifier (e.g., add-ons like "Extra Cheese"). For standard items, leave this as `FALSE`.
3. Save and Upload:
- After filling in the required details, save the file and upload it back to your POS system or any other platform that uses this template.
Tips for Better Organization
- Use consistent naming conventions for categories (e.g., avoid mixing singular and plural forms).
- Ensure all `Menu Item Ids` are unique to prevent errors during data import.
- If you have modifiers, mark them as `TRUE` in the "Is Modifier" column.
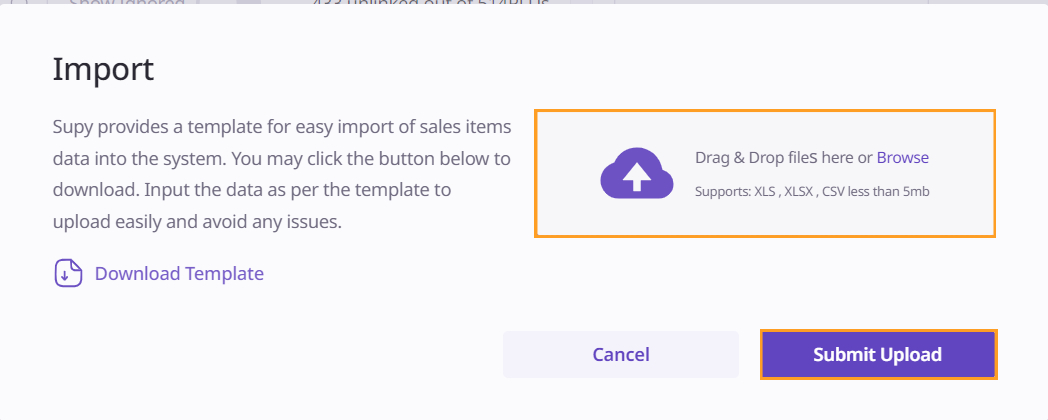
When you are done, please download the sheet.
Go back to the Supy portal and drop the sheet into the file upload space. Click ‘Submit Upload’, and your new POS Sales Items will now be visible in the list.
To link a POS item and a Recipe together, click on one and then click on the other. Once you’ve linked two items, the status will turn from yellow to green.

When two POS items are successfully linked, it indicates that they have been accurately mapped within the system.