Importing sales data into Supy is a straightforward process. Here’s a step-by-step guide to help you through it:
Begin by navigating to the Integration section in Supy. From there, select Sales Imports.
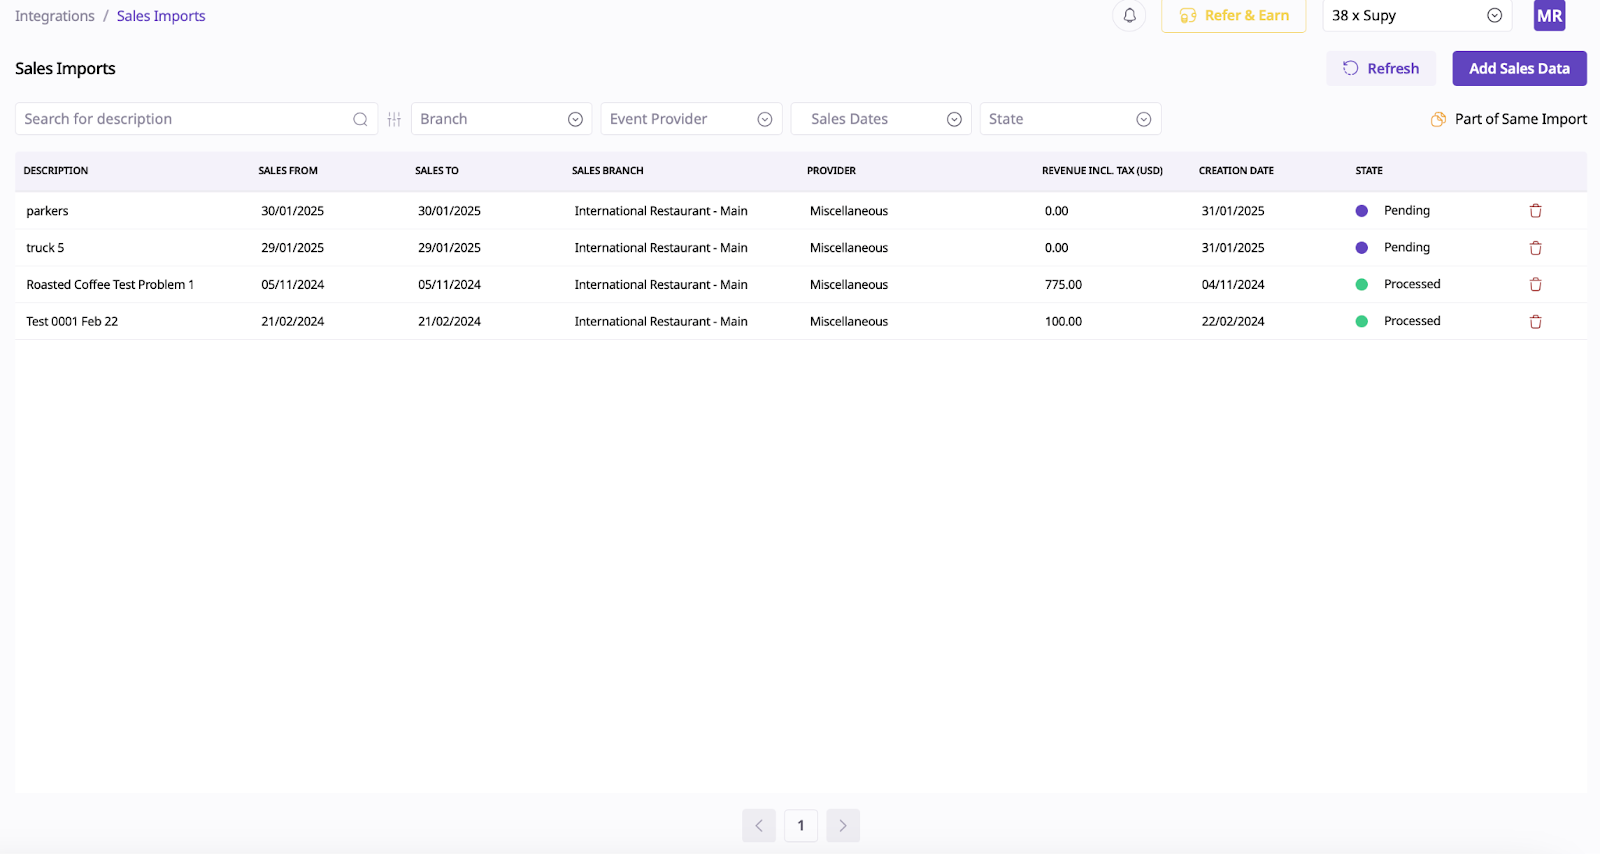
Click on the Add Sales Data option. This will open a section where you need to provide some initial details related to the sales data you want to import.
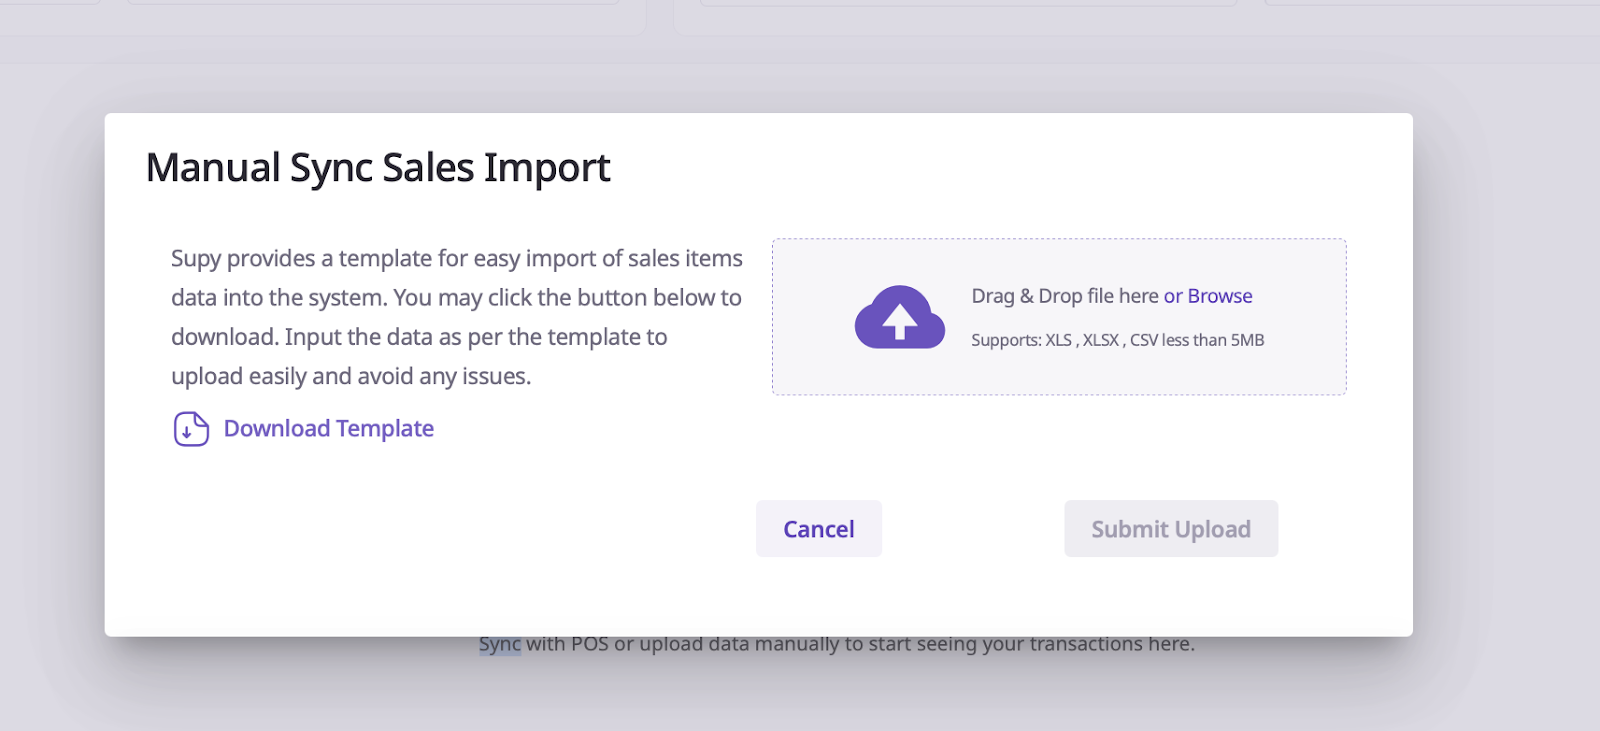
Then go to Add Sales Data:

Fill out this section:

Once you’ve filled out the required information, download the provided template. This template is designed to ensure your data is in the correct format for Supy.
Open the downloaded template and enter the necessary sales data. Typically, this will include details such as item IDs, item names, quantities, and any other required fields.
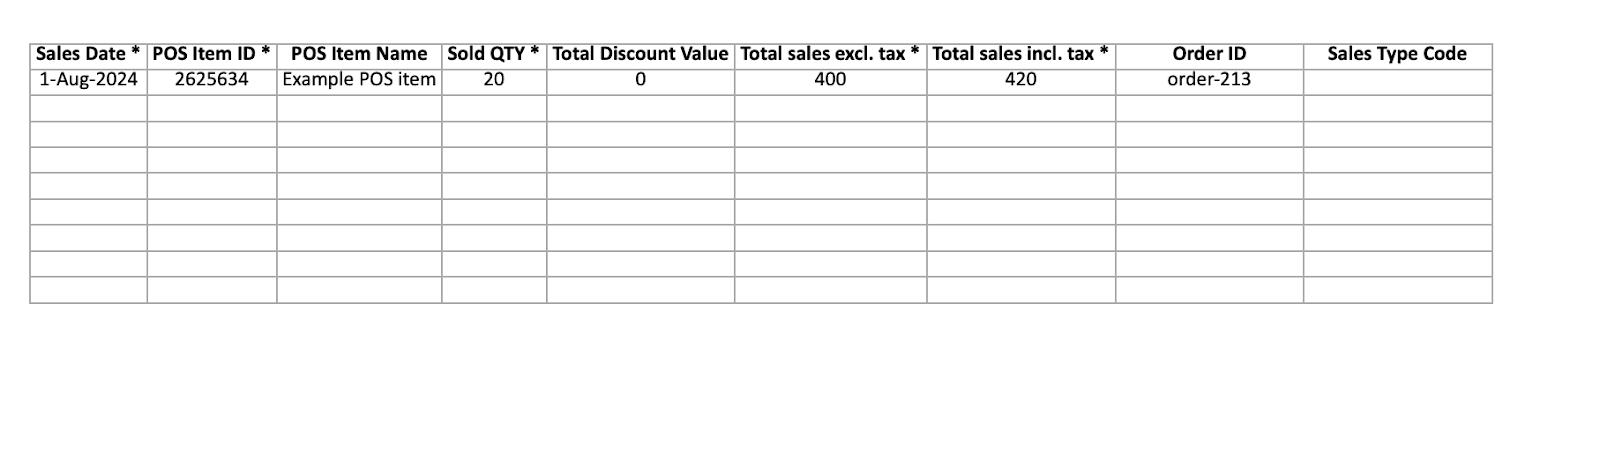
If you receive sales data from a client in a different format, use formulas or data transformation tools to shift their data into the Supy template format. This step ensures compatibility and smooth uploading.
Once your data is correctly formatted and filled out, upload the completed template back into Supy through the same Sales Imports section.